Fuel tank installation – Hangar 9 Beast 100cc ARF User Manual
Page 37
37
Required Parts
• Fuel tank
• Du-Bro 1/4-inch foam (DUB513)
• Aluminum T-fuel filter (JRP960298)
• Fuel dot filler (HAN115)
Required Tools and Adhesives
• Medium CA
• Scissors
• Hook and loop
• Double-sided tape
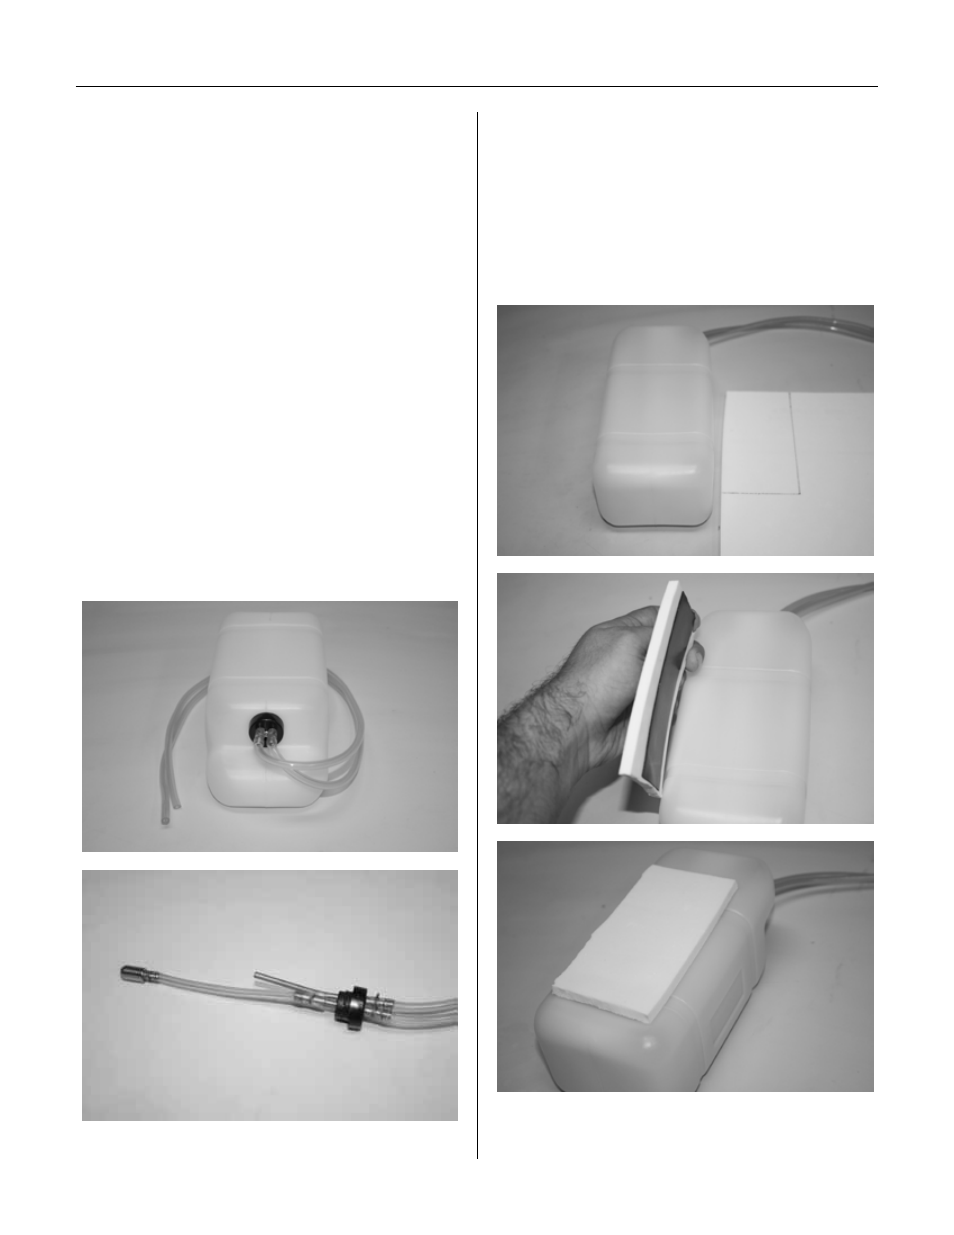
Step 1
Tank comes assembled and ready to be
installed. However, you should open up the
cap and ensure the connections are solid
before final installation
Note: The lines can get stiff if the
plane sits for some time with no fuel
in the tank after use. Please make
sure to check your lines often.
Step 2
Reassemble the tank. Make sure the cap is
secure but avoid over-tightening.
Cut some 1/4-inch foam the size of the
bottom of the tank. Use double-sided tape
between the tank and foam or wrap masking
tape to the bottom of the tank, then CA the
foam to the masking tape.
Fuel Tank Installation