Cowl installation – Hangar 9 Beast 100cc ARF User Manual
Page 30
30
Required Parts
• Aluminum L-brackets and wooden tabs
• 4-40 screws 1/2-inch and 1/4-inch (6 and
12 mm)
• #4 washers
Required Tools and Adhesives
• 3/32-inch ball driver
• Threadlock
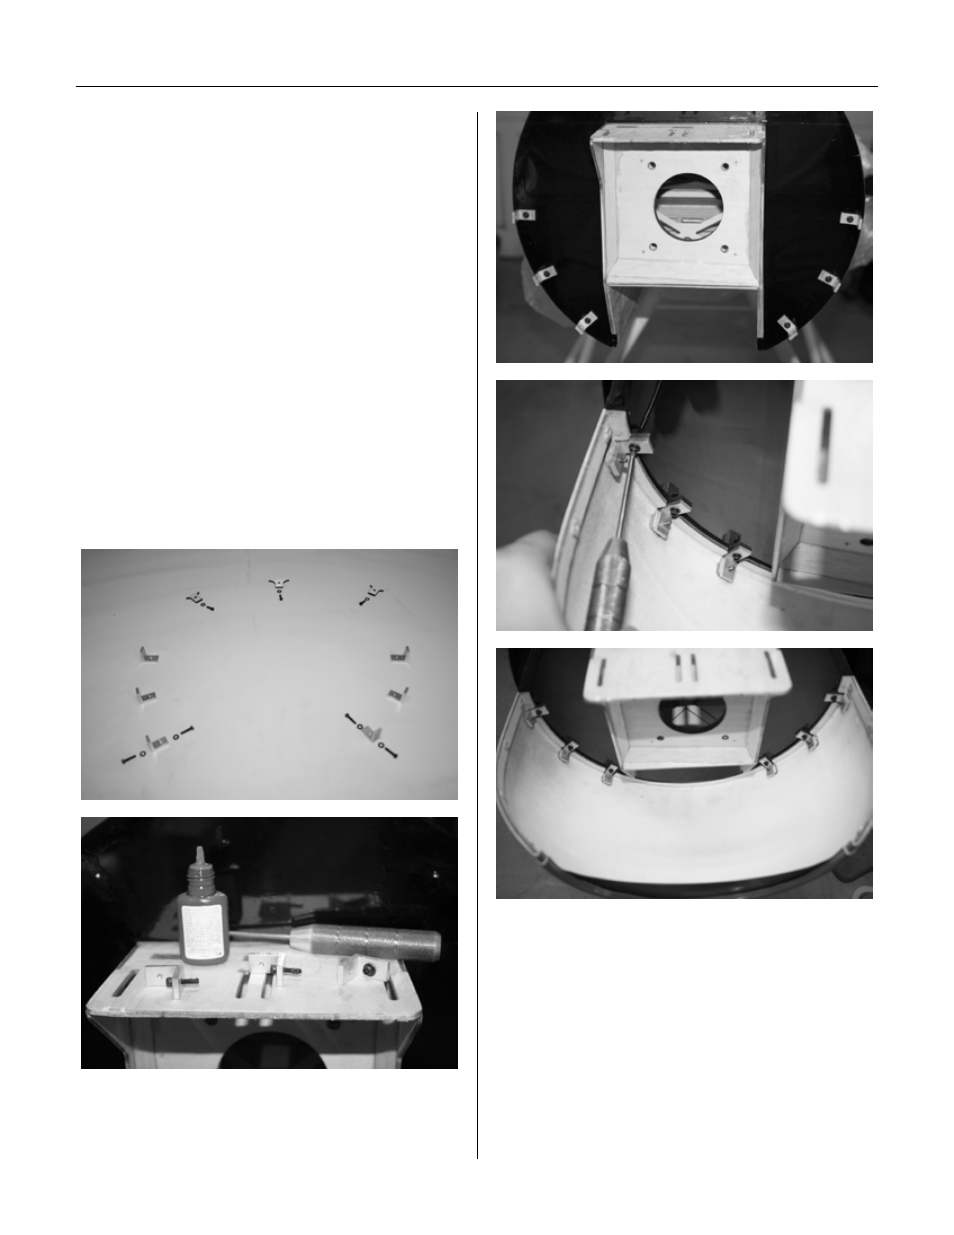
Step 1
Loosely attach the L-brackets, using 1/4-inch
4-40 and #4 washers, to the bottom half of
the fuselage. Use threadlock on the screws
but do not tighten yet. Line up the bottom half
of the cowl and bolt the cowl to the brackets
using the included 1/2-inch 4-40 screws and
washers. Once everything is lined up, tighten
the L-brackets' screws to the fuselage.
Step 2
Attach the top support tabs such that they
are located at the radius of the top half of the
fuselage. Use threadlock on the screws.
Cowl Installation