Tail gear steering installation – Hangar 9 Beast 100cc ARF User Manual
Page 26
26
Required Parts
• Tail gear assembly
Required Tools and Adhesives
• CA medium
• 1/16-inch drill bit and drill
• Phillips head screwdriver
• Z-bend pliers
• Threadlock
• Pin wise
Note: Before starting this section
take the wheel collar off the
tail gear assembly and apply
threadlock to the setscrew. Check
the nuts that hold the tail wheel.
Failure to do so may result in
losing the tail wheel in the air.
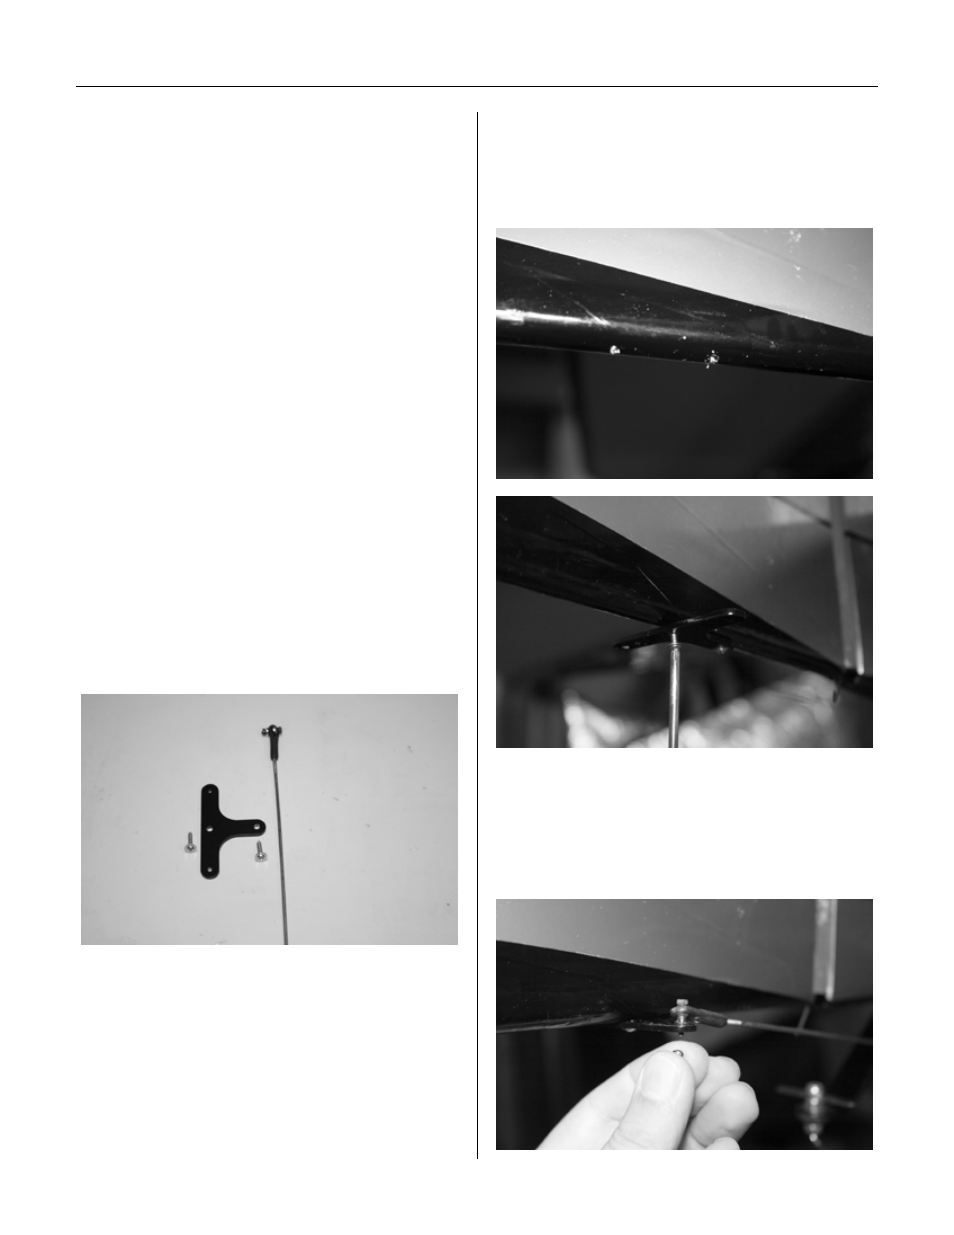
Step 1
The tail gear is attached to the bottom of
rudder via ball link on one side and Z-bend
on the other side. It is best to attach the ball
link to the tiller arm of the gear and Z-bend
end to the T-plate.
Step 2
Mark where the plate will be attached to the
bottom of rudder. Approximately 2 to 3 inches
away from the hinge line. Do not attach the
plate too far as it will result in poor steering.
Using a pin wise and 1/16-inch bit, make two
pilot holes. Screw the T-plate to the bottom
rudder using servo screws, then take them
out, apply thin CA to the holes and attach the
plate again.
Step 3
Screw the ball link into the rod about half
length of the threads to have room for
adjustments. Temporarily attach the ball link
to the tiller arm.
Tail Gear Steering Installation