Drive shaft – Cub Cadet 2000 Series User Manual
Page 47
Drive
41
Drive shaft
To remove/replace the drive shaft:
1. Remove the deck as described in chapter 8: Cutting
Decks and Lift Systems.
2.
Remove the dash by following the procedures
described in Chapter 4: Body.
3.
Remove the fender and running board by following
the procedures described in Chapter 4: Body.
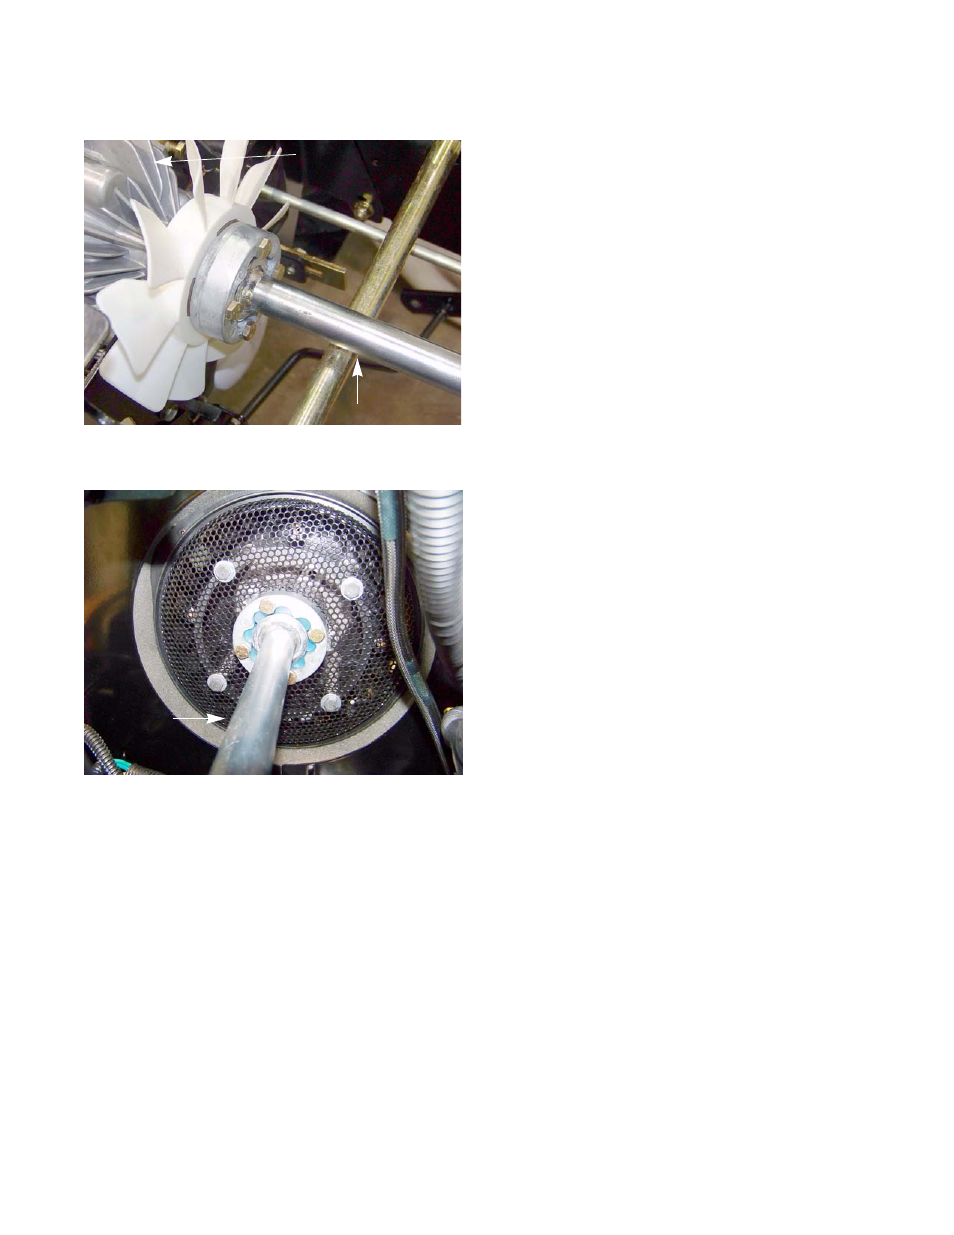
4.
Remove the four screws that attach the drive shaft to
the hydro pump using a 7/16” wrench.
See Figure 5.4.
5.
Remove the four screws that attach the drive shaft to
the engine using a 7/16” wrench. See Figure 5.5.
6.
Lift the drive shaft out of the tractor.
NOTE: There is a spacer between the drive shaft and the
engine.
7.
Install the drive shaft by following the previous steps
in reverse order.
NOTE: Apply a small amount of a releasable thread lock-
ing compound such as Loctite® 242 (blue) to the
drive shaft screws.
NOTE: Tighten the drive shaft screws to a torque of 10 -
12 ft lbs (14 - 16 Nm).
8.
Test drive the tractor in a safe area before returning it
to service.
Figure 5.4
Drive shaft
Hydro pump
Figure 5.5
Drive shaft