Cannon Instrument miniPV-X User Manual
Page 14
CANNON
®
miniPV-Series Automatic Viscometer with VISCPRO
®
Instruction & Operation Manual
Version 1.a— January, 2011;
CANNON
®
Instrument Company
2139 High Tech Road • State College, PA 16803 • USA
8
If you received a configuration disk with your installation package, the
software may have already been preconfigured with instrument settings
unique to your laboratory, including instrument type(s), tube range and
serial #, and calibration constants. In a moment, we will verify these
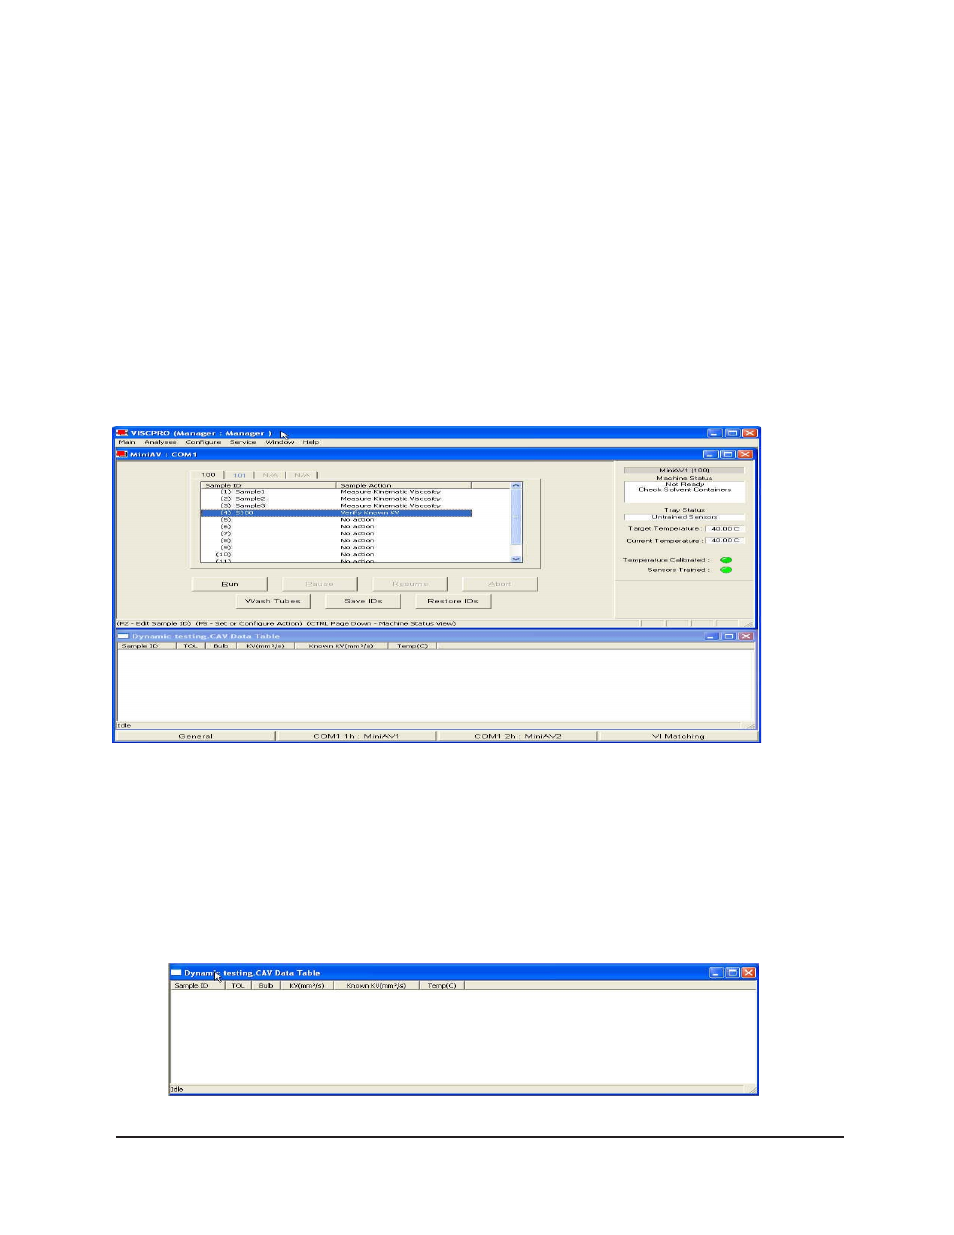
settings. The image below demonstrates a typical screen configuration:
The VISCPRO
®
primary display
The VISCPRO
®
primary display window is framed on the top by the
VISCPRO
®
title bar and menu bar, and on the bottom by the VISCPRO
®
status bar. The application window can be user-configured to include child
windows (Sample Input or Machine Status windows, Analyses) which can
be opened and closed independently. The
Sample Input
window describes
your
CANNON
®
instrument and provides controls for running tests. The
Analysis
window presents data from miniPV Series tests.
The Sample Input window
NOTE
If the Sample Input window does not appear when the software loads, click
View Instrument from the Main menu, then click the desired instrument group
(type of instrument, e.g. miniPV Series, CCS, CAV-2100) from the list of
available instruments and click OK. If the Available Instruments list box is
blank, your miniPV Series instrument may not be on-line. Check cable
connections and make certain the unit power switch is ON.
The Data Table analysis/report window (displays data from completed tests)