39 door install – Oldcastle BuildingEnvelope Reliance-IG SS User Manual
Page 42
39
R E L I A N C E - I G S S I N S T A L L A T I O N M A N U A L
All door framing components are shipped fabricated from the factory. The main curtain wall framing
can be erected prior to installing the doors.
D.1 Curtain wall verticals and door subframes run through to finish floor. Bed adjacent curtain wall verticals
in sealant and anchor to floor per approved shop drawings.
D.2 SUBFRAME INSTALLATION:
D.2.1 Attach TH-44 threshold clip to bottom of each jamb subframe with two (2) FS-256 #8 x 1 1/2" Phillips
Round Head Screws.
D.2.2 Install WW-341 pocket filler into pocket of vertical facing the door opening. Install horizontal glass
stop, then install CH-93 channel and attach channel with FS-55 (#10 x 1/2" pph) at 12" o.c. through
face of horizontal. Cap seal all fasteners, then install the horizontal face cap.
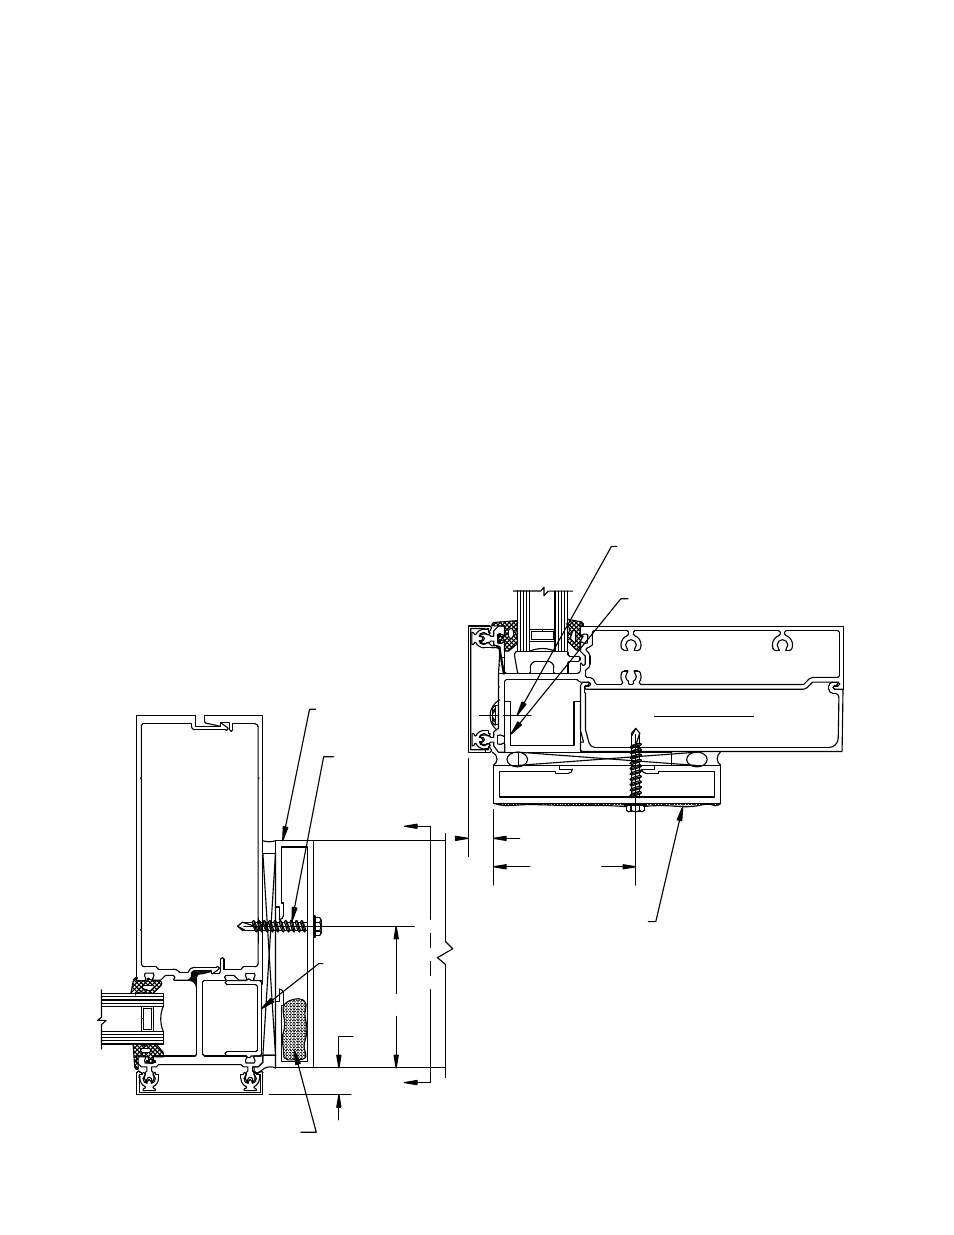
D.2.3 Bed subframes in sealant and anchor to curtain wall framing members with FS-325 #12-14 x 1 1/2"
Drillflex at 18" O.C. Seal joint between jamb and header subframes. Seal also the tops of the jamb
subframes. SEE FIGURE 46.
2-13/16"
2 -13/16"
1/2"
1/2"
D-186
Subframe
Insert backer rod at the top of
jamb subframe and seal void.
WW-341
Filler
"A"
"A"
CH-93 Channel
FS-55 (#10 x 1/2" prh)
@ 12" o.c. & cap seal fastener
Seal joint at corner
of subframe
Section "A-A"
FS-325
#12-14 x 1-1/2"
HH Drill-Flex
FIGURE 46
Door Frame Installation
DOOR INSTALLATION