Kontron CG2200 Carrier Grade Server User Manual
Page 90
83
Kontron CG2200 Carrier Grade Server Installation and Maintenance Guide
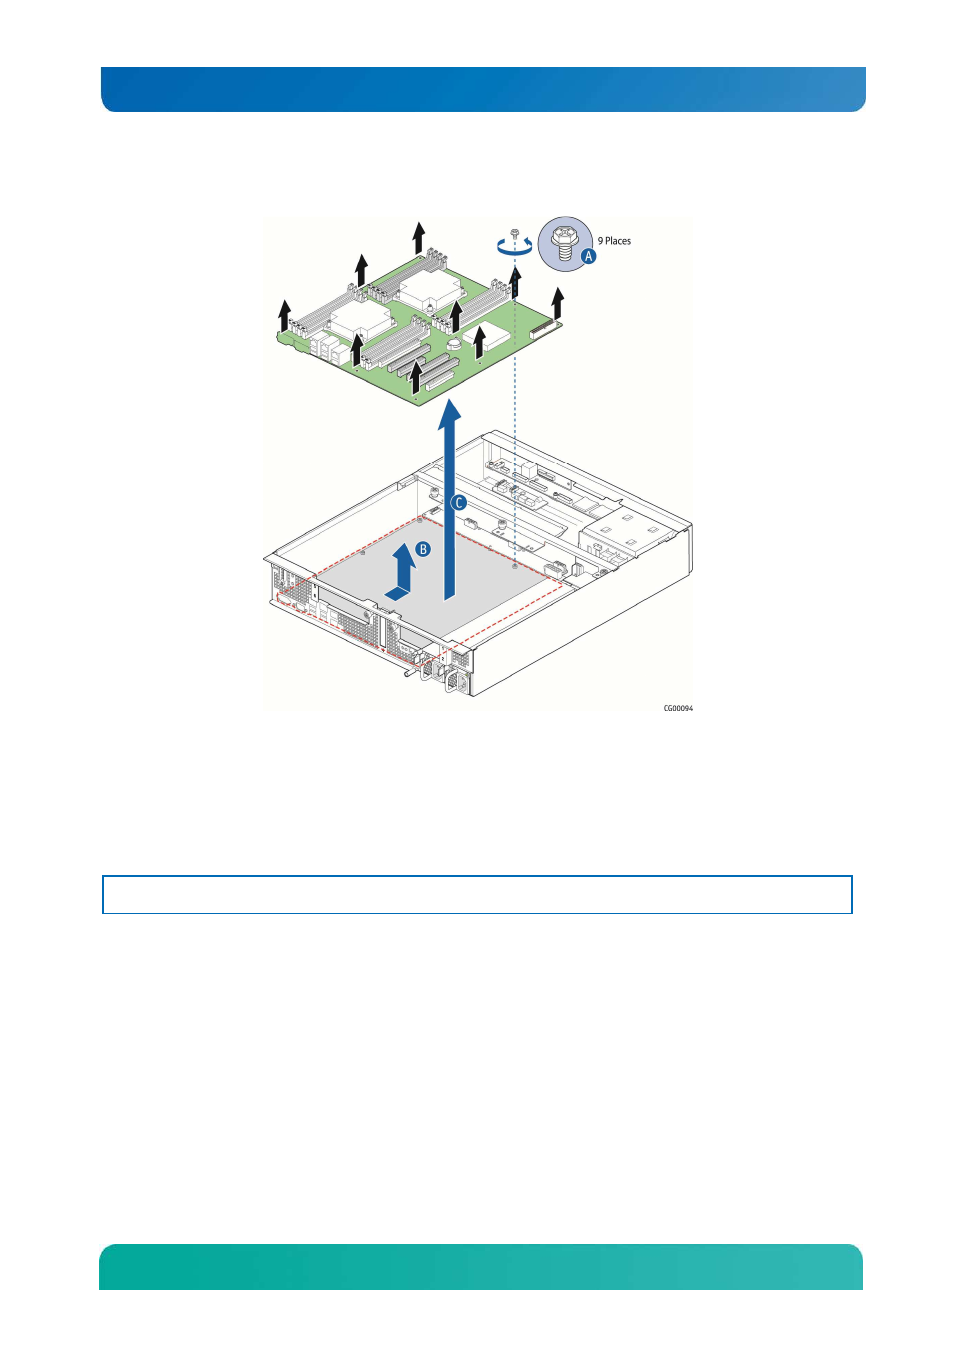
Figure 60. Removing the Server Board
5.10.2 Installing the New Server Board
1. Set the replacement server board in place.
Insert the rear edge of the board first and line up the I/O ports with the slots in the rear panel of the
chassis.
2. Make sure all three self-aligning standoffs go through the holes at the front of the board.
NOTE: If the standoffs are misaligned when the board is screwed down the holes will be damaged and the
standoffs may be cross-threaded.
3. Fasten the server board to the chassis base with the nine screws that were removed and saved.
4. Remove the white plastic standoff (for the eUSB module) that comes with the server board and
replace it with the metal standoff saved from the old server board.
If the new server board does not have components pre-installed and you are re-using components from
the old server board, install components as follows”
•
To install memory DIMMs, see “Installing Memory DIMMs” in Section 3.3.
To install heat sink(s) and processor(s), see “
•
Installing a New Processor” in Section 3.3.
Re-install the RMM4 module or RMM4Lite, if used. For information about how this card is installed, see
Section 4.8, “Installing a Remote Management Module 4” or Section 4.9, “Installing RMM4Lite”.