Kontron CG2200 Carrier Grade Server User Manual
Page 27
20
Kontron CG2200 Carrier Grade Server Installation and Maintenance Guide
CAUTION: This unit must have the cover installed when it is running to ensure proper cooling.
3.2.3 Removing the Front Bezel
You need to remove the front bezel for tasks such as:
•
Installing or removing hard disk drives or an SD flash card
•
Observing the individual hard disk drive activity/fault indicators
•
Replacing the control panel LED/switch board
NOTE: The server does not have to be powered down just to remove the front bezel.
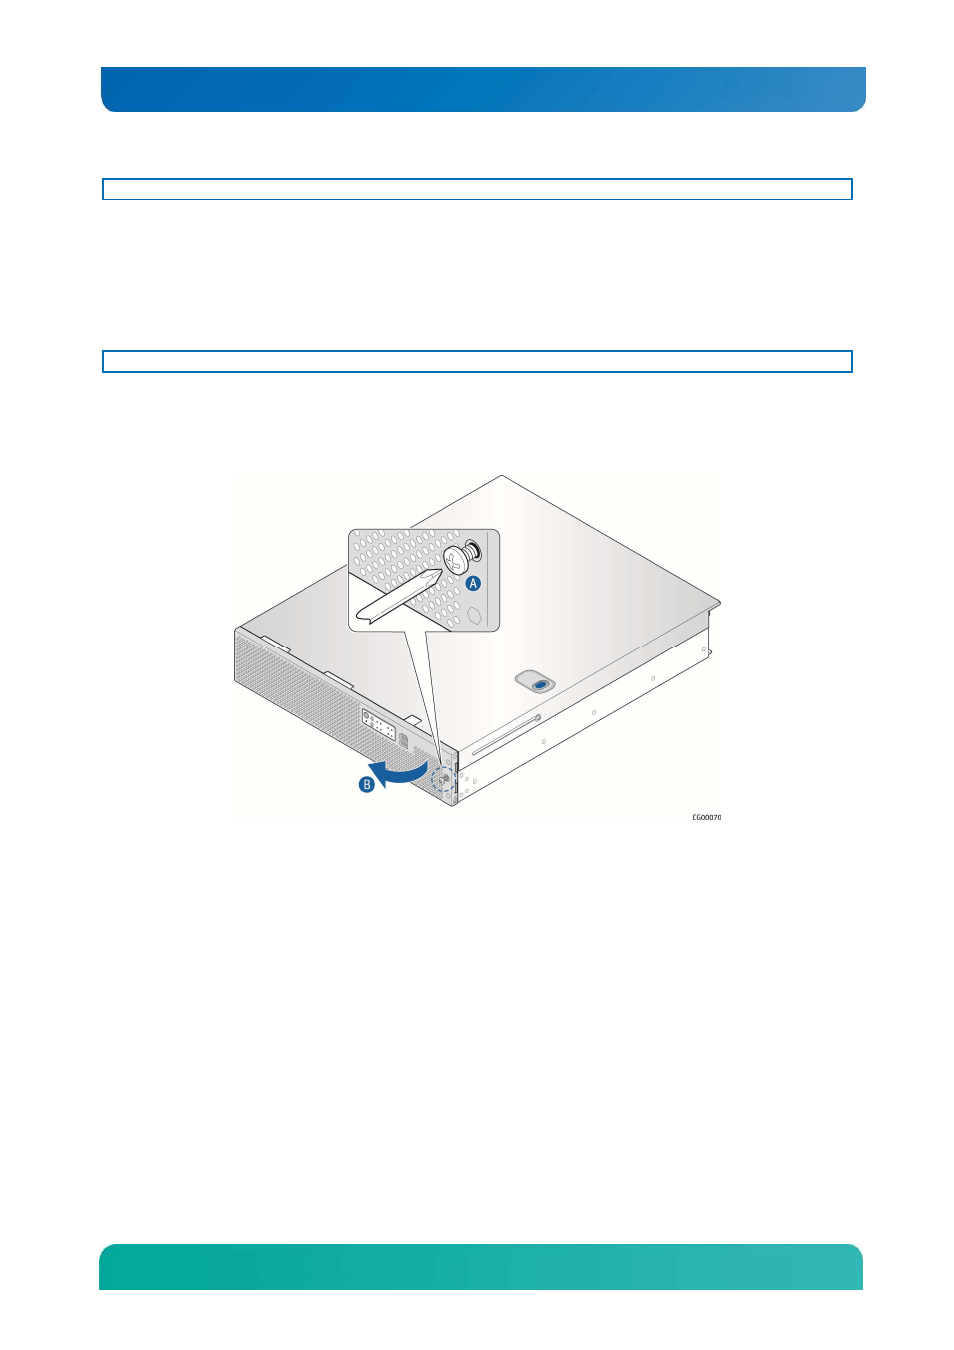
1. Loosen the captive bezel retention screw on the right side of the bezel (Figure 10, “A”).
2. Rotate the bezel to the left to free it from the pins on the front panel, (“B”) and remove it.
Figure 10. Removing the Front Bezel
3.2.4 Re-Installing the Front Bezel
1. Insert the tabs on the left side of the bezel into the slots on the front panel of the chassis.
2. Move the bezel toward the right and align it on the front panel pins.
3. Snap the bezel into place and tighten the retention screw to secure it.
3.2.5 Removing a Riser Card Assembly
One or both of the riser card assemblies has to be removed from the chassis to perform tasks such as:
•
Installing or replacing a riser card and any PCI add-in card(s)
•
Working with any components on the server board that are near the riser card assembly
•
Installing or replacing processors or memory DIMMs
•
Removing the server board
To remove a riser card assembly:
1. Power down the server and remove all peripheral devices and the power cord(s)
2. Remove the chassis cover. For instructions, see “Removing the Chassis Cover” in Section 3.2.