Dynojet 248x: Installation Guide User Manual
Page 30
3 - 12
Document #98219101
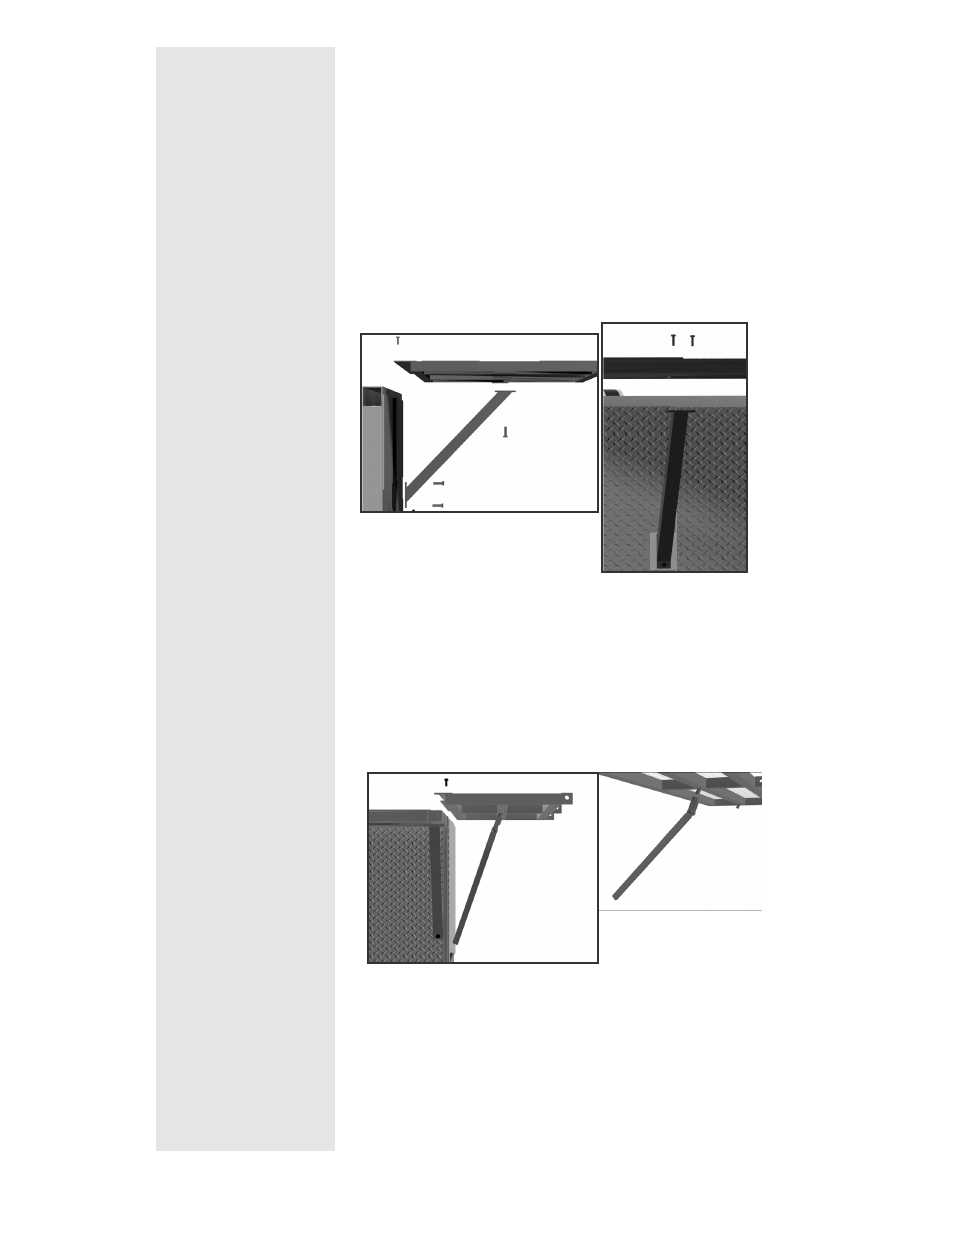
Step 2
Using the 3/8" x 1" bolts, loosely secure each
of
the
four
support
braces
to
the
dynamometer and the bottom of the back
catwalk. When the support tubes have been
attached, tighten the bolts on the bottom of
the support tubes. Tighten the bolts at the top
of the support tubes where they attach to the
catwalk.
Step 3
Place the side-catwalks on the dynamometer so
the Dynojet stickers are upright and visible when
looking from the brake side of the dynamometer.
Secure them to the dynamometer with the 3/8" x
1" bolts and to the back plate with the 3/8" x 1"
bolts and nylon insert nuts.
Step 4
Screw the supports (with rotating head) onto
the threaded rods on the side-catwalks.
Place the support tubes over the pegs on the
side of the dynamometer.