Power carriage, Parts list, Removing the hand crank – Dynojet 200: Installation Guide User Manual
Page 67: Figure 3-46: remove the hand crank
O P T I O N A L A C C E S S O R I E S
Power Carriage
Version 3
Motorcycle Dynamometer Installation Guide
3-37
. . . . . . . . . . . . . . . . . . . . . . . . . . . . . . . . . . .
POWER CARRIAGE
The power carriage replaces the standard hand crank with an electrically powered tire
carriage allowing you to easily adjust for various wheel base distances with the press
of a button. This option is ideal for dynos that are recessed where the hand crank is
difficult to access. The power carriage will also reduce the time spent making
adjustments for various length motorcycles.
The power carriage motor is preset to be installed with the carriage screwed in
all the way. Do not run the motor prior to installing it on your dyno.
To prevent possible injury, disconnect the battery before performing any dyno
maintenance or installing any optional accessory.
P
ARTS
L
IST
The following table lists all of the parts included in the Power Carriage Installation kit.
Check your kit against the parts listed to make sure you have received all of the parts.
If any part is missing, contact Dynojet Technical Support.
R
EMOVING
THE
H
AND
C
RANK
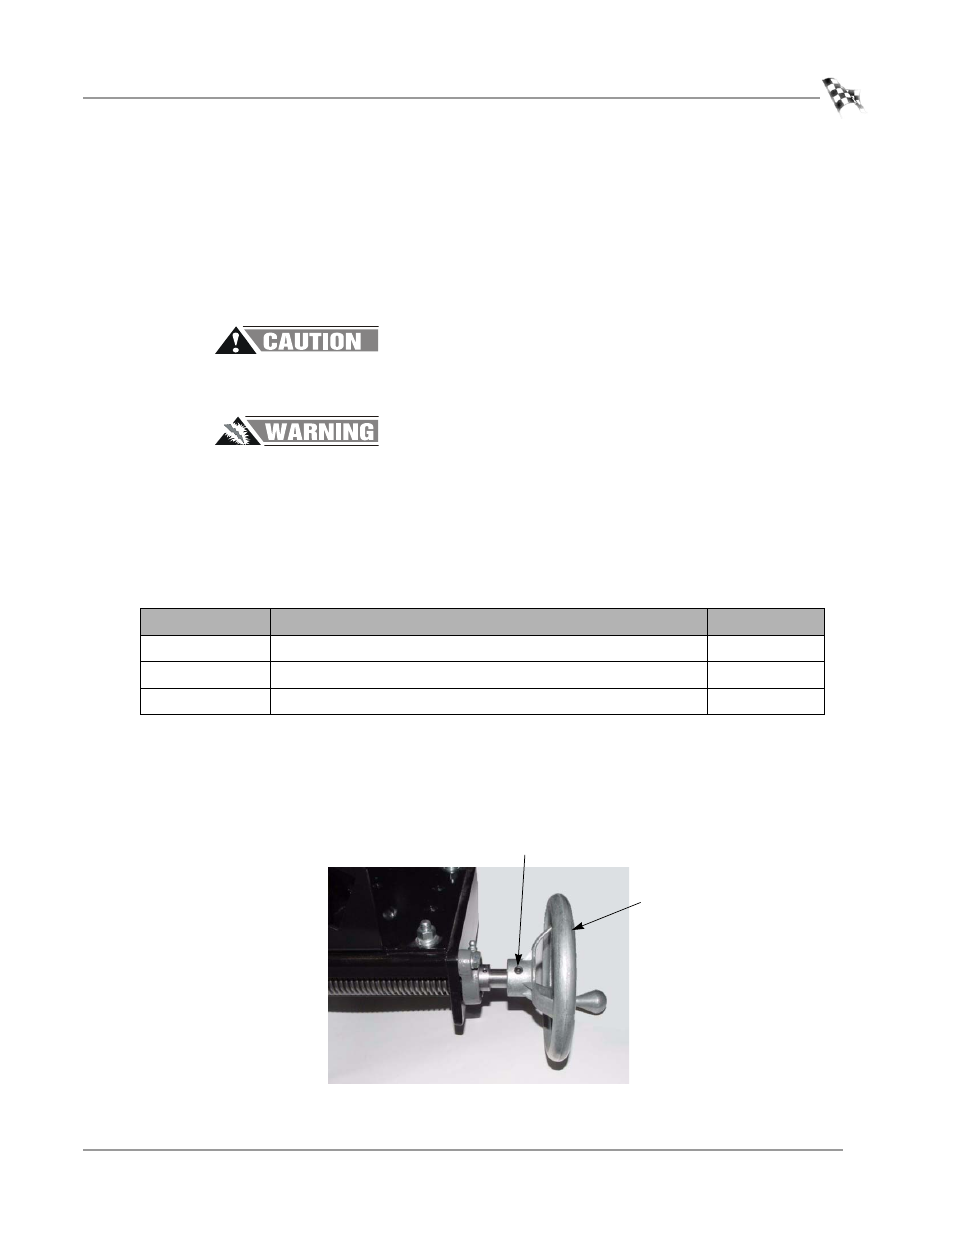
1
Remove the hand crank from the tire carriage.
1a
Screw the carriage all the way in.
1b
Loosen the set screw on the hand crank and remove the hand crank.
Figure 3-46: Remove the Hand Crank
part number
description
quantity
36561284
Screw, 1/4-20 x 3/4” Button-Head
2
36561670
Bolt, 1/4-20 x 1”, Hex
2
36912100
Washer, 1/4”, Splitlock, STL
2
hand crank
set screw