Removing the dyno from the crate, Figure 1-6: remove the hood, Figure 1-7: loop strap placement – Dynojet 200: Installation Guide User Manual
Page 15
D Y N O I N S T A L L A T I O N A N D S E T U P
Uncrate the Dyno
Version 3
Motorcycle Dynamometer Installation Guide
1-7
R
EMOVING
THE
D
YNO
FROM
THE
C
RATE
You will need to provide equipment capable of lifting a minimum of 1600 lb.
(725 kg.) to lift the dyno off the crate and into position in your dyno room. You will
also need a pair of straps capable of supporting 1600 lb. (725 kg.) to attach to the
dyno. Dynojet recommends using single loop style straps.
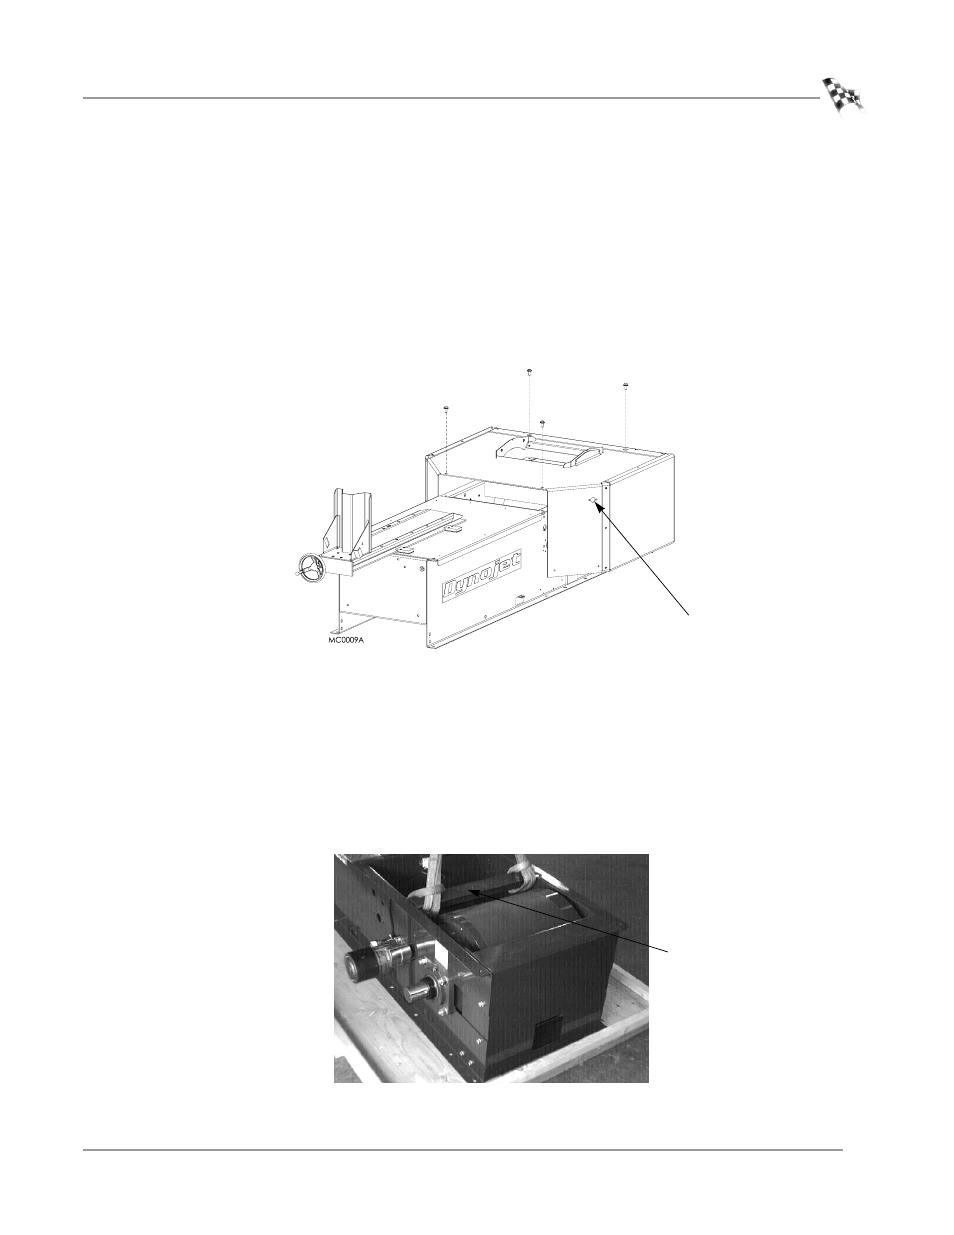
1
Remove the four bolts securing the hood to the dyno and set aside. Prop up the
hood.
2
If present, disconnect the wires to the key switch.
3
Remove the hood from the dyno and set aside.
Figure 1-6: Remove the Hood
4
Remove the four screws securing the dyno to the crate base using a 9/16-inch
socket, open or box end wrench.
5
Wrap the single loop straps around the dyno support frame just in front of the
drum.
6
Position the straps as far to the outside of the support frame as possible. Refer to
Figure 1-7 for exact placement.
Note: Exact placement of the loop straps is important. Any other placement could
damage the dyno.
Figure 1-7: Loop Strap Placement
key switch
support frame
in front of drum