Dell OptiPlex GX110 User Manual
Page 64
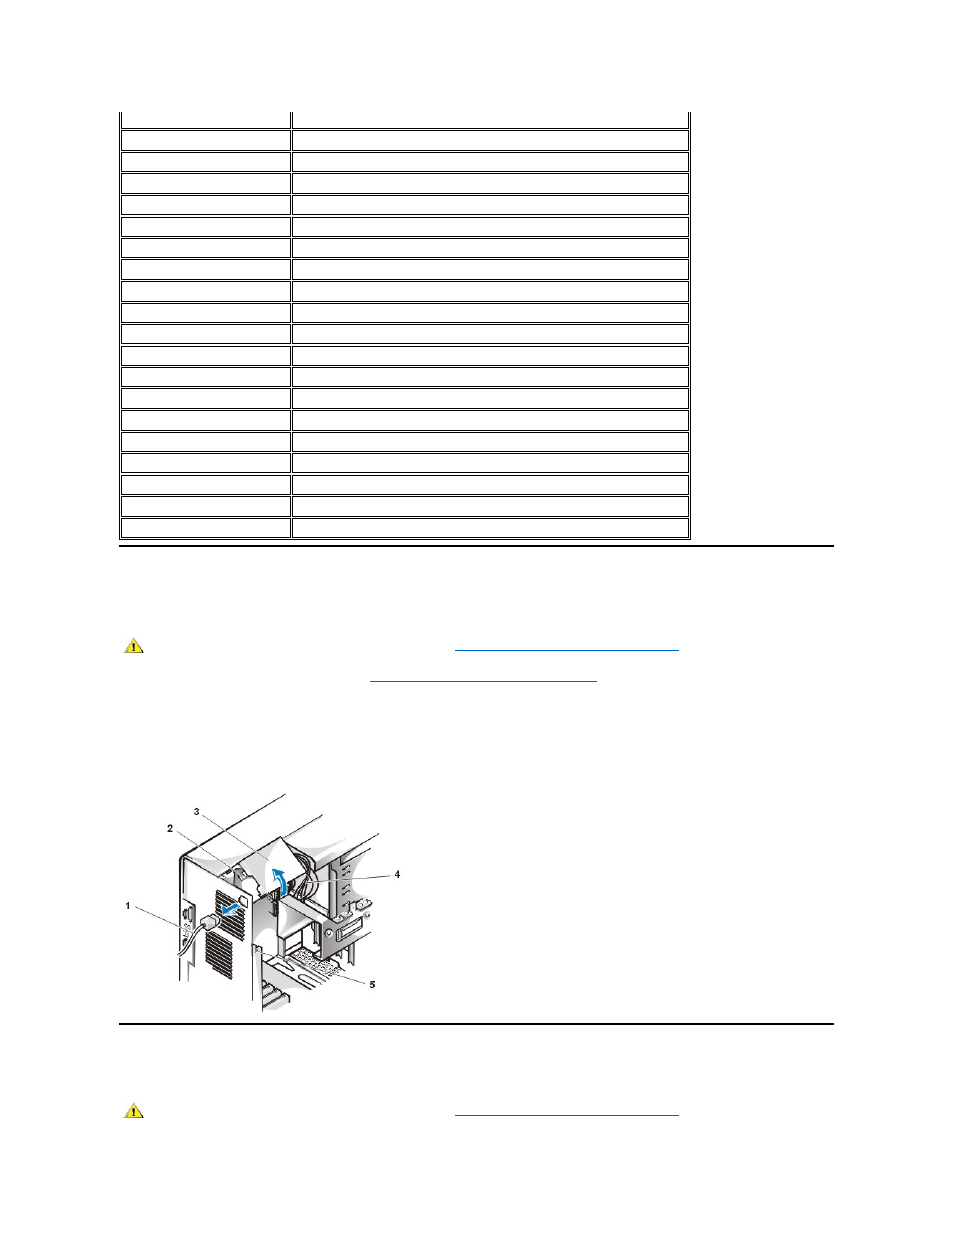
Rotating the Power Supply Away From the System Board (Midsize and Mini Tower Chassis Only)
To access some components on the system board, you may have to rotate the midsize or mini tower chassis system power supply out of the way.
To rotate the power supply, perform the following steps.
1. Remove the computer cover as instructed in "
Removing and Replacing the Computer Cover
."
2. Disconnect the AC power cable from the AC power receptacle on the back of the power supply (Figure 11 illustrates rotating the power
supply on the mini tower chassis; the power supply is on the right side of the midsize chassis).
3. Free the power supply from the securing tab labeled "RELEASE
—>," and rotate it upward until it locks in its extended position.
Figure 11. Rotating the Power Supply
Removing and Replacing the Front Bezel (Mini Tower Chassis Only)
To access some drive bays in the mini tower chassis, you must first remove the front bezel. To remove the front bezel, perform the following steps.
Connector or Socket
Description
AUX_LED
Auxiliary power indicator
B1
Battery socket
DIMM_x
Dual in-line memory module (DIMM) socket
DSKT
Diskette/tape drive interface connector
ENET
Integrated network interface controller(NIC) connector
FAN
Microprocessor fan connector
IDEn
EIDE interface connector
INTRUSION
Chassis intrusion switch connector
KYBD
Keyboard connector
MICROPROCESSOR
Microprocessor connector
MONITOR
Video connector
MOUSE
Mouse connector
PANEL
Control panel connector
PARALLEL
Parallel port connector; sometimes referred to as LPT1
POWER_1
Main power input connector
POWER_2
3.3-volt (V) power input connector
RISER
Riser board connector
SERIALn
Serial port connectors
USB
Universal Serial Bus (USB) connectors
CAUTION: Before you remove the computer cover, see "
Safety First
—For You and Your Computer
."
1 AC power cable
2 AC power receptacle
3 Power supply
4 DC power cables
5 Securing tab
CAUTION: Before you remove the computer cover, see "
Safety First
—For You and Your Computer
."