Mist resist ember™ led strip light applications, Cutting custom lengths and mounting in use photo, Trimming step 1. step 2 – Diode LED Mist-Resist User Manual
Page 2
DIODELED.COM
1.877.817.6028
MIST RESIST EMBER™ LED STRIP LIGHT
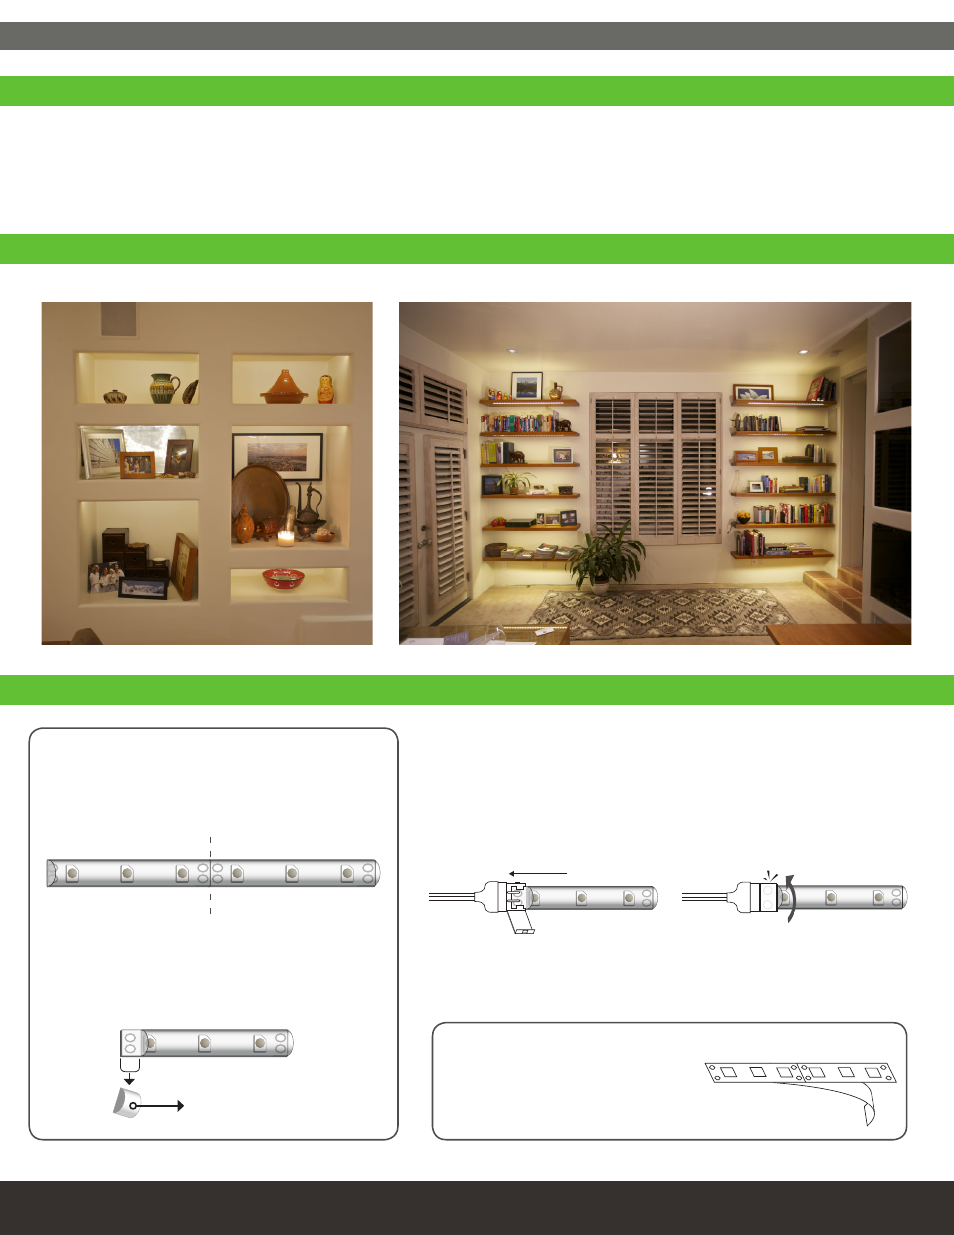
APPLICATIONS
• Stairways and railings
• Marker lighting
• Theaters and cinemas
• Pathways and walkways
• Ambient lighting
• Interior cove lighting
Install the Strip Light on a clean, dry surface
by peeling the protective layer from the 3M™
adhesive backing and attaching the strip from
one end, keeping it taut to prevent bumps and
to ensure a straight installation.
CUTTING CUSTOM LENGTHS AND MOUNTING
IN USE PHOTO
1. Carefully open CLICKTIGHT™ latch and note +/- polarity markers.
2. Firmly insert strip into connector tray. Be sure the contact points of the strip are
directly underneath the placement tabs of the connector (trim excess strip close to
contact points if lights do not light up once powered).
3. Close the CLICKTIGHT™ latch to ensure connection.
Note: LED strip light is operated by a DC (Direct Current) constant voltage power
source and is polarity sensitive. If your strip does not light up,check the +/- polarity.
For custom lengths of Mist Resist Ember Strip Lights, trim
along cut points on strip light to desired length.
Trimming
Step 1.
Step 2.
Carefully cut away silicone from the strip light solder
points and discard the unneeded silicone.
CLICKTIGHT™ STRIP LIGHT CONNECTORS
Mounting Strip Light
–
+
–
+
–
+
–
+
–
+
–
+
–
+
–
+
–
+
3
–
+
–
+