Installation instructions – Brandmotion 1008-9525-V2 User Manual
Page 12
INSTALLATION INSTRUCTIONS
9520 and 9525 Instructions 9-24-12.doc
12 of 34
Section 7: Inside Rear View Mirrors without Auto Dimming
(if required)
Follow the steps in Section 7 only if the vehicle does not have an auto dimming inside
rear view mirror.
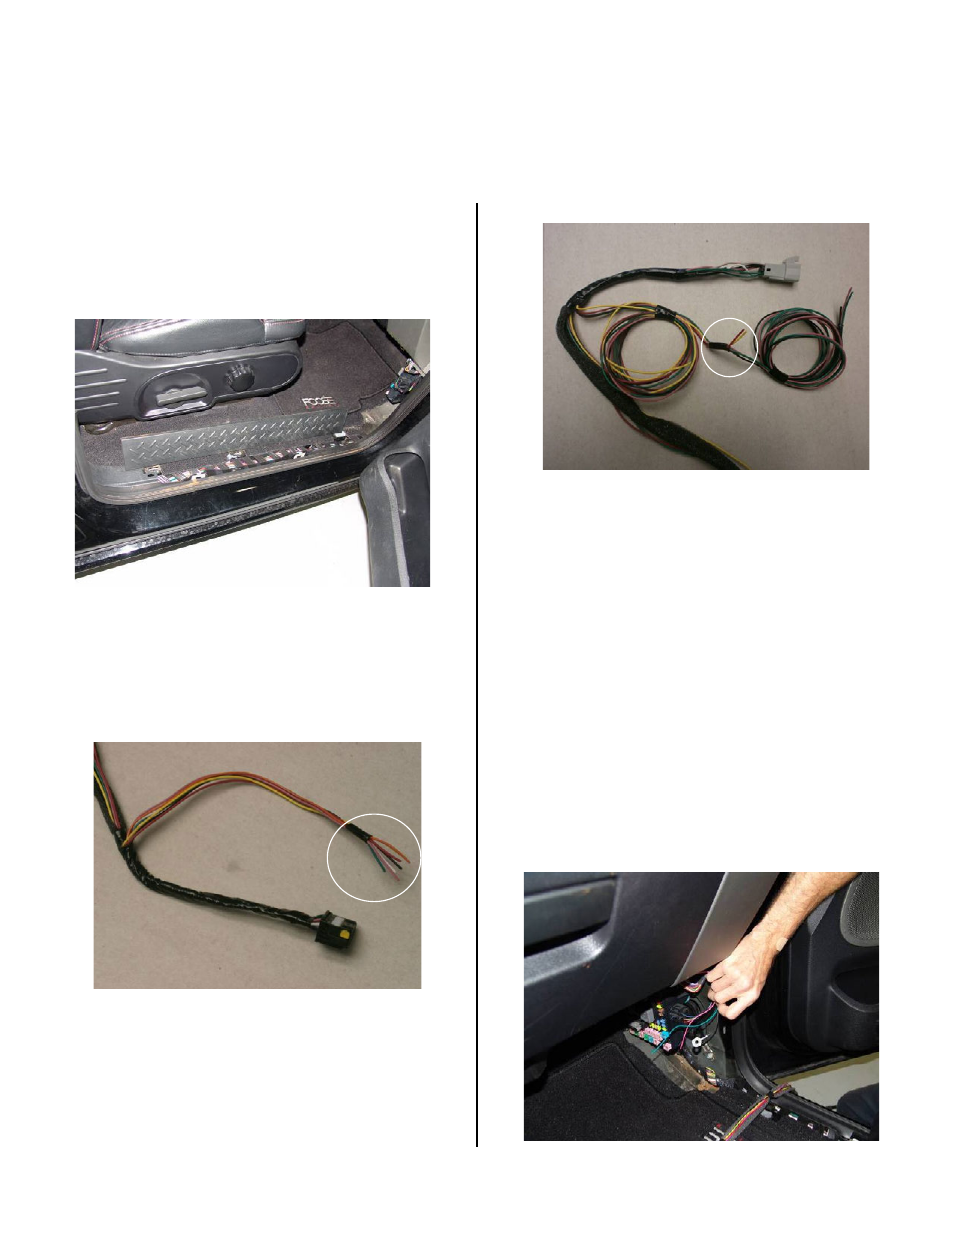
45. Remove the passenger side door sill plate with a
trim tool and remove passenger side kick panel with
hands, just disengaging the two clips from the sheet
metal (Figure 31).
Figure 31
46. Isolate the seven wires near the black 16-pin mirror
connector on the supplied interior harness (Figure
32) with electrical tape along with the red and
yellow wires near the white 6-pin connector (Figure
33).
Figure 32
Figure 33
47. Route the supplied interior harness green, pink, and
black wires along the vehicle cross dash harness.
Secure using wire ties wherever possible at 2 inch
intervals.
48. Splice the green reverse wire from the supplied
interior harness white 6-pin connector end to the
wire listed in Diagram A3, on the next page,
depending on the vehicle model. Solder and cover
the connection with tape or heat shrink tubing.
49. Splice the pink ignition wire from the supplied
interior harness white 6-pin connector end to the
wire listed in Diagram A3, on the next page,
depending on the vehicle model. Solder and cover
the connection with tape or heat shrink tubing.
50. Attach the black ground wire eyelet from the
supplied interior harness white 6-pin connector end
to sheet metal in the passenger side kick panel with
a screw using an 8mm socket (Figure 34).
Figure 34
Cover seven
unused wires.
with tape.
Cover unused red &
yellow wires with
tape.