Brandmotion 9002-8520 User Manual
Installation instructions
INSTALLATION INSTRUCTIONS
8520 Instructions 11-20-13.doc
Page 1 of 4
OEM Lip Mount CCD Camera with Prismatic Mirror
(Kit part number 9002-8520)
Please read thoroughly before starting installation and check that kit contents are complete.
Items Included in the Kit:
Tools & Supplies Required:
Manual Dimming Mirror with 3.5” Video Display
Mirror Harness
Bubble bag containing:
Camera with Mount (in zip lock bag)
Camera Harness
Chassis Harness
Zip lock bag containing:
2 Rubber Well Nuts
2 Bolts
Zip lock bag containing:
These Instructions
Self-adhesive Template
T20 Torx Bit
Phillips Screwdriver
Center Punch
1/8” & 5/16” Drill Bits
5/8” Drill Bit or Center Hole Saw
Power Drill
Deburring Tool or Round File
Multi-meter or computer safe test light
Wire Ties or Electrical Tape
Wire Crimper
Ground Eyelet
(Recommended)
Rust Inhibitor
(Recommended)
Soldering Iron
(Recommended)
Solder
(Recommended)
or T-taps
Plastic Trim Removal Tool
Mirror Removal Tool # OTC8200 or
Brandmotion part # CTAA585
(Required for non-screw type mirrors)
Vehicle service manual
(If needed)
Safety Precautions:
•
Work in a well ventilated area that is clear of obstructions.
•
Secure vehicle with tire chucks in both front and rear of tires.
•
Turn vehicle accessories OFF and ensure ignition key is in OFF position.
•
Wear safety goggles and snug fitting clothes.
•
Use tools only for their intended purpose and which are in good repair.
•
Only perform this task if confidence, skill, and physical ability permit.
NOTE: We strive to provide accurate and up-to-date installation instructions.
For the latest full color instructions, as well as an installation video (refer to relevant portions of the video
for Kit # 9002-8530), please visit www.brandmotion.com
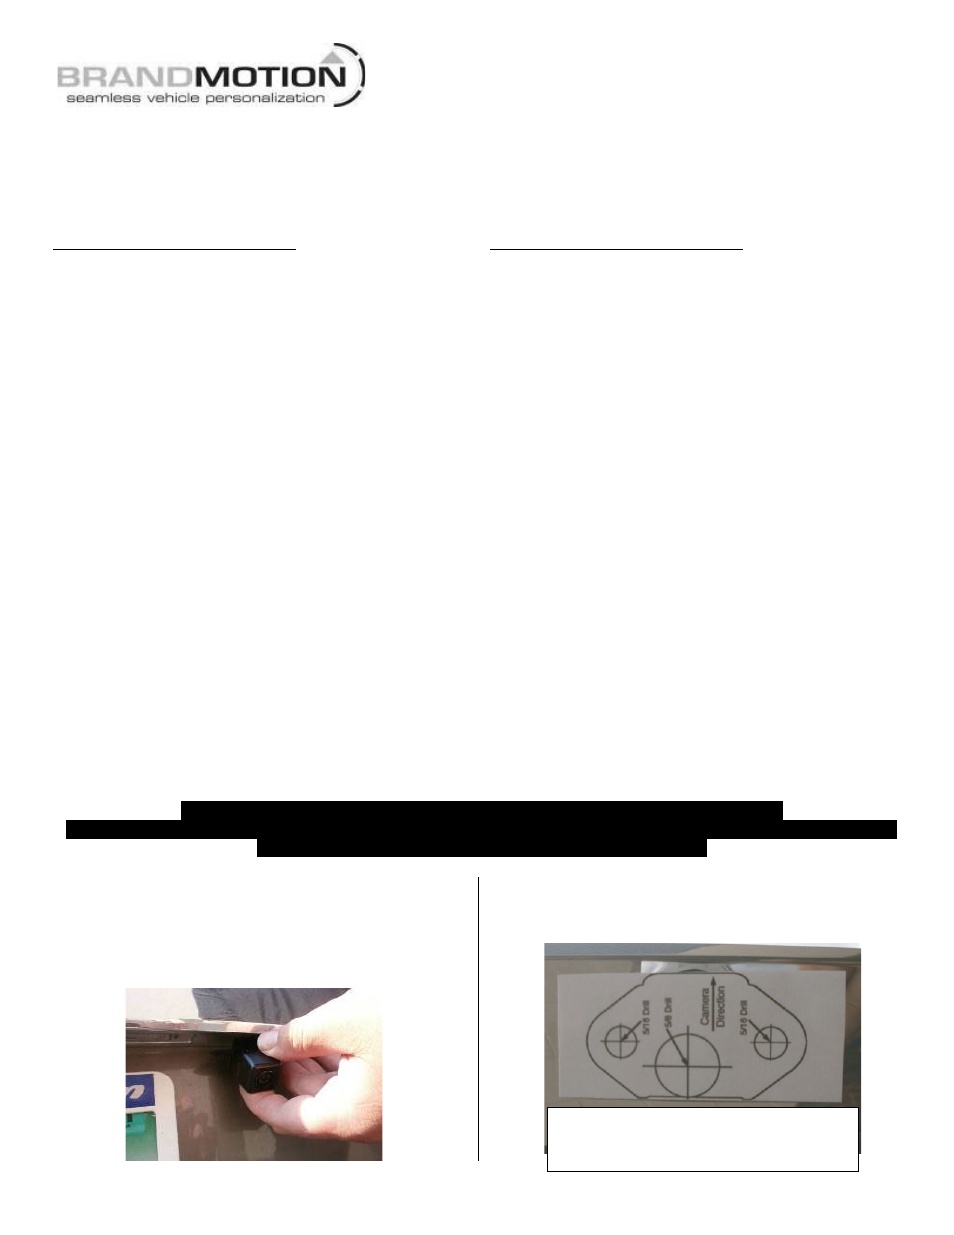
Step 1: Place Camera Mount in desired
position to confirm fitment. (IMPORTANT:
Some states prohibit items blocking the vehicle
license plate; check local authorities to confirm
legal status for your specific application).
Step 2: Peel adhesive backing from supplied
Camera Mount Template, ensure camera direction
is correct, and apply to desired location.
NOTE: If self-adhesive Template is missing or
damaged, cut out the image above and affix
with Masking Tape.