Replace the display module bezel, Replace the backlight – Rockwell Automation 2711P-xxxx PanelView Plus 6 Terminals User Manual User Manual
Page 126
126
Rockwell Automation Publication 2711P-UM006C-EN-P - April 2013
Chapter 5
Install and Replace Components
Replace the Display Module Bezel
Follow these steps to replace the display module bezel.
1. Make sure the bezel is free of lint and marks before attaching.
2. Attach the connectors.
• Function key connector
• Connector on keypad or keypad/touch units
3. Place the back of the display module over the bezel.
Be careful not to pinch any of the cables. Let the touch screen connector
out of the access opening.
4. Attach the touch screen connector.
5. Replace the new sealing gasket.
6. Attach the screws that secure the display module to the bezel and tighten
to a torque of 1.35…1.58 N•m (12…14 lb•in).
7. On touch-screen terminals, reattach the small metal plate to the back of
the display module and torque the two screws to 0.58 N•m (5…7 lb•in).
Replace the Backlight
The 700, 1000, 1250, and 1500 CCFL-display modules have replaceable
backlights except for the 1250 high-bright displays. Backlight replacement does
not apply to LED displays.
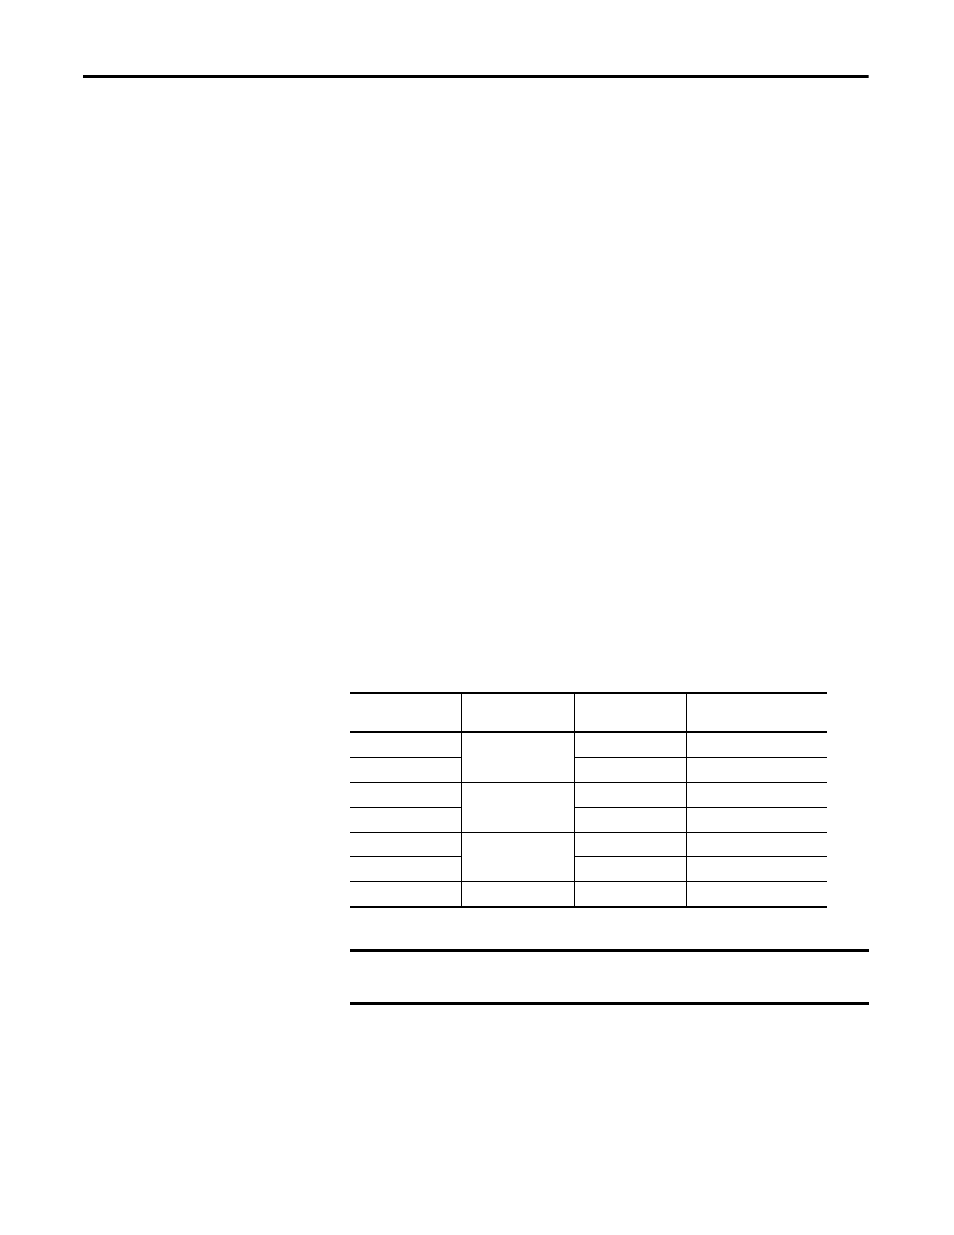
Table 60 - CCFL Backlight Replacements
(1)
(1) These CCFL-backlight replacement catalog numbers do not apply to LED displays.
Use Cat. No.
For Display
Series
Number of CCFL
Backlights
2711P-RL7C
700
A and B
1
2711P-RL7C2
C and D
1
2711P-RL10C
1000
A
1
2711P-RL10C2
B and C
1
2711P-RL12C
1250
A and B
2
2711P-RL12C2
C
1
2711P-RL15C
1500
B
2
IMPORTANT
Disposal: The backlights for these products contain mercury. Dispose of per
applicable laws.