Mount the module, Mount the module in high vibration areas – Rockwell Automation 1732E-IR4IM12R ArmorBlock Dual-Port EtherNet/IP 4-Point Thermocouple and RTD User Manual
Page 17
Rockwell Automation Publication 1732E-UM004A-EN-E - July 2012
9
Install Your ArmorBlock Module Chapter 2
Mount the Module
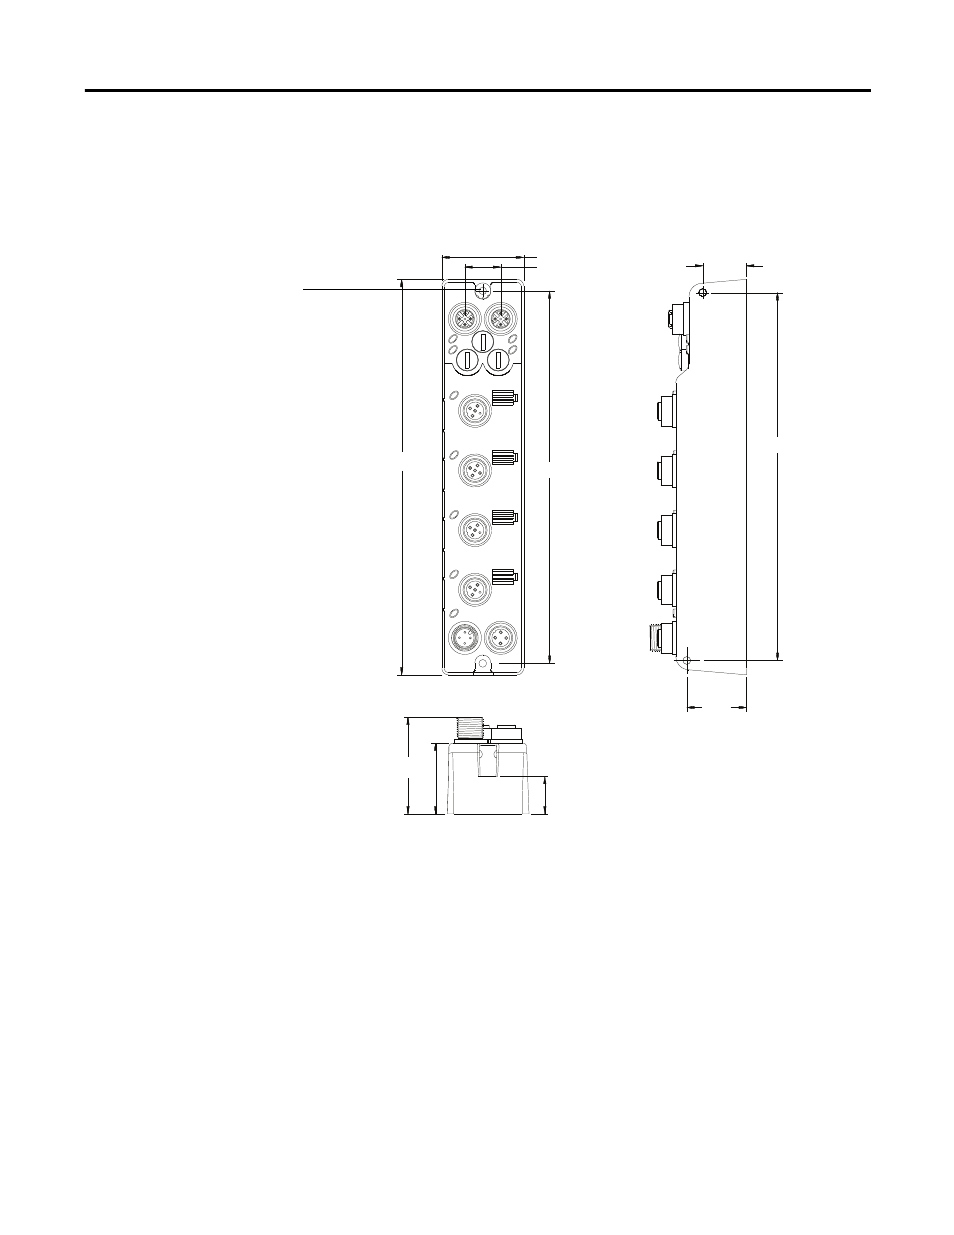
To mount the module on a wall or panel, use the screw holes provided in the
module. Refer to the drilling dimensions illustration to guide you in mounting
the module.
Mounting Dimensions
Install the mounting base as follows:
1.
Lay out the required points as shown above in the drilling dimension
drawing.
2.
Drill the necessary holes for #6 (M3) pan head screws.
3.
Mount the module using #6 (M3) screws.
Mount the Module in High Vibration Areas
If you mount the module in an area that is subject to shock or vibration, we
recommend you use a flat and a lock washer to mount the module. Mount the flat
37 (1.46)
16.2 (0.64)
168.6 (6.64)
(1.26)
32
(1.70)
43.3
(0.78)
19.8
166.5 (6.56)
27
(1.06)
6LGH0RXQWLQJ
)URQW0RXQWLQJ
179 (7.05)
18
(0.71)
Millimeters
(Inches)
45870
Functional Earth
Grounds the I/O block
EtherNet/IP communication
circuitry which is designed to
mitigate the effect of noise on
the network. It requires a solid
earth ground connection,
either through a metal screw
to a grounded metal panel or
through a wire.