Assigning a name for the wim (optional) – Rockwell Automation 22-WIM-N1 DSI Wireless Interface Module User Manual
Page 28
3-8
Configuring the WIM
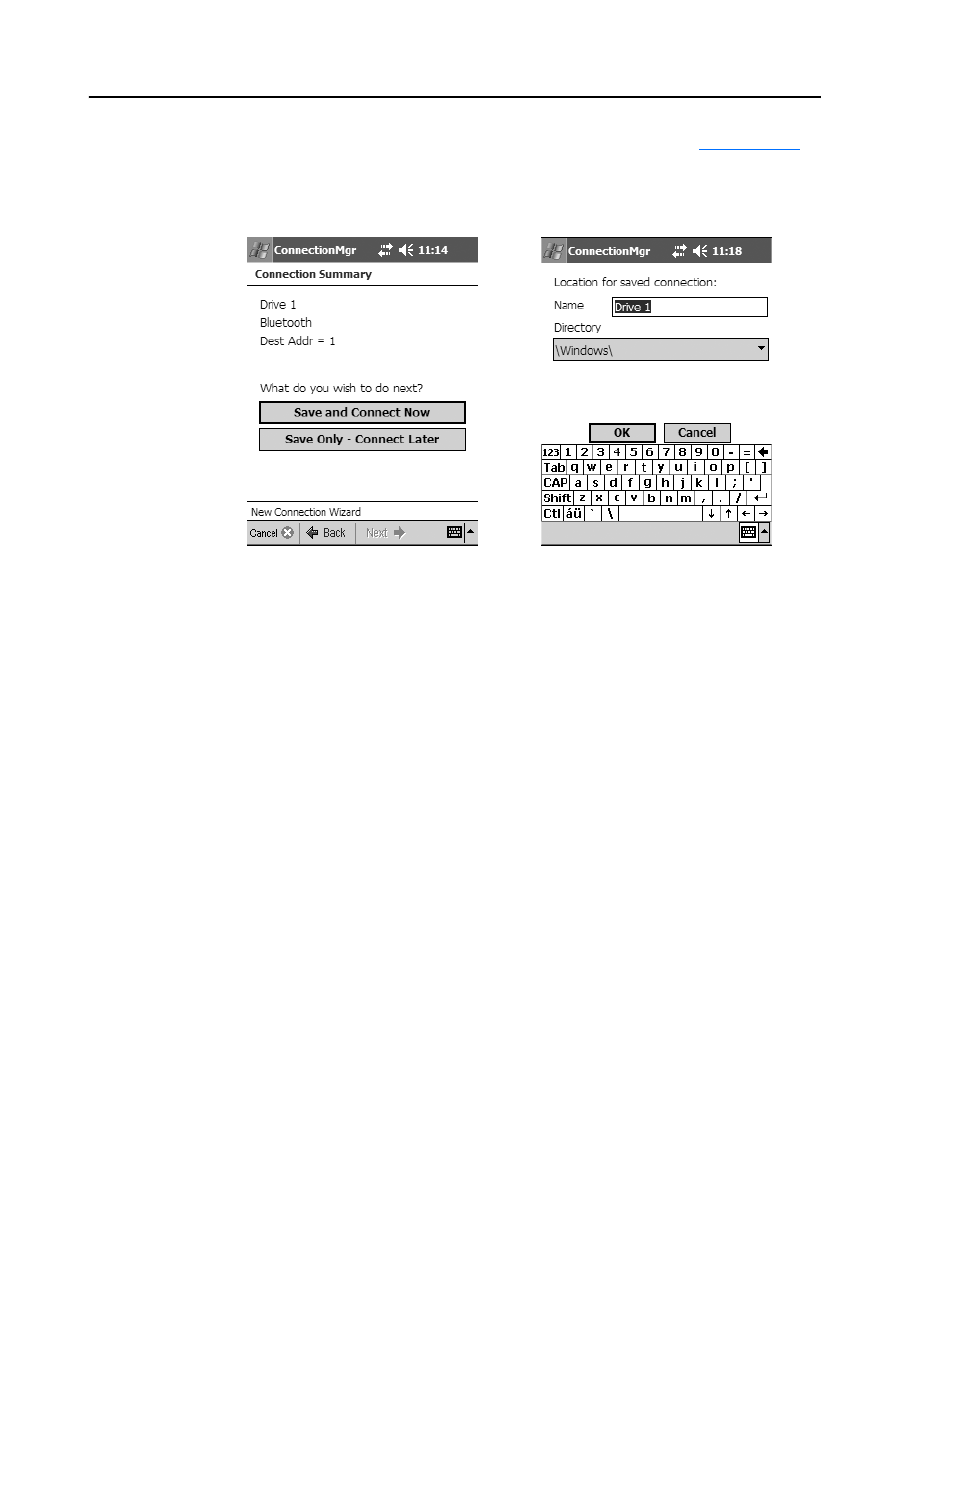
display the “Location for saved connection” screen (
Figure 3.14
).
E. Use the default name shown or enter a desired name (for this
example, Drive 1). Use the default directory shown or select a
different path to which the connection is saved on the Pocket PC.
Then tap OK. The StatusMonitor screen for the drive appears.
F. From the Drive 1 StatusMonitor screen, select Connect > New…
from the menu list. The New Connection Wizard screen appears.
Then select the “Bluetooth” radio button and tap Next ->.
G. Repeat sub-steps A through E for each remaining drive on the
network.
H. From the last drive’s StatusMonitor screen, select Connect > and
the drive to which you want to connect to (for example, Drive
1.dfc). This establishes connection to that drive and displays its
StatusMonitor screen.
Note: Using the “Remote” connection option for the WIM
establishes a point-to-point connection. Therefore, you can only
connect to one networked drive at a time.
Assigning a Name for the WIM (optional)
The WIM can be assigned a custom name (up to 16 alpha-numeric
characters) that represents its associated drive’s application function,
such as Pump 1 or Conveyor A. After successfully establishing a custom
WIM name, it replaces the default drive name (for example, PowerFlex
40 3P 460V 1.0HP) that appears in the “Searching for Bluetooth
Devices” screen and will now be recognized on the network.
Figure 3.13 Connection Summary
Screen
Figure 3.14 “Location for saved
connection” Screen