Snap-loc 24 installation of gutter flashing, Cont.) – Metal Sales Snap-Loc 24 Installation User Manual
Page 52
© Metal Sales Manufacturing Corporation / Subject to change without notice. 10/99
51
SNAP-LOC 24
INSTALLATION OF GUTTER FLASHING
(CONT.)
1
/
8
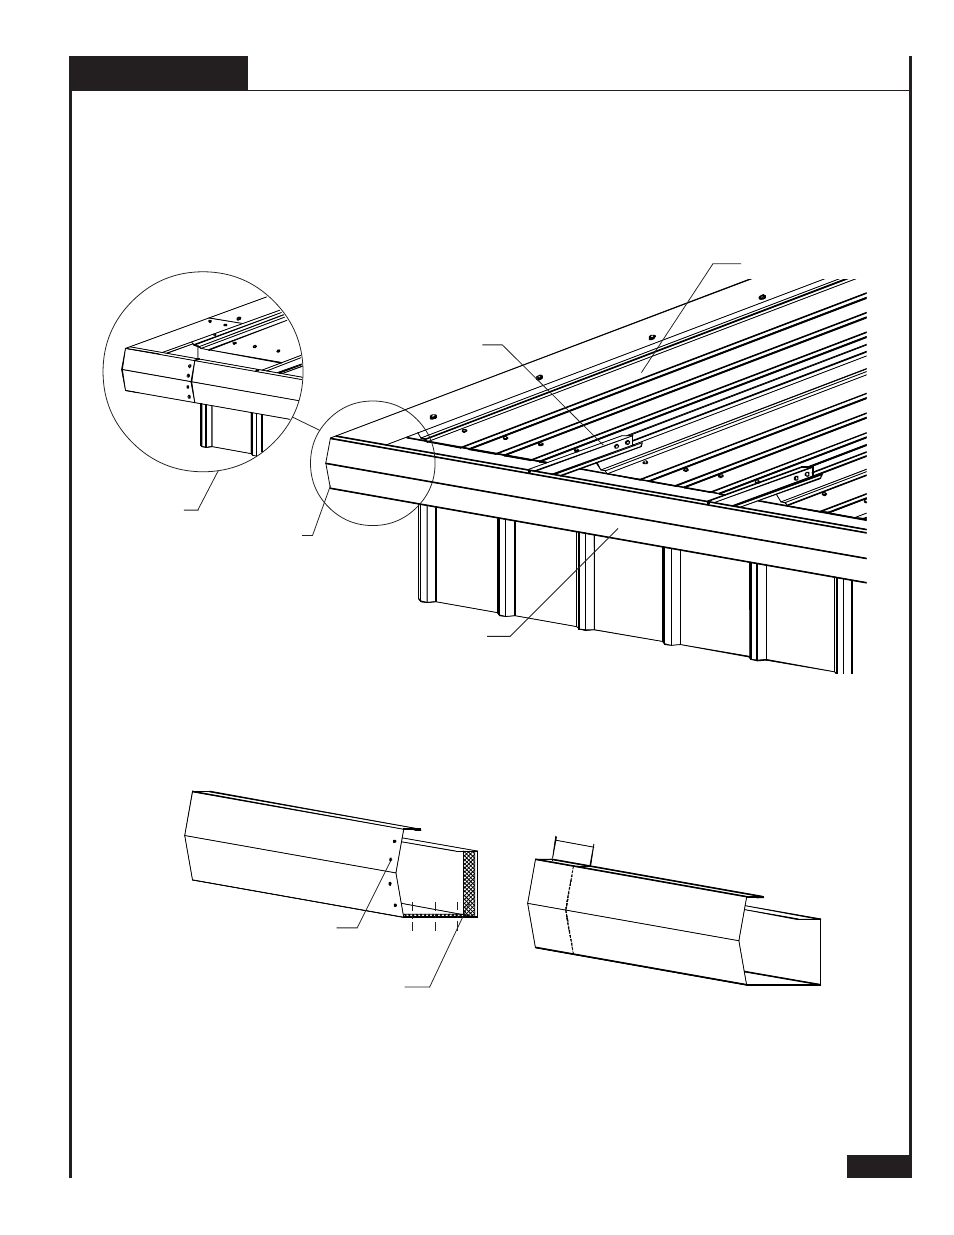
" POP RIVET
DOUBLE BEAD TAPE SEALANT
SSR GUTTER SUPPORT
SNAP-LOC SCULPTURED GUTTER
OPTIONAL
CORNER BOX
SNAP-LOC 24 PANEL
10. Continue fastening the gutter flashing to the SSR Gutter Support and the panel flat as before.
11. Terminate the gutter at the rake flashing by attaching a Snap-Loc Gutter End to the gutter flashing
and field cut the rake trim to fit the gutter contour.
2"
FIELD MITER
8. If two or more gutter flashings are required, apply Double Bead Tape Sealant on the inside of the
gutter flashing, two inches from the end.
9. Lap the gutter flashing 2" and fasten with ten (10) #
1
/
4
-14 x
7
/
8
" Stitch XL screws or Pop Rivets as
shown below.
5. Position the gutter over the SSR Gutter Supports with one end against the rake flashing.
6. Clamp the top of the back lip of the gutter in position with a "C" vice-grip clamp. Field miter the
rake trim to fit the gutter contour at the corner of the building or a SSR Sculptured Corner Box
can be installed.
7. Install a #
1
/
4
-14 x
7
/
8
" Stitch XL screw or Pop Rivet where the front lip of the gutter rests on the
SSR Gutter Support, and fasten the back lip of the gutter to the panel flat with #
1
/
4
-14 x
7
/
8
" Stitch
XL screws 12" O.C.