Snap-loc 24, Installation of panel, Cont.) – Metal Sales Snap-Loc 24 Installation User Manual
Page 37
© Metal Sales Manufacturing Corporation / Subject to change without notice. 10/99
SNAP-LOC 24
36
INSTALLATION OF PANEL
(CONT.)
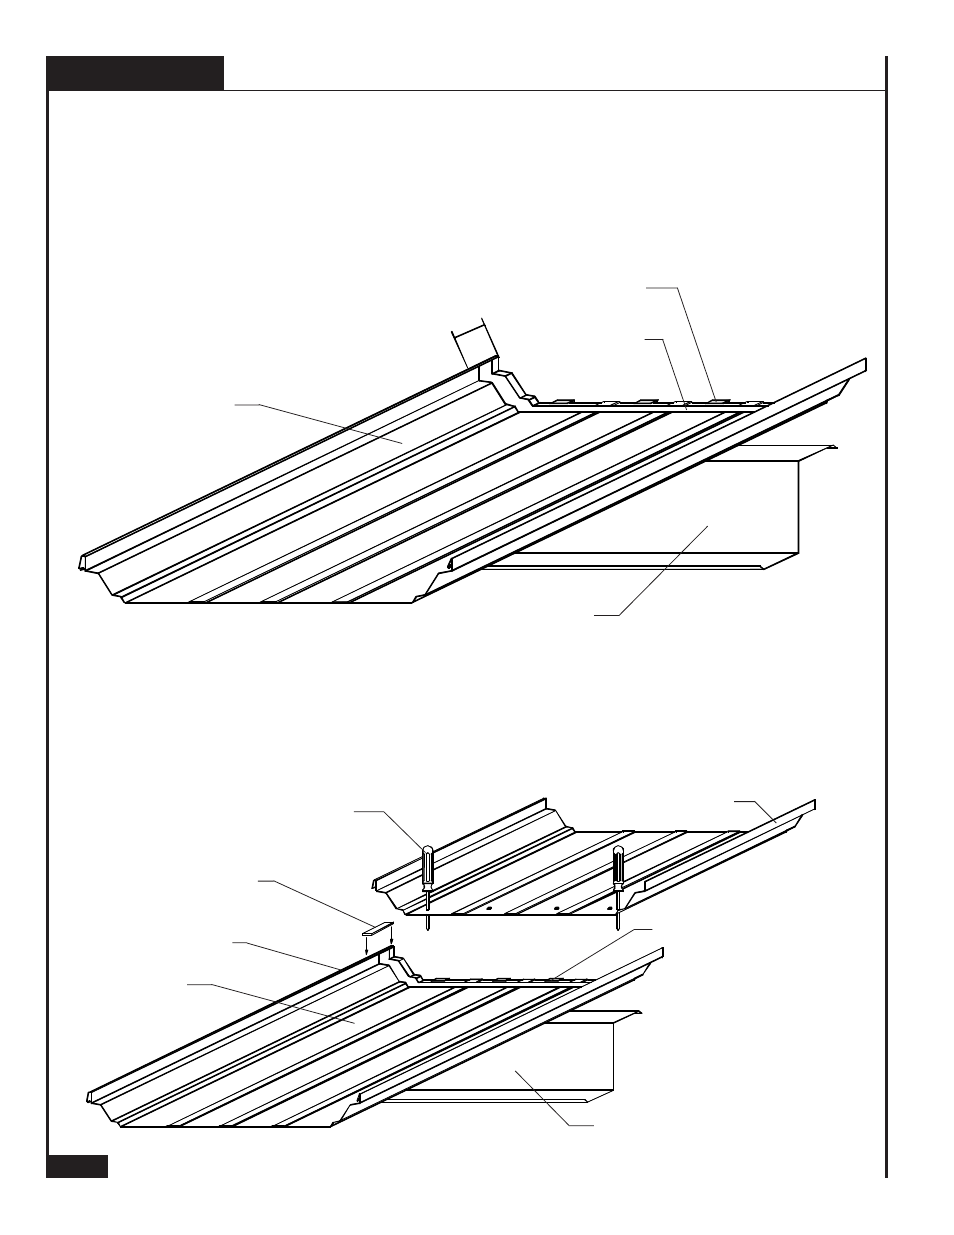
ENDLAP PURLIN
2
1
/
8
"
COMPRESSION PLATE
ENDLAP PURLIN
FEMALE LEG
MALE LEG
ENDLAP PAD
2. The male and female side of both ends of the eave panel are factory notched 2
1
/
8
" to allow the
peak panel to nest inside the eave panel.
3. Slide the Compression Plate on to the end of the eave panel. The tab on the Compression Plate
should engage the panel. A portion of the Compression Plate should rest on the purlin flange.
4. Apply an Endlap Pad on the endlap end of the eave panel down the male leg, across the panel,
and up the female leg
1
/
4
" from the end of the panel. Center the Endlap Pad over the factory
punched holes. Do not stretch the Endlap Pad as this will cause gaps in the pads coverage.
5. Apply a 2
1
/
8
" pig tail of Double Bead Tape Sealant over the factory notched section of the
Snap-Loc 24 panel legs.
6. Place two hole punches in the peak panel in the outer most factory punched holes. Push punches
through endlap pad and factory punched holes in compression plates, thus aligning panels and
lapping the proper 2
1
/
8
".
7. Nest the peak panel into the eave panel. It may be necessary to bow the center of the peak panel
slightly upward to allow ease in aligning the two panels.
EAVE PANEL
COMPRESSION PLATE
HOLE PUNCH
EAVE PANEL
PIG TAIL OF DOUBLE
BEAD TAPE SEALANT