Snap-loc 24, Installation procedure overview – Metal Sales Snap-Loc 24 Installation User Manual
Page 27
© Metal Sales Manufacturing Corporation / Subject to change without notice. 10/99
SNAP-LOC 24
26
INSTALLATION PROCEDURE OVERVIEW
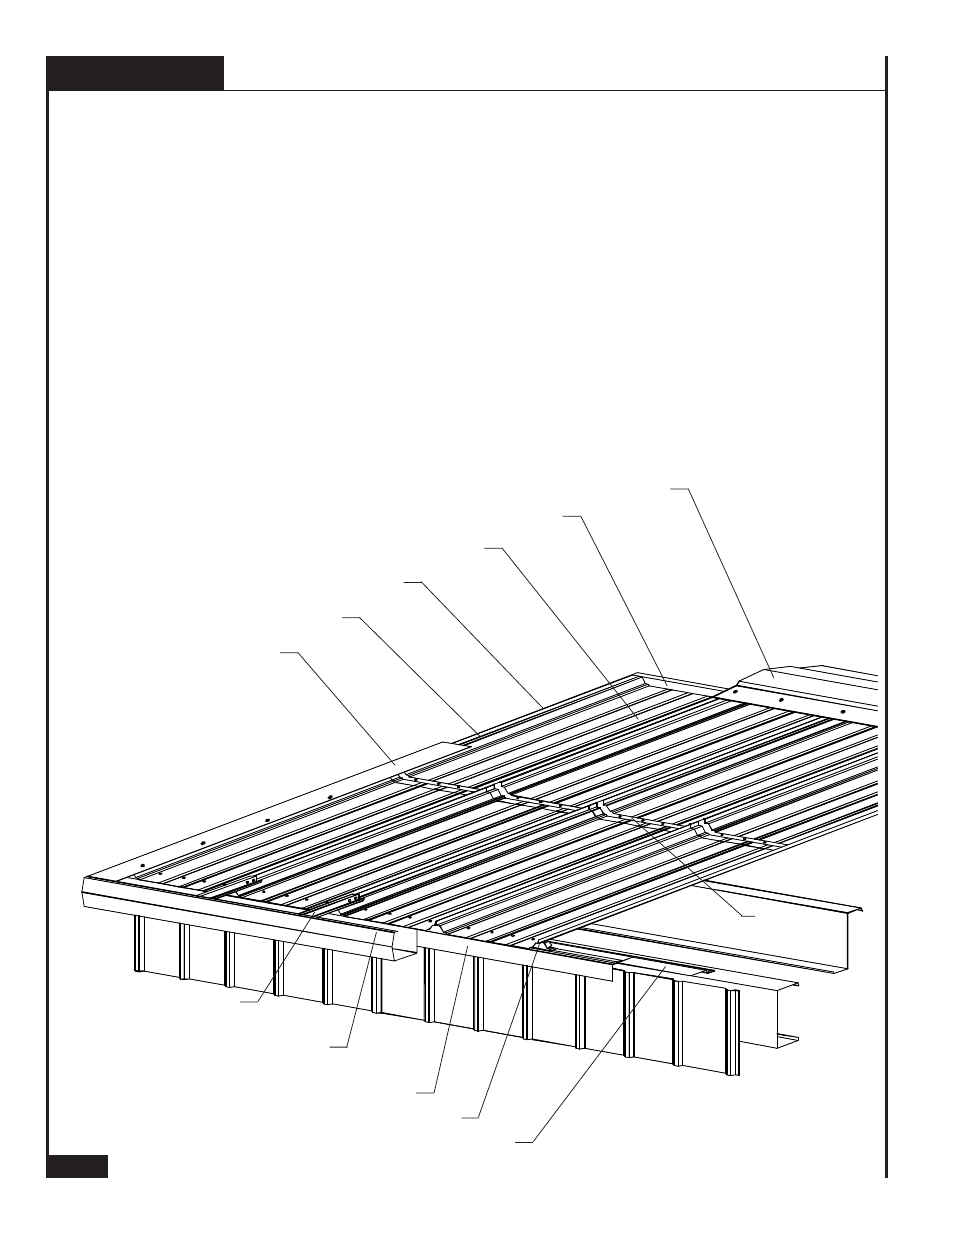
EAVE PLATE (SEE PAGE 29)
GUTTER DRIP (SEE PAGE 30)
METAL INSIDE CLOSURE (SEE PAGE 31)
SNAP-LOC SCULPTURED
GUTTER (SEE PAGE 51)
SSR RIDGE (SEE PAGE 47)
METAL OUTSIDE CLOSURE (SEE PAGE 42)
SNAP-LOC 24 PANEL (SEE PAGE 32)
FLOATING RAKE ANGLE (SEE PAGE 27)
SSR SCULPTURED RAKE
(OFF MODULE) (SEE PAGE 43)
SSR RAKE CLEAT (SEE PAGE 43)
SSR GUTTER SUPPORT
(SEE PAGE 50)
The following procedures (pages 27-53) are presented as a general guide for installing
Snap-Loc 24 panels, flashings, and accessories on a typical metal building.
The installation procedures will involve:
1. Panel installation from left to right (looking from eave to peak).
2. Installation over steel purlins, rake angles, and eave struts.
3. Panel installation over faced blanket insulation (insulation not shown).
4. Clip system without Thermal Blocks.
5. Eave Plate attached to eave framing member.
6. Wall panel installation prior to roof panel.
7. Gutter Drip and Snap-Loc Sculptured Gutter flashing used at the eave.
8. Starting panels on module and ending panels off module.
9. Panel runs with endlaps.
10. SSR Sculptured Rake (off module) flashing used at the rake.
11. SSR Ridge flashing used to close off peak end.
ENDLAP
(SEE PAGE 35)