Snap-loc 24, Design / installation considerations – Metal Sales Snap-Loc 24 Installation User Manual
Page 20
SNAP-LOC 24
© Metal Sales Manufacturing Corporation / Subject to change without notice. 10/99
19
DESIGN / INSTALLATION CONSIDERATIONS
(CONT.)
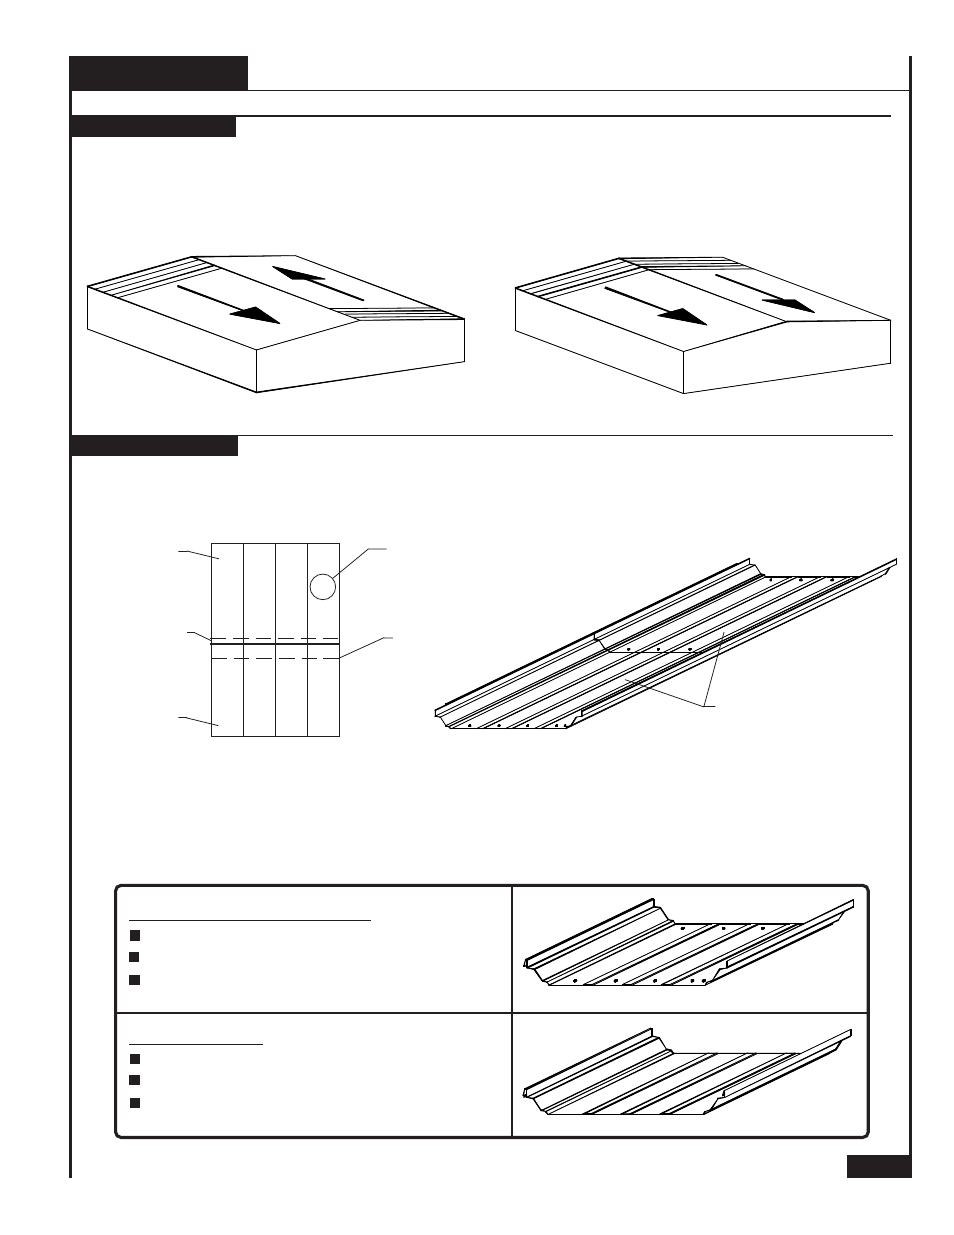
If panel endlapping is required, endlaps are to be applied in one continuous line. This allows the cinch
straps to complete full coverage of the Snap-Loc 24 panel. See page 35-37
ENDLAP
PURLIN
2
4
6
1
3
5
8
PANEL INSTALLATION
SEQUENCE
EAVE PANEL
PEAK PANEL
7
PEAK
STANDARD PANELS
NOTCHED/PUNCHED
EAVE
PANEL ENDLAP
FACTORY NOTCHED/PUNCHED PANELS - Unless otherwise specified, Metal Sales provides all Snap-
Loc 24 panels with factory rib notching and fastener hole punching on both panel ends. This elimi-
nates reliance on field notching for weathertight seams at panel endlaps and ease of fastener hole
alignment. Panels that are not to be factory notched/punched must be specified at time of order.
OPTIONAL PANEL
Optional if endlapping of panels is not required
No Notching
No Punching
STANDARD PANEL-See page #7
Required when endlapping panels
Used as both the eave and peak panel
Both ends factory notched and punched
PANEL ENDLAPPING
INSTALLATION OPTION #1
INSTALLATION OPTION #2
INSTALLATION DIRECTION
Snap-Loc 24 can be installed on each roof plane from left to right as shown in option #1. Snap-Loc 24
accessories are fabricated to allow the installer to begin work on the left side of the building, continue
across the ridge, and work to the right side of the building, option #2. However, if endlapping of panels
is required, panels must be laid from left to right.