Snap-loc 24 installation of eave plate, Steps – Metal Sales Snap-Loc 24 Installation User Manual
Page 30
© Metal Sales Manufacturing Corporation / Subject to change without notice. 10/99
29
SNAP-LOC 24
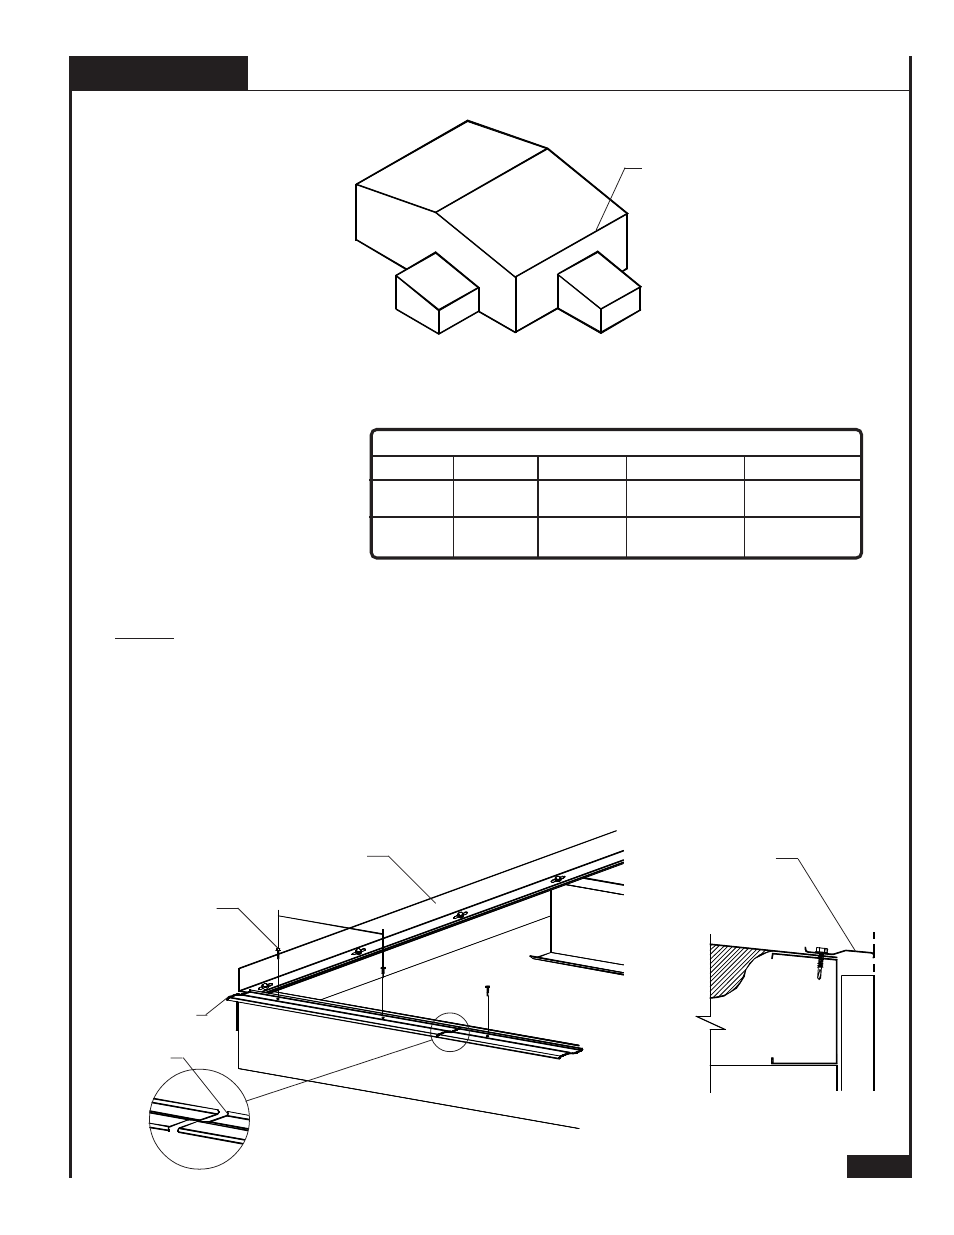
INSTALLATION OF EAVE PLATE
EAVE PLATE
The Eave Plate serves as an extension of the structure to support and fasten the panel at the
eave on applications utilizing the Low or High clip systems.
STEPS
1. If using blanket insulation the Eave Plate may be used to secure the insulation at the eave. Be sure
to remove the fiberglass and fasten only the vapor barrier to avoid wicking.
2. Place pre-punched leg of Eave Plate on top of Floating Rake Angle lower leg. Align the top leg of
the Eave Plate flush with the finished wall surface at the eave of the building.
3. Fasten Eave Plate to eave framing member with #
1
/
4
-14 x 1
1
/
2
" Self Driller No Washer screws
12" O.C. Do not fasten through Eave Plate into Floating Rake Angle. Movement of the Floating
Rake Angle is imperative for proper installation of system.
4. If two or more Eave Plates are required, butt ends of the Eave Plates (do not overlap) and continue
fastening.
FLOATING RAKE ANGLE
12"
SELF DRILLER
NO WASHER
ALIGN EAVE PLATE
WITH FINISHED
WALL SURFACE
EAVE PLATE
BUTT ENDS
Refer to the chart for
determination of the
proper Eave Plate. The
correct Eave Plate must be
used for the panel system
to function properly.
4" TO 6" BLANKET
1"
LOW
HIGH
SYSTEM COMPONENTS
4" BLANKET
NONE REQUIRED
3
1
/
4
" LOW
4
1
/
4
" HIGH
3
1
/
8
" LOW
4
1
/
8
" MID
SYSTEM
CLIP
EAVE PLATE THERMAL BLOCK
INSULATION