Snap-loc 24 installation of metal inside closure, Steps – Metal Sales Snap-Loc 24 Installation User Manual
Page 32
© Metal Sales Manufacturing Corporation / Subject to change without notice. 10/99
31
SNAP-LOC 24
INSTALLATION OF METAL INSIDE CLOSURE
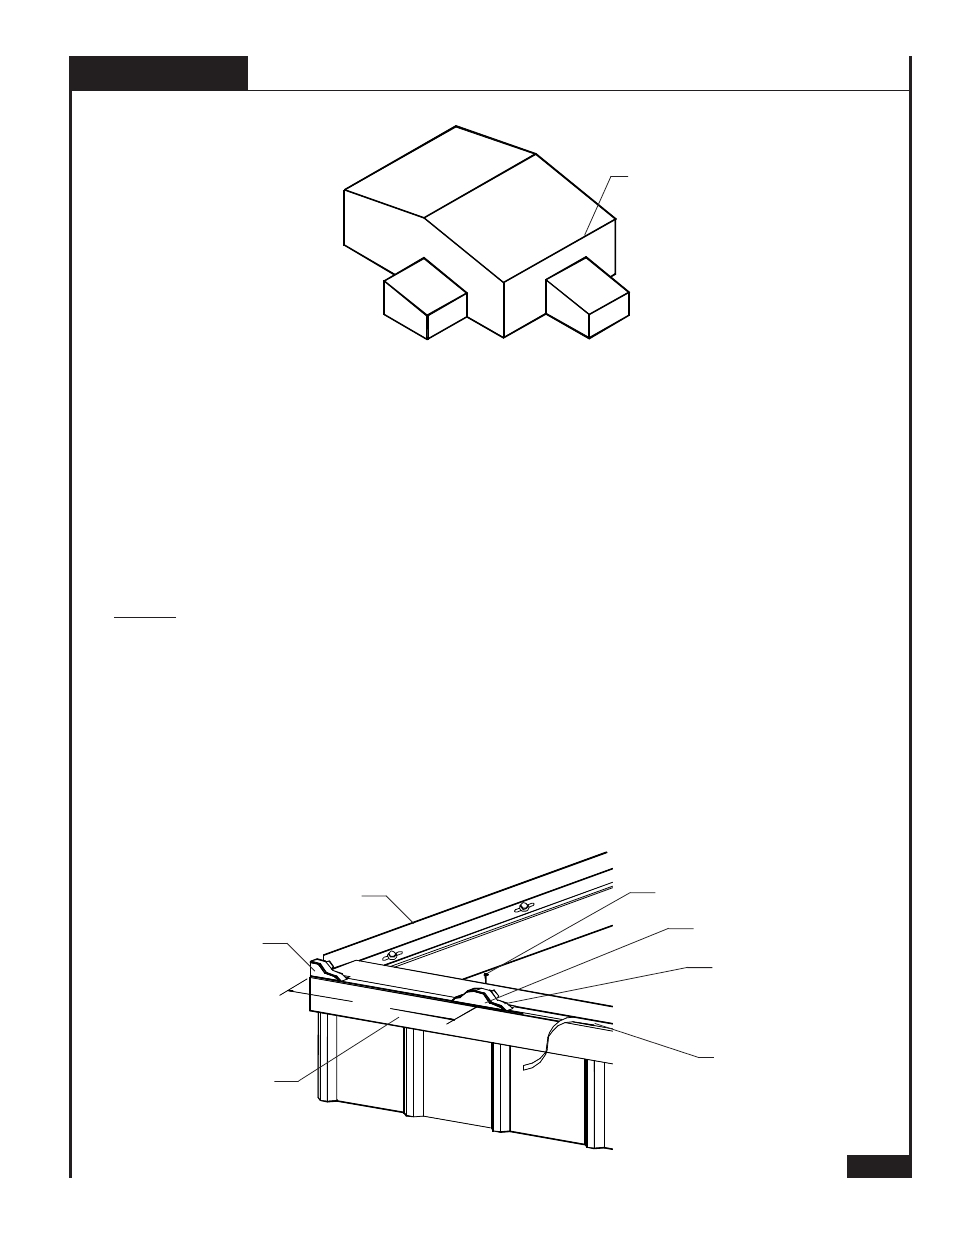
METAL INSIDE CLOSURE
DOUBLE BEAD TAPE
SEALANT (Across Top of
I/S Closure)
FLOATING RAKE ANGLE
METAL INSIDE CLOSURE
SELF DRILLER NO WASHER
METAL I/S CLOSURE
(FIELD CUT)
GUTTER DRIP
Snap-Loc 24 panels can be installed going from either left to right or right to left, looking from
eave to peak. If the roof is symmetrical about the ridge and without any endlaps, the panel can
be installed on both sides simultaneously. However, if endlapping of panels is required, panels
must be installed from left to right.
The following procedures are based on installing Snap-Loc 24 panel from left to right starting
on module (full panel width). For starting panel off module see page 41.
The following procedures are for installing the Snap-Loc 24 panel to accomodate for Snap-Loc
Sculptured Gutter and Gutter Drip flashing.
Metal Inside Closures can be installed prior to panel installation or as the panel installation
occurs. The following procedures are based on installing Metal Inside Closures as installation
of each panel occurs.
STEPS
1. Starting at the left hand side of the building (looking eave to peak) measure from the vertical leg of
the Floating Rake Angle along Gutter Drip flashing and mark every 24". Care should be taken in
measuring as this helps determine panel modularity.
2. Strip off the paper backing on the Double Bead Tape Sealant a few inches past the first mark.
3. Field cut a Metal Inside Closure in half and place on top of the Double Bead Tape Sealant flush
with the end of the Gutter Drip flashing. Place next Metal Inside Closure so that the hole at the
base of the closure lines up with the first mark.
4. Fasten both Metal Inside Closures through Gutter Drip flashing and into Eave Plate with #
1
/
4
-14 x
1
1
/
2
" Self Driller No Washer screws.
5. Apply Double Bead Tape Sealant to the top of the Metal Inside Closures. Cut Double Bead Tape
Sealant, do not tear.
24"
DOUBLE BEAD
TAPE SEALANT