Snap-loc 24, Installation of panel – Metal Sales Snap-Loc 24 Installation User Manual
Page 39
© Metal Sales Manufacturing Corporation / Subject to change without notice. 10/99
SNAP-LOC 24
38
INSTALLATION OF PANEL
(CONT.)
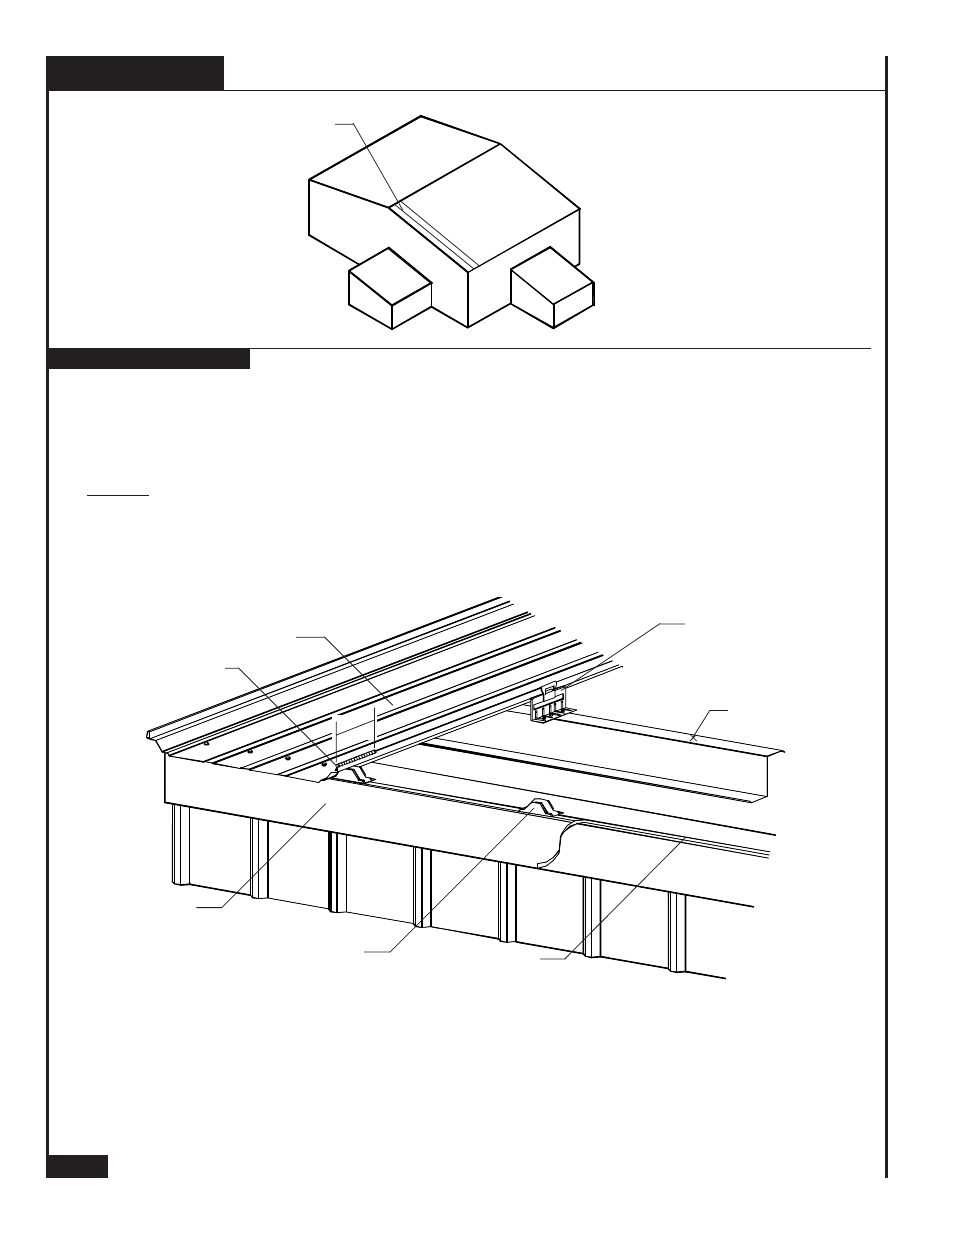
SIDELAPPING OF PANEL
SIDELAPPING OF
SNAP-LOC 24 PANEL
DOUBLE BEAD
TAPE SEALANT
SNAP-LOC 24 PANEL
METAL INSIDE CLOSURE
GUTTER DRIP
PANEL CLIP
Before sidelapping of panel can occur, panel clips must be installed properly on the previous
panel run. Verify that all clip tabs have been properly centered on the clip base.
It is important to maintain 24" increments between panel clips along the same framing member
as the panel clips control even panel modularity.
STEPS
1. Strip off the paper backing on the Double Bead Tape Sealant a few inches past the next mark. Place
Tube Sealant on top of the male leg of the previously installed panel 6" from the eave of the panel.
2. Install the Metal Inside Closure at the eave following the same procedures as previously shown
(see page 31).
3. Place the female leg of the second panel on top of the male leg of the previously installed panel.
Align the panel ends so that they are flush at the eave 3" past the finished wall surface. Do not let
the flat of the second panel touch the Double Bead Tape Sealant at the eave until the ends are
flush.
4. Beginning at the eave end of the panel, use hand force to push the female leg of the panel down
over the male leg. If required, a rubber mallet may be used to start the snapping at the eave.
CLIP MARK
6 "
TUBE SEALANT