Warning – Eppendorf R Series 48R CO2 Incubator User Manual
Page 17
17
New Brunswick Scientific
User’s Guide
5. Level the incubator by adjusting the feet. Place a small level on the second shelf of
the incubator. Adjust the leveling feet until the incubator is level and stable. Lock
the leveling legs in place by tightening the locking nuts on each leg.
Install the humidity tray:
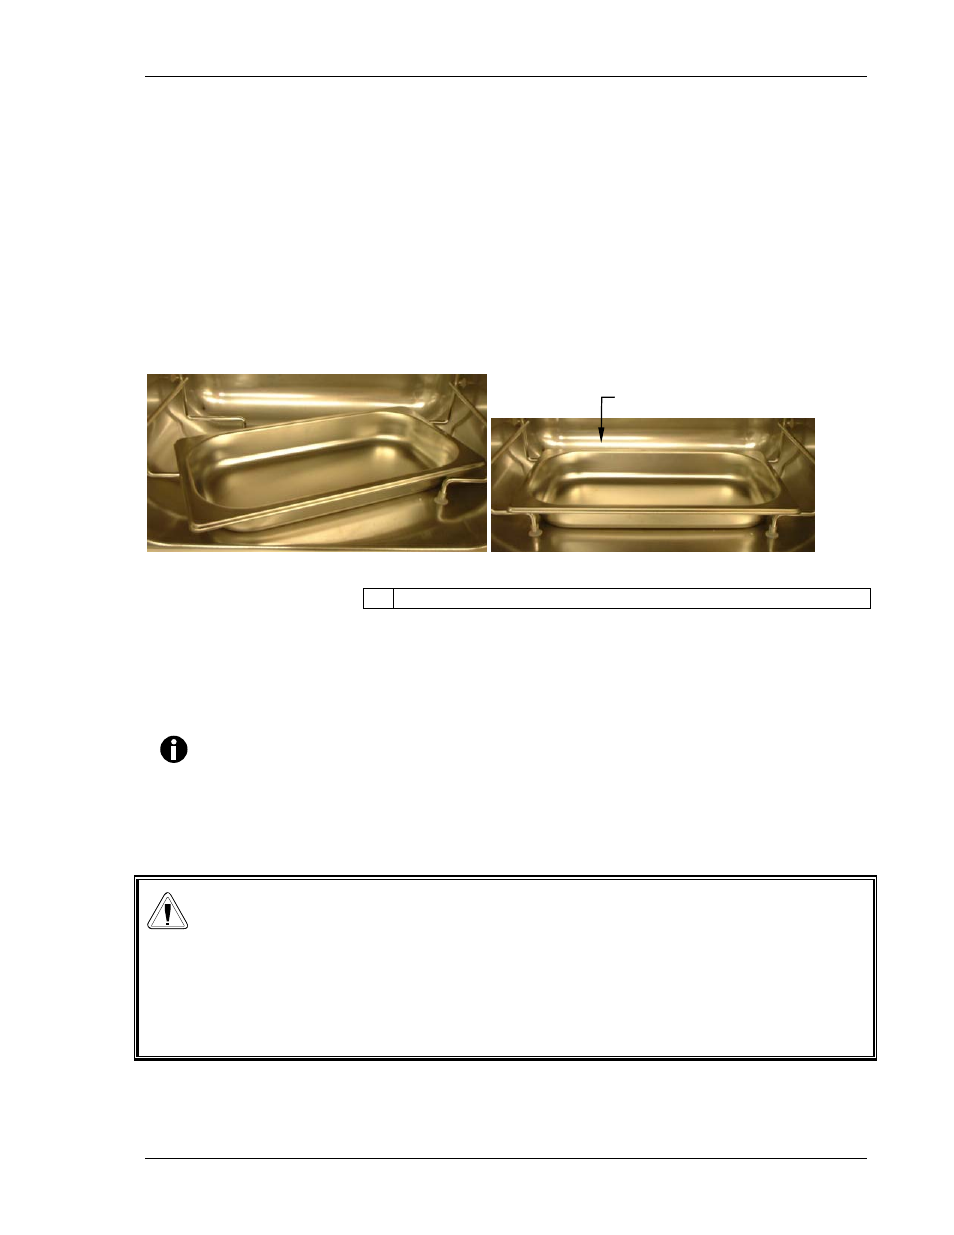
1. Install the humidity tray in its location beneath the lowest shelf rack position: insert
the tray diagonally (see Figure 3a), then turn the tray 45
° as shown, until you can
set it in position, resting on the chamber floor, with its front and rear edges resting
just above the shelf rack supports (see Figure 3b).
Figure 3: Installing/Removing the Humidity Tray
a
b
1 Center the tray, making sure it sits within the rack supports.
Connect the CO
2
gas supply:
1. Connect the incubator to the CO
2
supply using the ~1/4-inch or 6mm plastic tubing
(with installed HEPA filter) by attaching the tubing from the two-stage regulator (or
in-line regulator) to the matching CO
2
inlet on the rear of the incubator.
NOTE:
It is highly recommended that an in-line regulator be used at the
incubator’s gas inlet(s).
2. Use the tubing clips provided to eliminate CO
2
leaks.
WARNING!
Slightly increased levels of CO
2
may be found in and around the operating
area of the CO
2
incubator. Over time, this can have adverse effects on
those exposed to such an environment. Users working in environments
with elevated levels of CO
2
should take all appropriate precautions to
protect their breathing.
1