Using the i.link interface, Other connections 07, Watching photos and video content – Pioneer SC-LX90 User Manual
Page 58: Switching the ipod operation mode
Other connections
07
58
En
Watching photos and video content
To view photos or video on your iPod, since video control
is not possible using this amplifier, you must use the
main controls of your iPod instead.
1
1
Set the operation selector switch to SOURCE, then
press iPod CTRL to switch to the iPod controls for photo
and video playback.
The amplifier controls will be unavailable while you are
watching iPod videos or browsing photos.
2
Press iPod CTRL again to switch back to the
amplifier controls when you’re done.
Switching the iPod operation mode
On this amplifier, there are two iPod operation modes.
Normally
Type 1, the factory default, can be used, but
with some models of iPods the iPod cannot be controlled
from this amplifier unless you switch to
Type 2. If Error
I3 is displayed when you connect the iPod, use the
procedure described below to switch to
Type 2.
2
1
When this amplifier is in the standby mode, press
the
STANDBY/ON button while pressing the SETUP
button.
2
Select ‘iPod mode
Type 1 ’ on the LCD.
3
Select ‘Type 1’ or ‘Type 2’ (
/ then ENTER).
iPod is a trademark of Apple Inc., registered in the U.S. and
other countries.
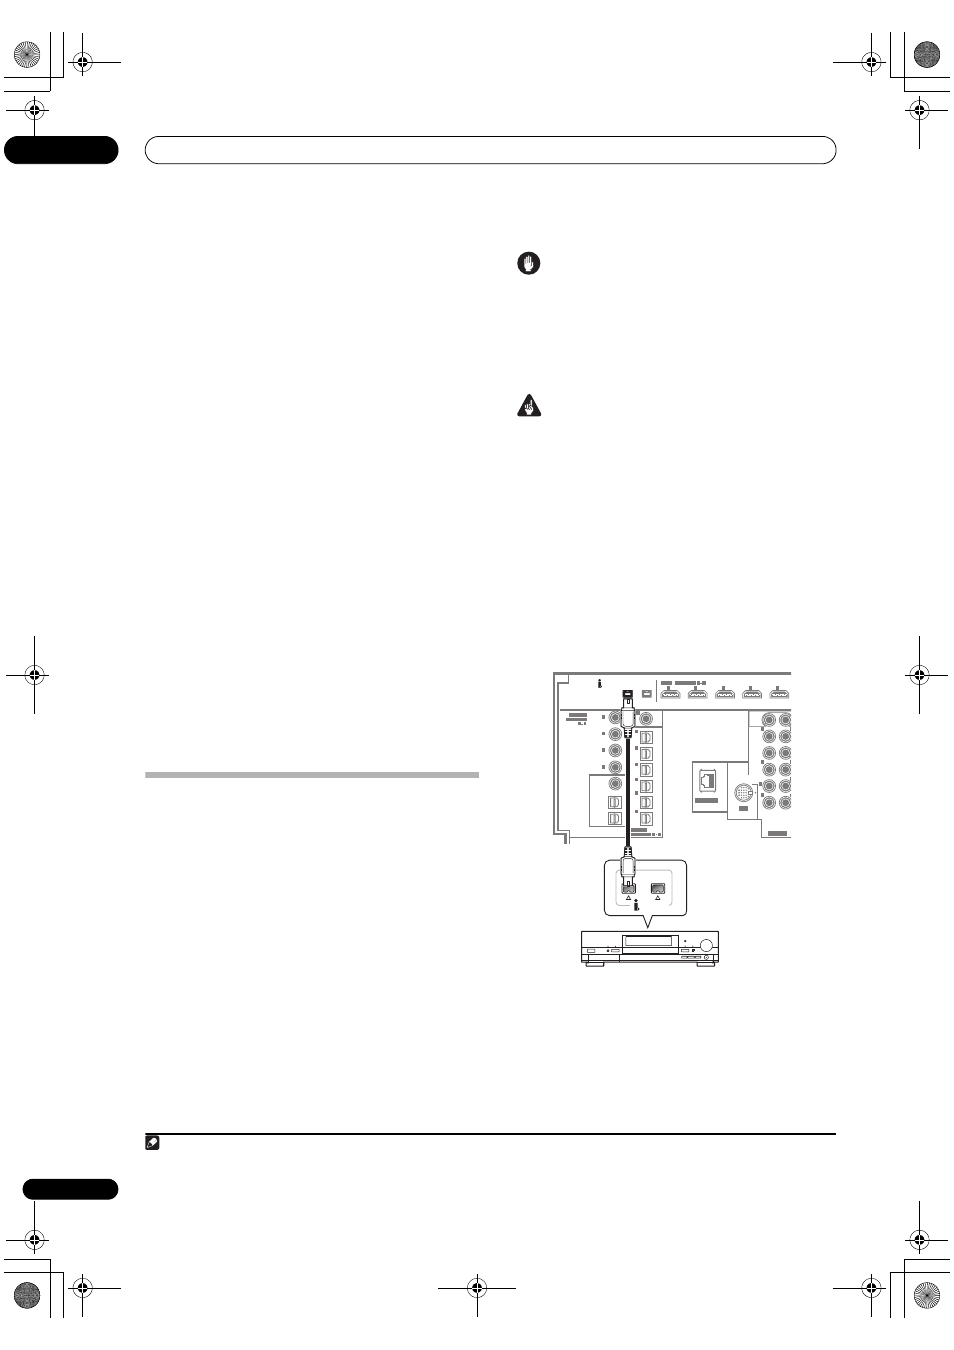
Using the i.LINK interface
If you have a component with an i.LINK connector, you
can connect it to this amplifier using an i.LINK cable.
Since the i.LINK interface does not transmit video
signals, the video signal of i.LINK-connected
components must be connected with other cables (see
Connecting your equipment on page 16 for more on
making video connections). If you’ve already hooked up
the video signal from the component, assign the i.LINK
input to the input function to which you’ve connected the
video signals (see
The Input Setup menu on page 94). See
Checking the i.LINK inputs on page 59 to confirm your
i.LINK settings.
The two i.LINK connectors on the rear of your amplifier
are 4-pin connectors. Use a 4-pin, S400 i.LINK cable to
connect i.LINK-equipped components.
Caution
• If your i.LINK connector comes into contact with
metallic parts of the amplifier other than the i.LINK
terminal, an electrical short may occur. Some cables
have metal parts that may touch the unit when
connected. Please take care to use a suitable i.LINK
cable only.
Important
• Please use 4-pin, S400 cables less than 3.5 meters
long. Although longer ones are available, they may
not work reliably.
• There may be cases where the PQLS/rate control
function and/or the i.LINK audio does not work
properly even when connected to i.LINK Audio-
compatible equipment.
• Do not connect/disconnect i.LINK cables or switch
on/off any components connected using i.LINK when
the amplifier is on.
1
Use an i.LINK cable to connect one of the i.LINK
connectors on this amplifier to an i.LINK connector on
your i.LINK component.
Note
1 Your iPod nano currently restricts viewing of photo images stored.
2 The Video Browse function cannot be used when
Type 2 is set.
S400
S400
(AUDIO)
(For LD)
ASSIGNABLE
6
1
ASSIGNABLE
L
R
L
R
R
L
L
R
SUB
WOOFER
FRONT
CENTER
1
2
1
2
EXTRA
SUR-
ROUND
(Single)
SURROUND
BACK
PRE OUT
IN
1
IN
2
IN
3
IN
4
IN
5
HDMI
RF IN
IN
(TV)
1
IN
(SAT)
2
IN
(DVR/
VCR 1)
3
IN
(DVR/
VCR 2)
4
IN
(VIDEO/
GAME
1)
5
IN
(CD-R/
TAPE/
MD)
6
(DVD/LD)
2
IN
1
(BD)
IN
2
(CD)
IN
3
(SACD)
IN
4
COAXIAL
1
4
ASSIGNABLE
OPTICAL
1
6
ZONE2
OUT
SOURCE
OUT
ZONE3
/SOURCE
OUT
LAN (10/100)
IN
iPod
S400
(AUDIO)
S400
SC-LX90
i.LINK-equipped component
SC_LX90_WY.book Page 58 Wednesday, February 6, 2008 11:49 AM