Controlling the rest of your system 12, Erasing one of the remote control button settings, Resetting the remote control presets – Pioneer SC-LX90 User Manual
Page 107
Controlling the rest of your system
12
107
En
3
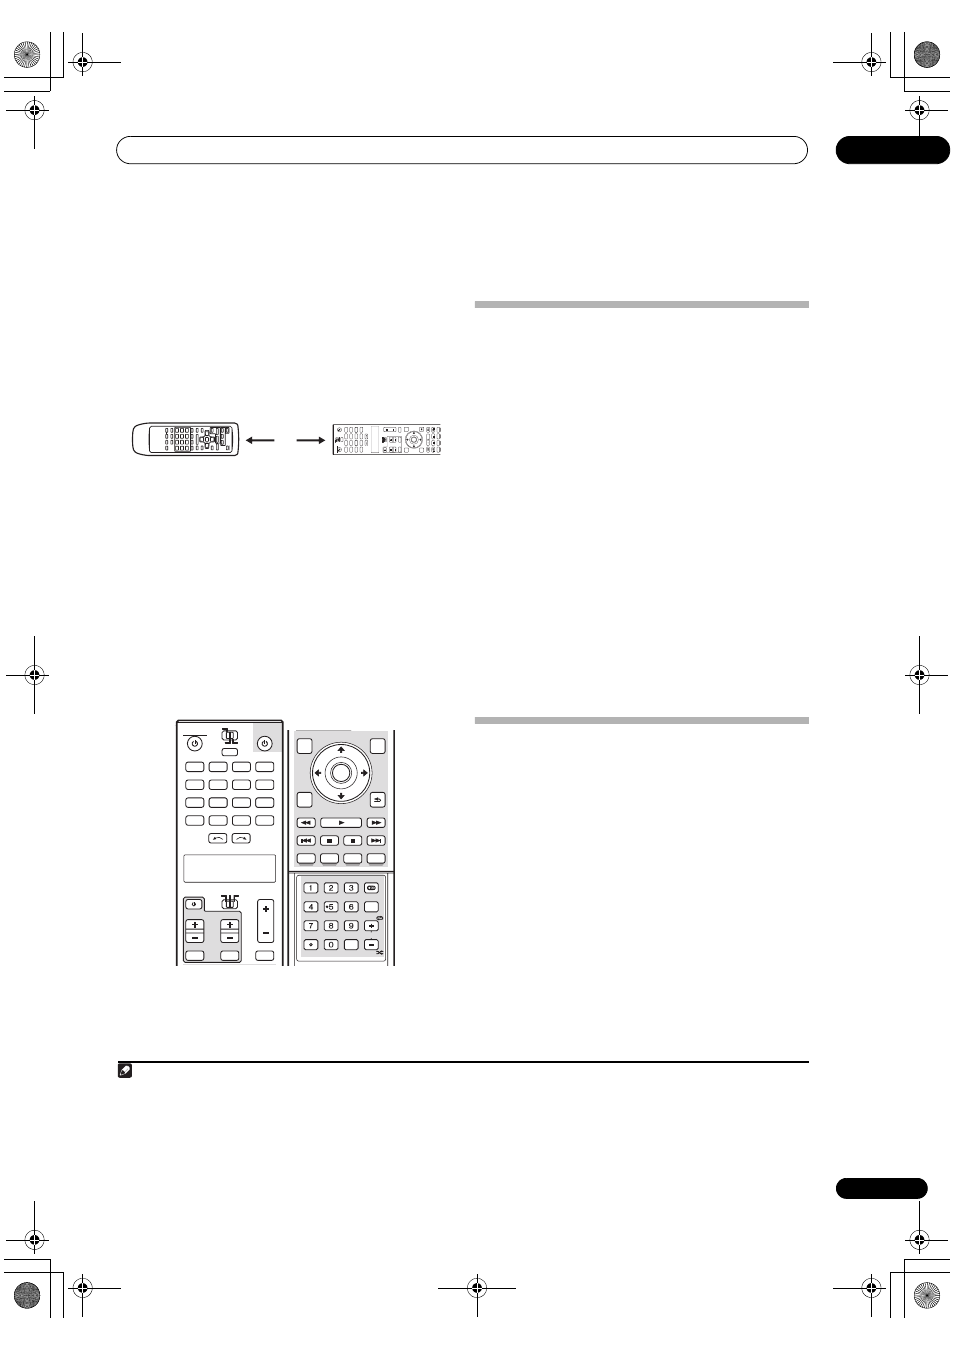
Press the input source button for the component
you want to control, then press ENTER.
PRES KEY shows in the LCD display.
1
4
Point the two remote controls towards each other,
then press the button that will be doing the learning on
this amplifier’s remote control.
PRES KEY starts flashing to indicate the remote is ready
to accept a signal.
• The remote controls should be 3 cm to 5 cm apart.
5
Press the corresponding button on the other
remote control that is sending (teaching) the signal to
this amplifier’s remote control.
For example, if you want to learn the playback control
signal, press and hold
briefly. The LCD display will
show
OK if the operation has been learned.
2
If for some reasons the operation hasn’t been learned the
LCD will display
ERROR briefly, and then display PRES
KEY again. If this happens, keep pressing the (teaching)
button as you vary the distance between the two remotes,
until the LCD display shows
OK.
3
Certain buttons represent operations that cannot be
learned from other remote controls. The buttons
available are shown below:
6
To program additional signals for the current
component repeat steps 4 and 5.
To program signals for another component, exit and
repeat steps 1 through 5.
7
Press and hold the MULTI OPERATION button for a
couple of seconds to exit and store the operation(s).
Erasing one of the remote control
button settings
This erases one of the buttons you have programmed and
restores the button to the factory default.
1
While pressing the MULTI OPERATION button,
press SETUP.
The remote LCD display shows
SETUP.
2
Use
/ to select ERASE, then press ENTER.
The LCD on the remote prompts you for the component
corresponding to the button setting to be erased.
3
Press the input source button corresponding to the
command to be erased, then press ENTER.
The LCD display flashes
PRES KEY.
4
Press and hold the button to be erased for two
seconds.
The LCD display shows
OK or NO CODE to confirm the
button has been erased.
5
Repeat step 4 to erase other buttons.
6
Press and hold the MULTI OPERATION button for a
couple of seconds when you’re done.
Resetting the remote control presets
This will erase all preset remote control preset codes and
programmed buttons.
4
1
While pressing the MULTI OPERATION button,
press SETUP.
The remote LCD display shows
SETUP.
2
Use
/ to select RESET, then press ENTER.
RESET flashes in the LCD display.
3
Press and hold ENTER for about two seconds.
The LCD shows
OK to confirm the remote presets have
been erased.
Note
1 • You can’t assign the
TUNER, iPod or HOME MEDIA GALLERY buttons.
• The
TV CONTROL buttons (TV
, TV VOL +/–, TV CH +/–, MUTE and INPUT) can only be learned after the operation selection switch is set to TV.
2 Note that interference from TVs or other devices will sometimes result in the remote control learning the wrong signal.
3 • Some commands from other remote controls cannot be learned, but in most cases the remotes just need to be moved closer together or farther apart.
• If the remote LCD shows
FULL, it means the memory is full. See Erasing one of the remote control button settings above to erase a programmed button
you’re not using to free up more memory (note that some signals may take more memory than others).
DV
D
AV AMPLIFIER
SOURCE
MAIN
MUL
TI
OPER
ATION
A
UDIO
PAR
AMETER
TOP MENU
ST
A
TUS
THX
CH LEVEL
MENU
VIDEO
PAR
AMETER
RETURN
SETUP
ZO
N
E
2
SOURCE
T
V
AMP
3
DV
R
1
GALLER
Y
HOME MEDIA
INPUT SELECT
CD
TUNER
INPUT
MUTE
MUTE
VO
L
VO
L
TV
C
ONTROL
CH
iP
o
d
HDMI
STEREO/ F.S.SURR
AU
TO
/
DIRECT
ST
ANDARD
A
D
V
S
U
R
R
PHONO
CD-R
DV
R
2
VIDEO1
VIDEO2
BD
T
V
SA
T
SA
CD
ENTER
3 cm to 5 cm
DVD
AV AMPLIFIER
SOURCE
MAIN
MULTI
OPERATION
AUDIO
VIDEO
ZONE2
SOURCE
TV
AMP
3
DVR1
GALLERY
HOME MEDIA
INPUT SELECT
CD
TUNER
INPUT
MUTE
MUTE
VOL
VOL
TV CONTROL
CH
iPod
HDMI
PHONO
CD-R
DVR2
VIDEO1
VIDEO2
BD
TV
SAT
SACD
ENTER
AUDIO
PARAMETER
TOP MENU
STATUS
THX
CH LEVEL
MENU
VIDEO
PARAMETER
RETURN
SETUP
STEREO/
F.S.SURR
SIGNAL SEL SLEEP
AUDIO
DIMMER
SR+
CLR
SBch
PHASE
iPod CTRL
A.ATT
GENRE HDMI OUT
ENTER
MCACC
DISP
CH
AUTO/
DIRECT
STANDARD ADV SURR
4 When
Selecting preset codes directly on page 106 are set, all the signals learned in the input source buttons are cleared. This function is convenient when
you want to reset some but not all of input source buttons.
SC_LX90_WY.book Page 107 Wednesday, February 6, 2008 11:49 AM