Printing – Allied Telesis FastPrint Server User Manual
Page 64
Chapter 7. Windows Peer-to-Peer
Printing
FastPrint Server User’s Guide
54
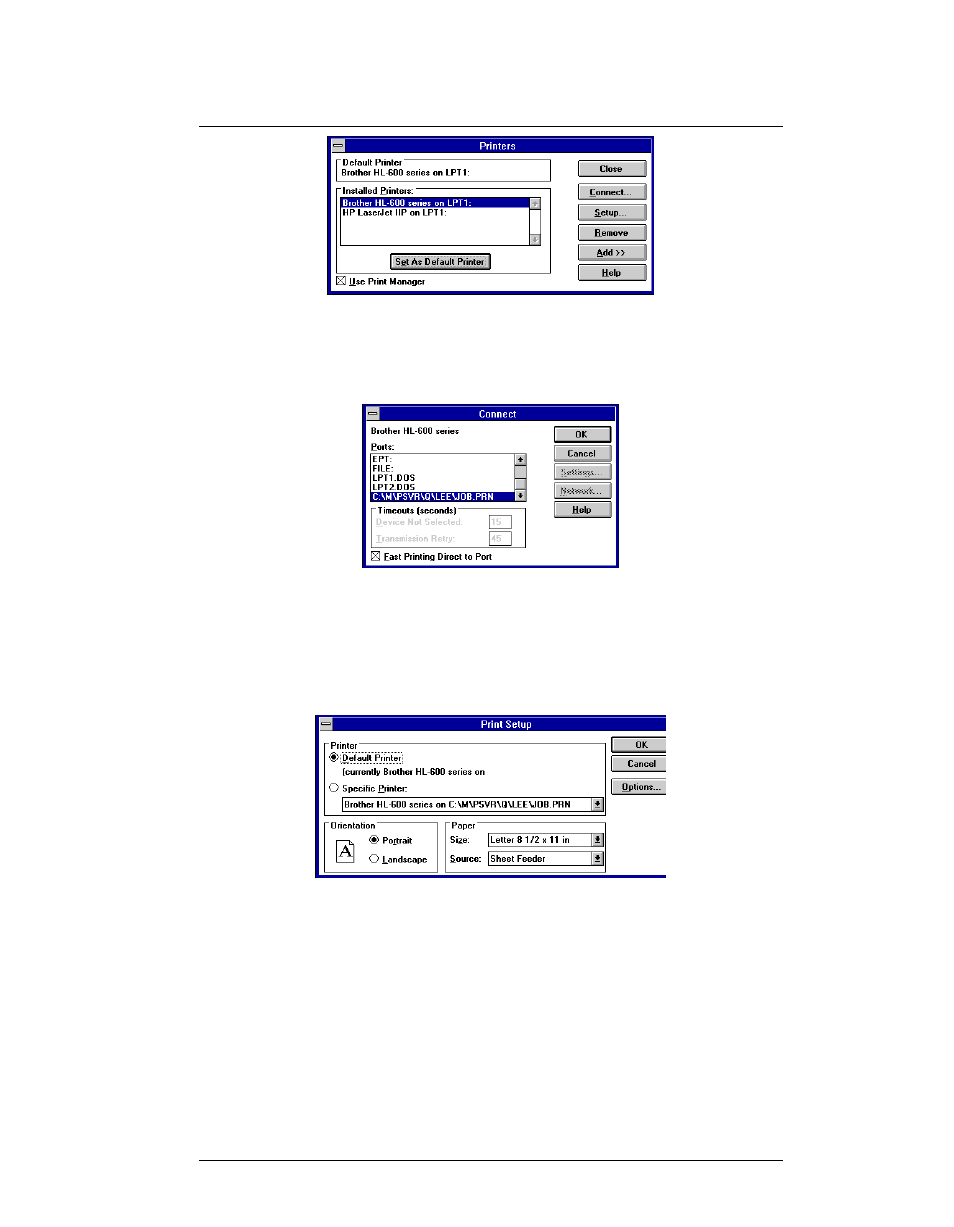
Figure 17 Control Panel - Printers (WfW)
2. Follow the normal process to add each printer that is attached to the FastPrint.
3. Each printer must be associated with the print queue it will service. Click the
Connect button and the following Connect dialogue box will appear:
Figure 18 Printer Connect (WfW)
4. From the Ports list, select the queue that services the FastPrint Server port to which
the printer is connected.
5. Repeat steps 3 and 4 to associate each printer with a queue.
6. Setup is complete. Now whenever you select Windows Print Setup, the printer and
its associated queue will appear in the printer list as shown in the example below.
Figure 19 Print Setup (WfW)
7.6. Printing
Printing with the FastPrint Server in the Windows Peer-to-Peer environment is the same
as printing with the printer attached directly to your local LPT port. Simply select
FileèPrint. When the Print screen appears, select the appropriate printer and options
and click OK.
Note: In Windows for Workgroups, use Pserver to manage your print jobs, rather
than Windows Print Manager.