Direct connection installation – DAVIS GroWeatherLink Software User Manual
Page 13
H
A R D W A R E
I
N S T A L L A T I O N
Direct Connection
6
Direct Connection Installation
1. If the station has been operating for some time and/or you have changed the default
settings, make a note of the barometric pressure, total rainfall, and (if applicable) cali-
bration numbers.
You must remove power from the station to install the WeatherLink, which
will cause these values to be erased.
Use the software to reenter these values
after restoring power to the station.
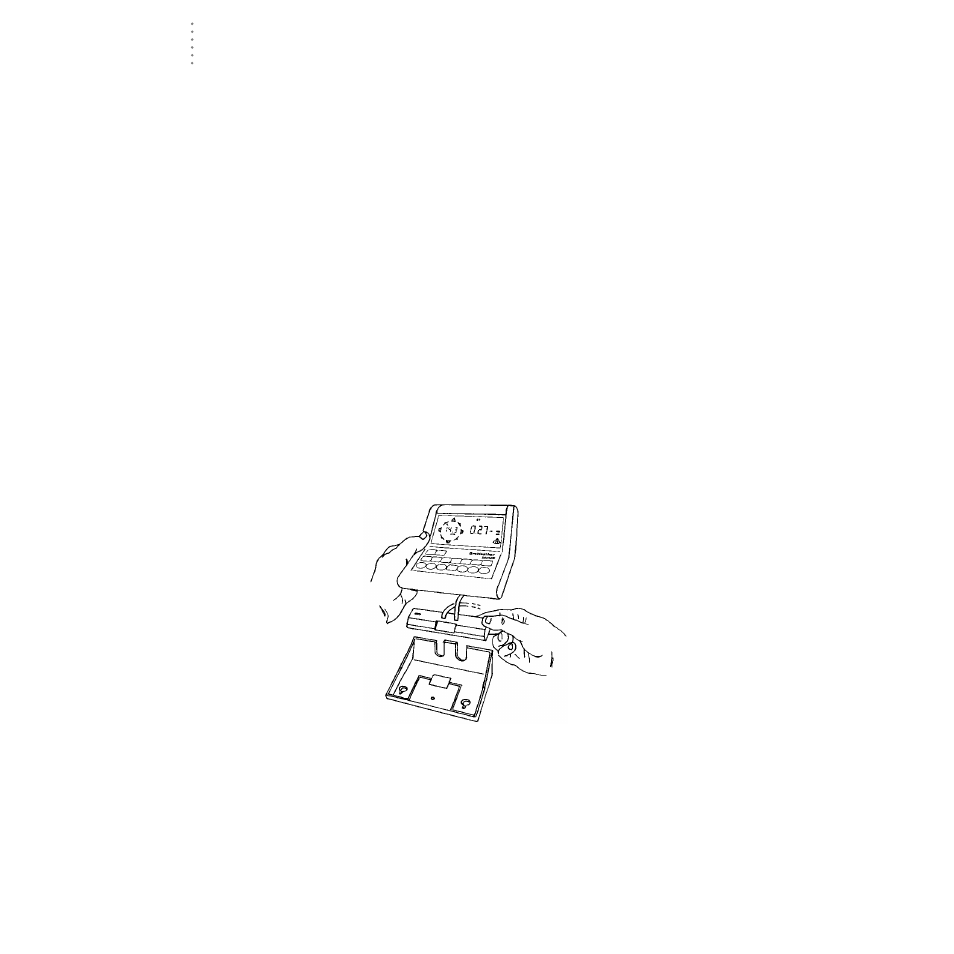
2. Remove the mounting base from the station and remove all power from the station by
removing the AC-power adapter and battery backup.
Failure to remove power to the weather station before installing the Weather-
Link may cause damage to the WeatherLink or station.
3. Insert the cable plug at the end of the short cable coming from the WeatherLink into
the jack marked C3 (To LINK) on the bottom of the console.
4. Restore power to the weather station by reattaching the power adapter and battery
backup.
The weather station should beep three times. The third beep, which should
occur within 30 seconds, indicates that the WeatherLink is operating correctly.
5. To identify which link revision you have, look at the label on the back of the Weather-
Link and write down the first two letters of the manufacturing code.
If the first two letters are “LD,” you have revision D. If the first two letters are
“LE,” you have revision E. The Rev. E WeatherLink has been enhanced for use
with radio connections.
6. Place the WeatherLink inside the mounting base and reattach the mounting base.
P
LACE
W
EATHER
L
INK
INSIDE
BASE
.
7. Insert the cable plug at the end of the long cable coming from the WeatherLink into the
jack marked L1 (To LINK) on the isolator unit.
8. Insert the cable plug at one end of the 40-foot WeatherLink cable into the jack
marked L2 (To PC) on the isolator unit. Use the cable plug on the end of the cable where
the L2 side of the cable label is closest to the cable’s end.