Add or manage servers, Enter server login information, Add or manage servers -4 – HP Storage Mirroring V4.5 Software User Manual
Page 74: Enter server login information -4
6 - 4
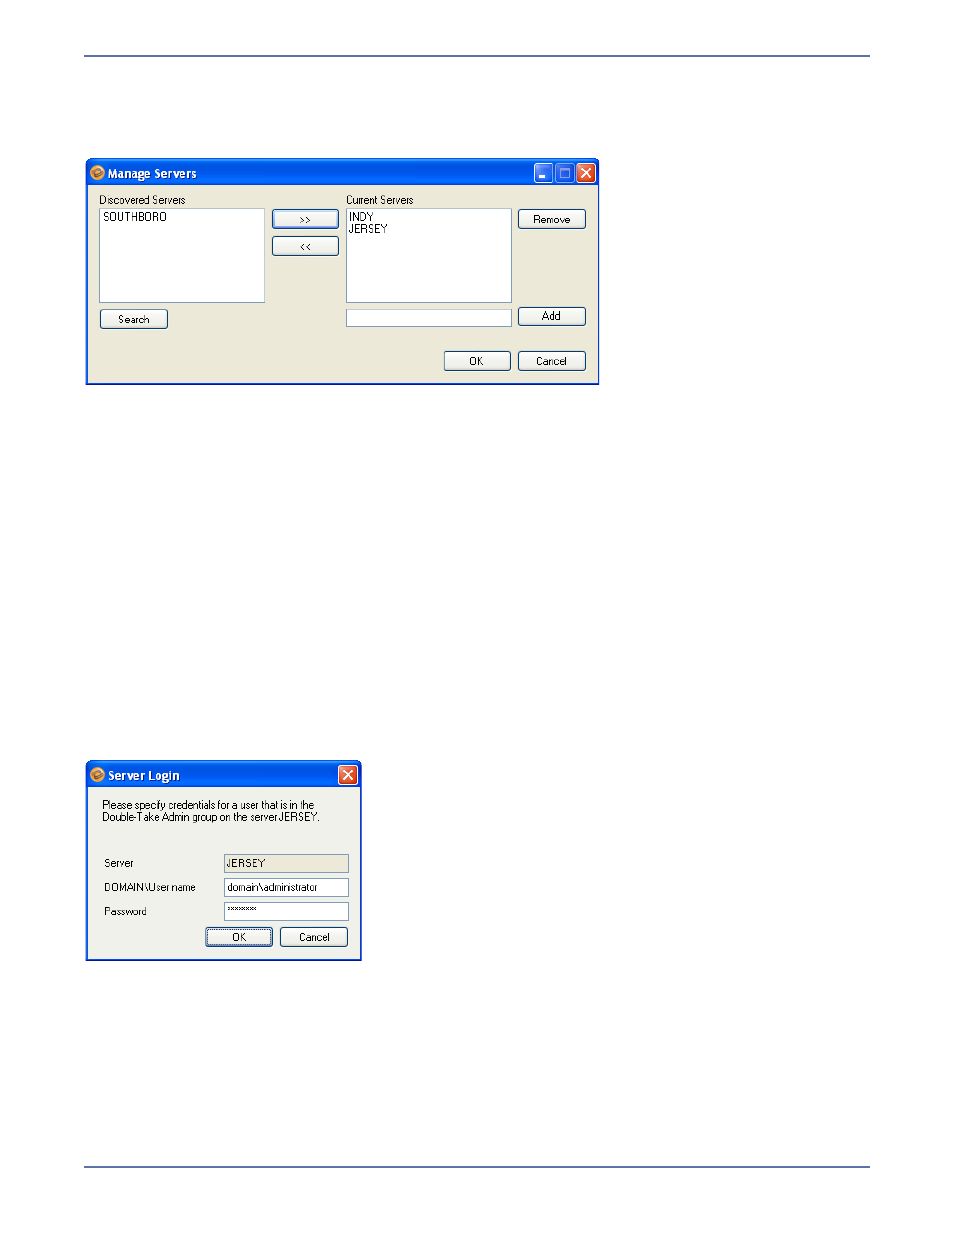
Add or manage servers
If the servers you need do not appear, click the Advanced Find button. The Manage Servers window
will appear.
To discover all servers in the domain:
1.
Click the Search button. The Discovered Servers list will be populated with all servers that the
Application Manager can discover that reside in the domain.
2.
To directly add a server to the drop-down list on the Manage File Server main page, select the
server in the Discovered Servers list, then use the >> button to move it into the Current
Servers list.
3.
To add a non-discovered server to the Current Servers list, enter the server name in the field
next to the Add button, then click Add.
4.
After a server has been added to the Current Servers list, you can click the Remove button to
remove the selected server from the drop-down list on the Manage File Server main page.
5.
When you have finished adding servers, click OK to save your changes, or Cancel to return to
the Manage File Server main page without saving.
Enter server login information
After you select a server for the first time, you will be prompted to enter a user name and password
to use for logging in to the selected server. The login account MUST be a member of the Storage
Mirroring Admin local security group for the selected server. For more information about required
account permissions, see
Recommended Credentials
on page A-1.
You may enter a user name for a different domain by entering a fully-qualified user name. The
fully-qualified user name must be in the format domain\username or username@domain. If you
enter a non-qualified name, the DNS domain will be used by default. Entering the credentials for the
logged-on user may be valid.
The Application Manager will attempt to use the same user name and password the next time you
select a server.