Services, Services -9 – HP Storage Mirroring V4.5 Software User Manual
Page 56
5 - 9
If you have client applications that are configured to connect to an IP address rather than a server
name.
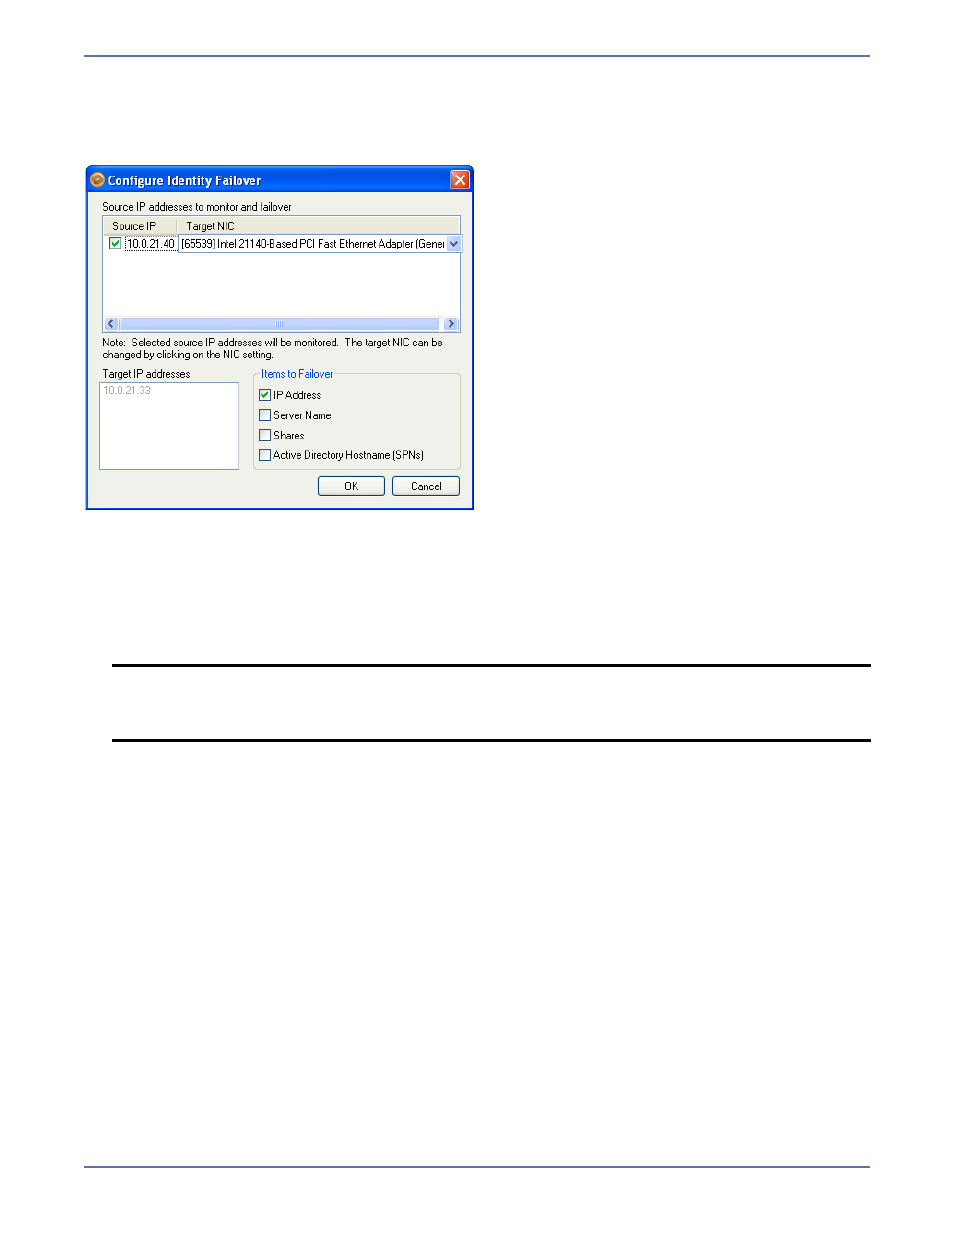
After you select the Identity Failover option, click Configure. The Configure Identity Failover window
will appear.
Enter the following information for Identity failover:
1.
In the Source IP column, select the source IP address(es) to be monitored for failover.
2.
In the Target NIC column, select the target NIC to be used when failover occurs.
3.
The Target IP Addresses area displays the IP address(es) of the selected target NIC.
4.
Select the IP Address checkbox if you want the specified source IP address to be monitored
(Default = selected).
5.
Select the Server Name checkbox if you want the source name to be added to the target when
failover occurs (Default = NOT selected).
6.
Select the Shares checkbox if you want the source file shares to be added to the target when
failover occurs (Default = NOT selected).
7.
Select the Active Directory Hostname (SPNs) checkbox to remove the host SPN (Service
Principle Name) from Active Directory for the source automatically and add it to Active Directory
for the target during failover (Default = NOT selected).
8.
Click OK to save your entries and return to the Configure Protection window.
Services
Application Manager will determine the appropriate SQL services to start/stop based on your
operating system/SQL configuration. You should only modify this selection if there are additional
services that need to be started along with SQL during the failover/failback process.
NOTE:
If your source and target servers are on different subnets, you should NOT failover
the IP address. Instead, if the server name is required you should choose DNS failover
with the Advanced switch and select the Server Name. For more information, see
Advanced settings
on page 5-22.