Ph calibration with atc – Thermo Fisher Scientific CyberScan pH 10/pH 100 User Manual
Page 16
12
4.2 pH
Calibration
with
ATC
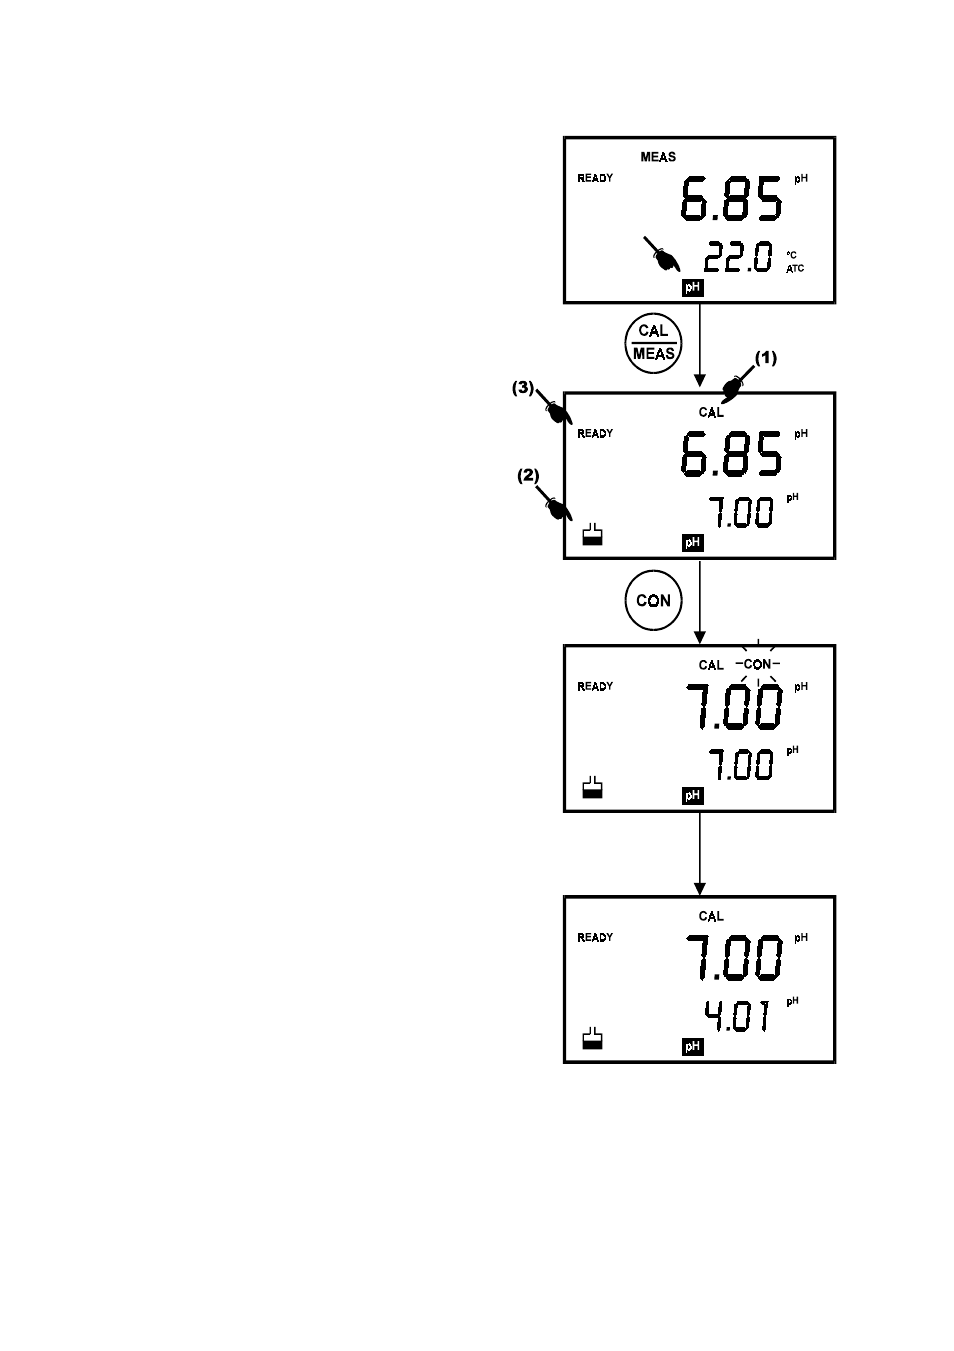
To activate the Automatic Temperature
Compensation (ATC), simply plug in the
temperature probe into the phono jack. The ATC
indicator will be displayed on the LCD (Figure
15). If the ATC indicator is not displayed, it
indicates that the temperature probe is either not
properly connected to the instrument or is faulty.
1.
Switching ‘ON’ the meter by pressing the
ON/OFF key.
2. All the LCD segments will be displayed
momentarily for a few seconds to check
that all segments are in working condition.
Then, the LCD will switch to the [pH]
measurement mode.
3.
Select the [pH] mode using the MODE key.
(See Figure 15 on right).
4. Rinse the electrode well with deionized
water or rinse solution. (Do not wipe the
electrode with tissue paper as this may
cause a build-up of electrostatic charge on
the glass surface!).
5. Dip the probe into the calibration buffer.
The end of the probe must be completely
immersed into the sample. Stir the probe
gently to create a homogeneous sample.
6.
Press the CAL key to calibrate the meter.
7.
The display will show the [CAL] mode and
the buffer icon as shown (see [1] & [2] in
Figure 15).
8. The primary display will show the
measured reading while the secondary
display will indicate that pH 7.00 is ready for
calibration.
9.
Wait for the measured pH value to stabilize.
The READY annunciator will light up. See [3]
in Figure 15.
Figure 15: pH Calibration at pH 7.00