8 making a pci express recording – Teledyne LeCroy PETracer ML Analyzer and Exerciser User Manual User Manual
Page 69
PETracer ML User Manual
Chapter 4: Software Overview
Teledyne LeCroy
61
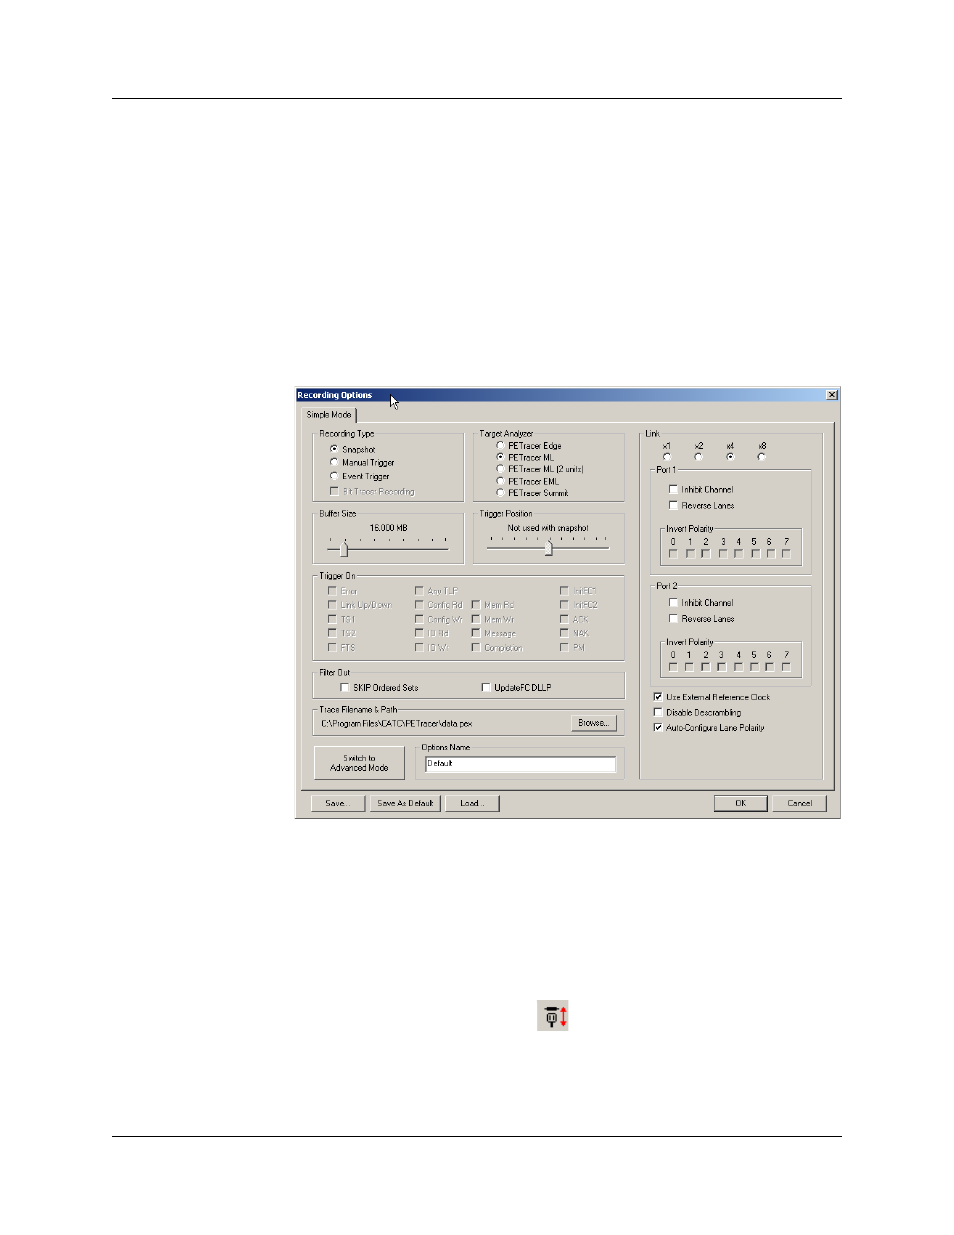
4.8 Making a PCI Express Recording
After connecting the Analyzer to the device(s), you must configure the
Recording Options. Then you can test the Analyzer by creating a 16-MB snapshot
recording.
To make this recording, follow these steps:
Step 1 From the Setup menu, select Recording Options.
Step 2 Select the General tab.
The following window displays the factory PETracer ML default settings in
Simple Mode, such as Snapshot and 16-MB buffer size. For your first recording,
you can leave these settings unchanged.
Step 3 In the Link section, specify the lane width of the PCI Express link to be
analyzed. The rest of the settings in this section can be left at the factory
defaults for most PCI Express systems.
Step 4 For multi-lane PCI Express links, the Analyzer needs to observe
link training in order to record link traffic correctly. If link training (or
re-training) is not easily controllable for the devices under test, the
Analyzer includes the capability to force link training by disconnecting
and reconnecting the PCI Express link.
Clicking the Connect/Disconnect
button disconnects the PCI Express
link for one second in both directions, then re-establishes the link.
Note: For x1 PCI Express links, it is not necessary for the Analyzer to observe
link training in order to record link traffic; this step may be skipped.