IAI America SEL-TG User Manual
Page 163
10. Position Edit
145
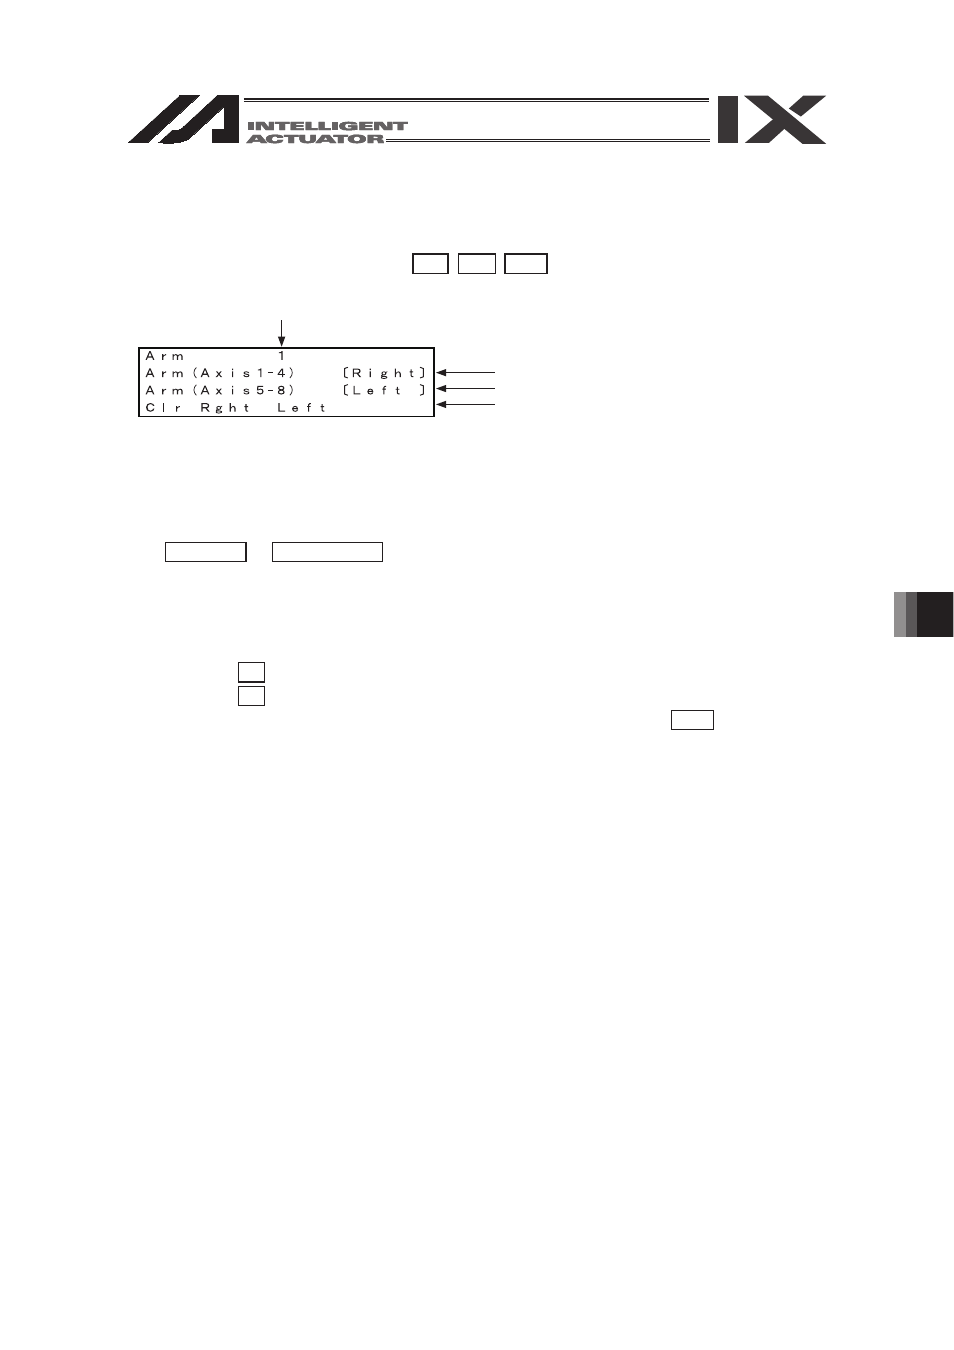
(12) Arm System seting
In the case of the XSEL-RX/SX, or RXD/SXD Controller, the arm system data can be set on
the position data.
0RGH&KDQJHWR7HDFKLQJ:LQGRZ(GLW3RVL7FK6
Only for XSEL-RXD/SXD, Axis 5 to 8 Arm System Scanning Selection Item is displayed.
Set the cursor on the Position No. Selection Section and select the Position No. using the
PAGE UP or PAGE DOWN key. Then, press the return key.
In the case of XSEL-RXD/SXD, move the cursor to “Arm (Axis 1 - 4)” or “Arm (Axis 5 - 8)”
using the cursor key and select the SCARA axis to be setup.
When the F2 key is pressed, the “Right” (Right Arm) data is setup.
When the F3 key is pressed, the “Left” (Left Arm) data is set up
After the data is entered, transfer the data to the controller using the WRT key.
When the data has been written, and the previous window is returned from the axis
associated maintenance information window using the ESC key, the Flash ROM data import
DQGVRIWZDUHUHVHWDUHFRQ¿UPHG
,QRUGHUWRDSSO\WKHZULWWHQGDWDLPSRUWWKHGDWDRQWKHÀDVK520DQGUHVHWWKHVRIWZDUH
Ԙ
ԙ
Ԛ
Arm System Data for Axis 1 to 5 Selection Section
Arm System Data for Axis 5 to 8 Selection Section
Function key display section
Position No. selection section