Slide number 6, Forward – Reese 30868 RAIL KIT User Manual
Page 6
30868N – 9FEB11D
PCN14805
©2011 CEQUENT PERFORMANCE PRODUCTS, INC.
LITHO IN USA
6
7.
Using a 18mm socket to remove all passenger side bed bolts and loosen or remove all driver side bed bolts. Then
raise and support the truck bed.(Only one side may need to be raised in which case the passenger side is
recommended.
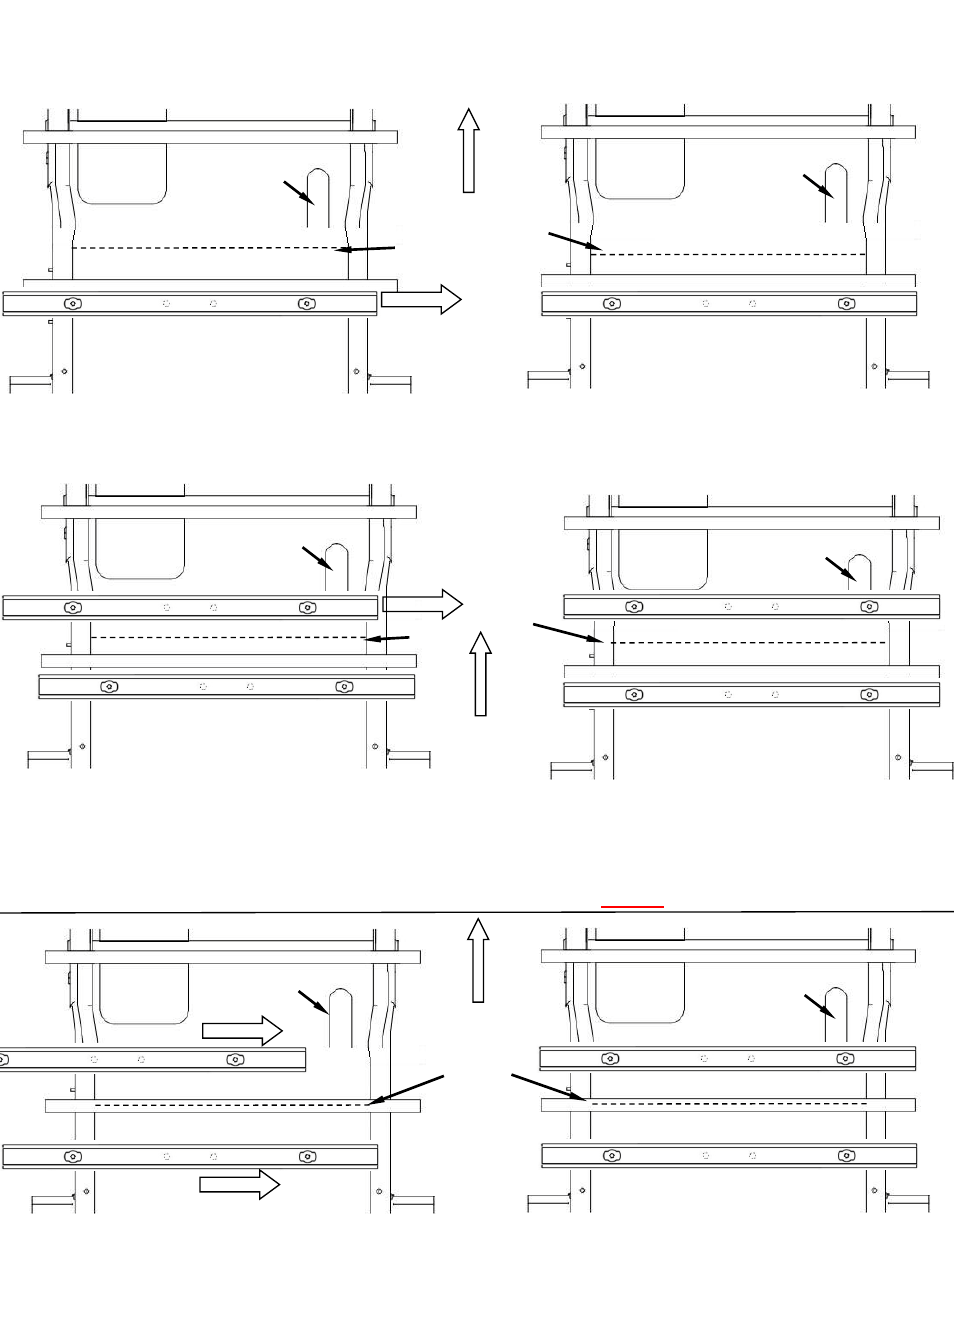
8.
Insert rails as shown in the following steps (
Figures 9 through 14
). With flat side up rear rail should be inserted
first. With flat side up insert front rail second. Refasten truck bed bolts after rails are inserted.
Step 1 : Slide one rail in behind the hat
channel located over the axel. Lift and
position it so that it rests on the frame.
Fuel
Cell
Front Hat Channel
Rear Hat Channel
Forward
Step 1
: Lift and rotate the rails over the
exhaust and towards the hat channel
Forward
Figure 9
Figure 10
Figure 11
Figure 13
Figure 12
Rear Hat Channel
Step 3 : Slide the front rail in over the
frame as shown.
Rear Hat Channel
Front Hat Channel
Rear Hat Channel
Front Hat Channel
Front Hat Channel
Front Hat Channel
Rear Hat Channel
Step 2
: Slide the rails so that they rest
evenly on both sides of the frame as
shown
Exhaust
Fuel
Cell
Fuel
Cell
Fuel
Cell
Fuel
Cell
Fuel
Cell
Front Hat Channel
Rear Hat Channel
Figure 14
Forward
F
r
a
m
e
F
r
a
m
e
Step 2 : Position the rail near the rear hat
channel as shown so that it rests evenly
on both sides of the frame.
Step 4 : Position the rail approximately
as shown so that it rests evenly on both
sides of the frame.
Axel
Axel
Exhaust
Exhaust
Axel
Axel
Exhaust
Exhaust
Axel
Note: Fig. 13-14 refer to the 6’ Bed
Exhaust