Luminex MAGPIX Hardware and Installation Manual User Manual
Page 40
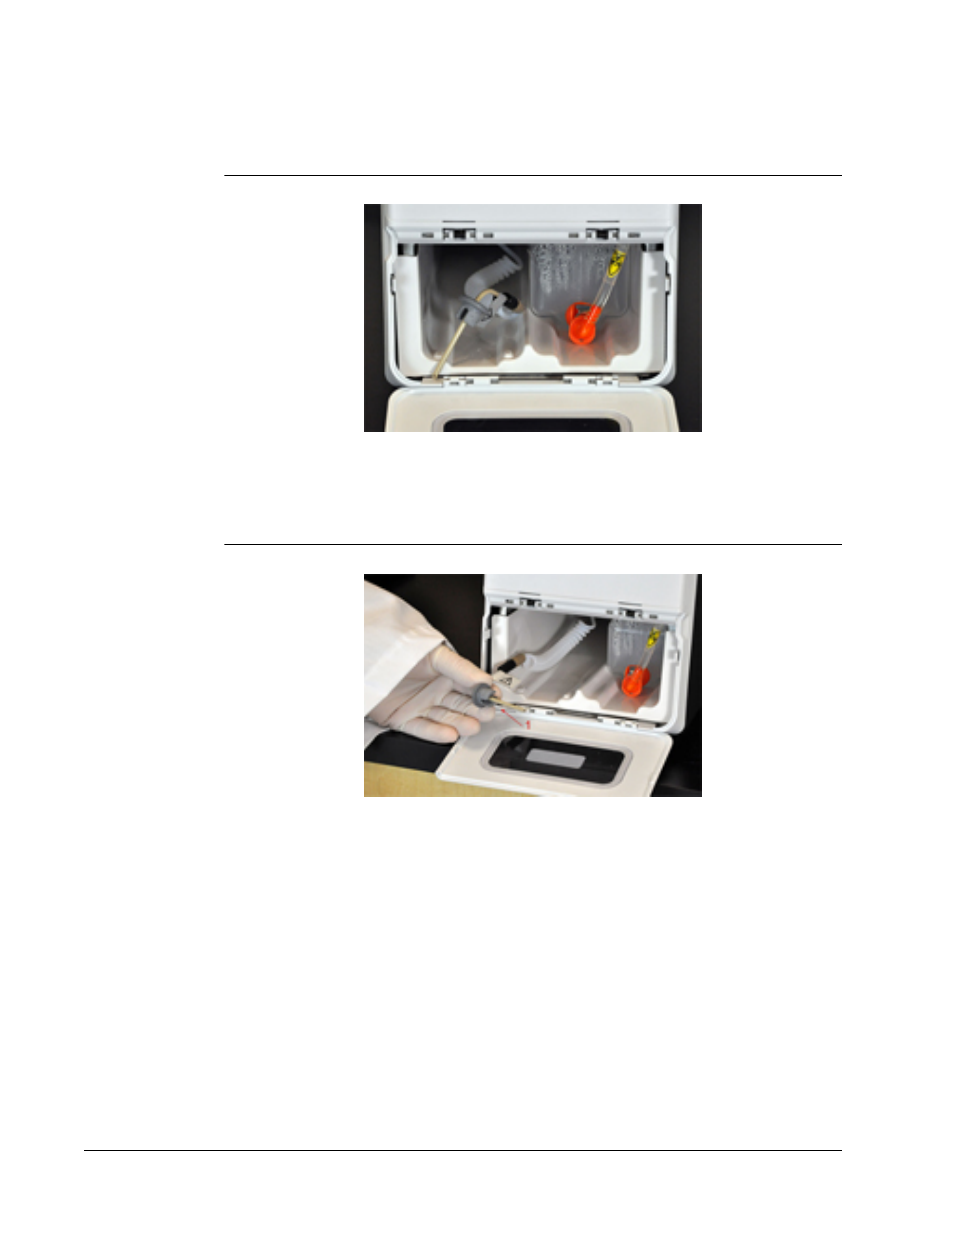
3. Open the door of the fluid compartment on the front of MAGPIX.
FIGURE 29.
The Fluid Compartment
4. Pull the Drive Fluid tube and plug (1) in the left side of the fluid compartment forward until
it extends outside the compartment. Pull it to the left to allow room to insert the Drive
Fluid container.
FIGURE 30.
Pulling out the Drive Fluid Tube and Plug
Installation Procedure
27
See also other documents in the category Luminex Equipment:
- FLEXMAP 3D User Manual (86 pages)
- MAGPIX User Quick Guide (29 pages)
- xMAP Antibody Coupling Kit (24 pages)
- xMAP AbC (2 pages)
- Salmonella Analysis Tool (8 pages)
- 200 Hardware User Manual (70 pages)
- FLEXMAP 3D Hardware User Manual (72 pages)
- 100E Hardware User Manual (38 pages)
- 200 System User Manual (63 pages)
- 100 IS 2.2 User Installation Guide (10 pages)
- 200 Installation Guide (52 pages)
- 100 IS 2.1 User Installation Guide (10 pages)
- No Top Plate (NTP) Swivel Base Installation and User Manual (18 pages)
- 100 IS 2.3 User Installation Guide (10 pages)
- MAGPIX Installation and Hardware User (IVD) (88 pages)
- PC Installation Instructions (2 pages)
- BioPlex XYP, LX200 User Manual (supplied by BioRad) (51 pages)
- 100 IS User Manual, Version 2.1 (184 pages)
- 100 IS User Manual, Version 2.1 (188 pages)
- 100 IS User Manual, Version 2.3 (228 pages)
- 100 IS Version 2.1 (84 pages)
- 100 IS Version 2.3 (230 pages)
- 100 IS Version 2.2 (96 pages)
- 100 IS Version 2.2 (246 pages)
- 100 IS Developer Workbench Guide Version 2.3 (74 pages)
- IS Version 2.3 (120 pages)
- IS Version 2.3 (IVD) (116 pages)
- 100 User Manual Version 1.7 (146 pages)
- 200 User Manual with LDS 1.7 Software (154 pages)
- 200 LDS User Manual Update (10 pages)
- Flock Monitor Quick Guide (2 pages)
- 200 User Manual with IS 2.3 Software (64 pages)
- 100 User Manual Addendum Version 1.7 (12 pages)
- 100 IS User Manual Addendum Version 2.3 (58 pages)