Wiring the ts-dim to a dbox and power receptacle, Wiring the ts-dim to a t1 series console, Ts-dim dimensions – Franklin Fueling Systems TS-DIM User Manual
Page 8
8
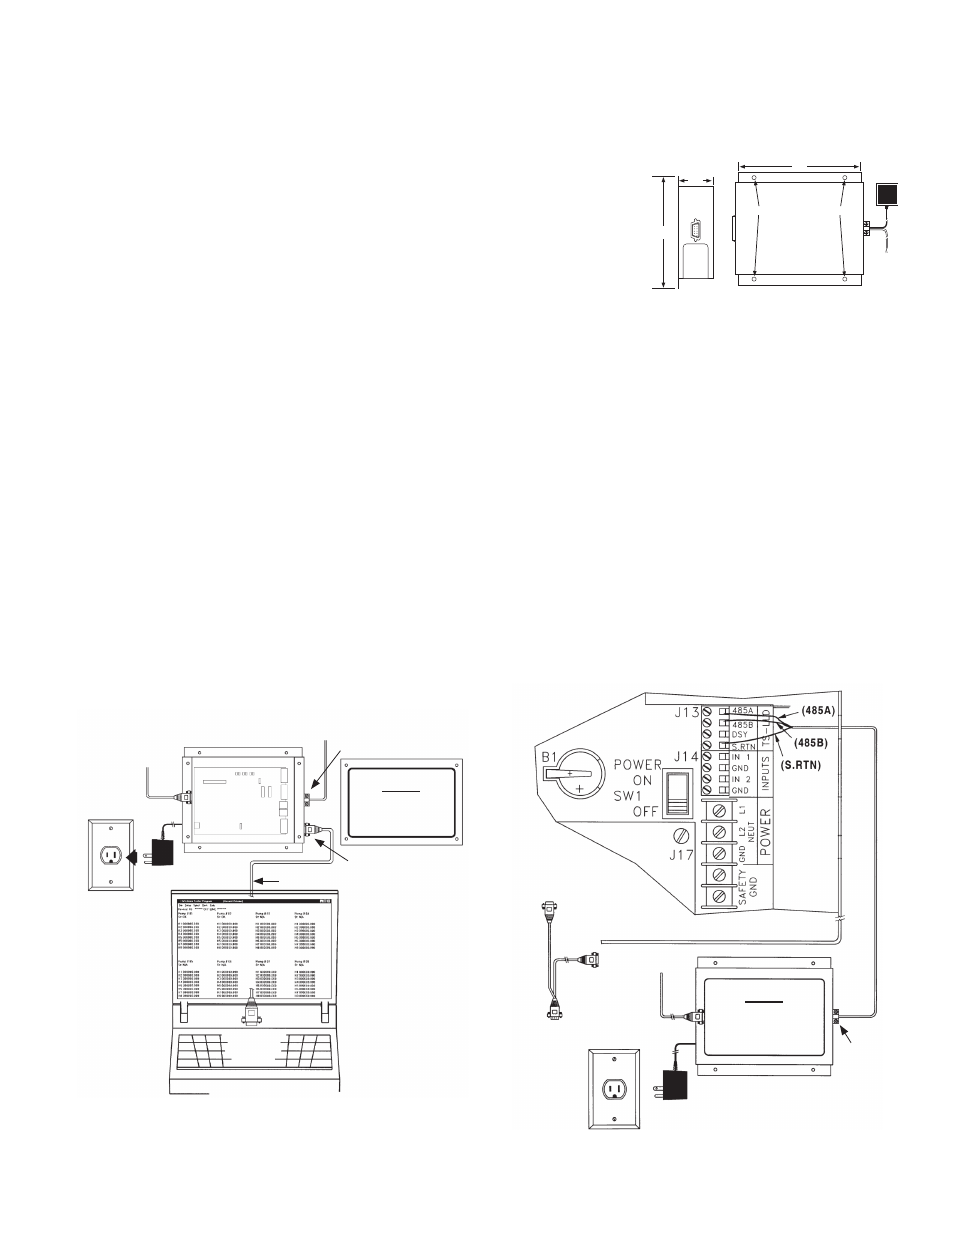
TS-DIM General Installation Steps – Wiring the TS-DIM
Wiring the TS-DIM to a Dbox and Power Receptacle
1. With all of the power off, install and wire the single outlet receptacle to a dedicated 10 circuit breaker in the power
panel. Label the circuit description on the power panel door “TS-DIM power only.”
2. Wire the TS-DIM to the Dbox. Information about wiring to the Dbox, or
Dbox & Controller, or G-Site Controller is found on pages 11 to 17 in this
manual under the appropriate section heading. The TS-DIM will be wired to
the console in the following section.
3. Connect your DB9 serial cable from the Diagnostic port on the TS-DIM to
the serial port on your PC.
Note: The Diagnostic port is used for diagnostics and sitemapping (see page 19).
For computers without serial ports, use a serial port to USB converter.
4. Apply power to the TS-DIM only (plug the TS-DIM power adapter into the
single outlet receptacle and turn on the TS-DIM circuit breaker).
Wiring the TS-DIM to a T1 Series Console
Turn off the main power source / all power sources that terminate in the console before working on or servicing this
equipment. Failure to do so will create a lethal electrical shock hazard.
1. Make sure all power to the tank gauge console is turned off at the power source.
2. On the right side of the console, use the third knockout from the bottom for the TS-DIM, 3 conductor cable wiring
(P / N 600-0207).
3. Install a clamp fitting at the console and insert the wires through the opening. Remove the plastic safety shield
and terminate the wires as follows:
a. Wire 485A to Terminal 485A
b. Wire 485B to Terminal 485B
c. Wire S.RTN to Terminal S.RTN
Note: There may be TS-LLDI interface wires already connected to the RS-485 terminals. In this case, remove one wire
and twist it together with the appropriate TS-DIM wire. Reinsert these into the correct terminal and tighten the screw.
4. Reinstall the plastic safety shield and tighten the clamp.
7.5"
2.0"
8.5"
TS-DIM
(4) Mounting Holes for #8 Screws
TS-DIM Dimensions
Figure 5: TS-DIM to Console Wiring
Dedicated Single
115VAC Power Outlet
TS-DIM
Dispenser
Interface
Module
Or...
Other Dbox
Adapter Cable N / A
for TS-DIM / M
FFS Console
INCON
P
/ N
600-0207
TS-DIM
Dispenser
Interface
Module
Dedicated
Single
115VAC
Power
Outlet
PC
To - PC
COMM
X Serial
Port
To Dispenser Dbox
To Tank Sentinel Console
Diagnostic Port
Host 1 / RS485 Port
Host 1 / RS485
Port
DB9 to DB9
Figure 4: TS-DIM to Dbox and Receptacle Power Wiring