Using a junction box – Extron Electronics TLP 350MV User Guide User Manual
Page 39
Using a Junction Box
1.
Locate a wall stud and mark the position
where the junction box will be placed.
Use the specifications provided by the
manufacturer. If necessary, cut a small hole in
the wall immediately adjacent to the stud so
that the position of the junction box can be
marked precisely.
2.
Cut a hole in the wall. To avoid making the
hole too big, cut inside the lines you marked
in step 1.
3.
Test the fit by inserting the junction box into
the hole in the wall. If necessary, use a rasp
or file to enlarge the hole so that the junction
box fits.
4.
Insert the junction box into the hole in the
wall. Secure it to the stud using two screws or nails, as appropriate.
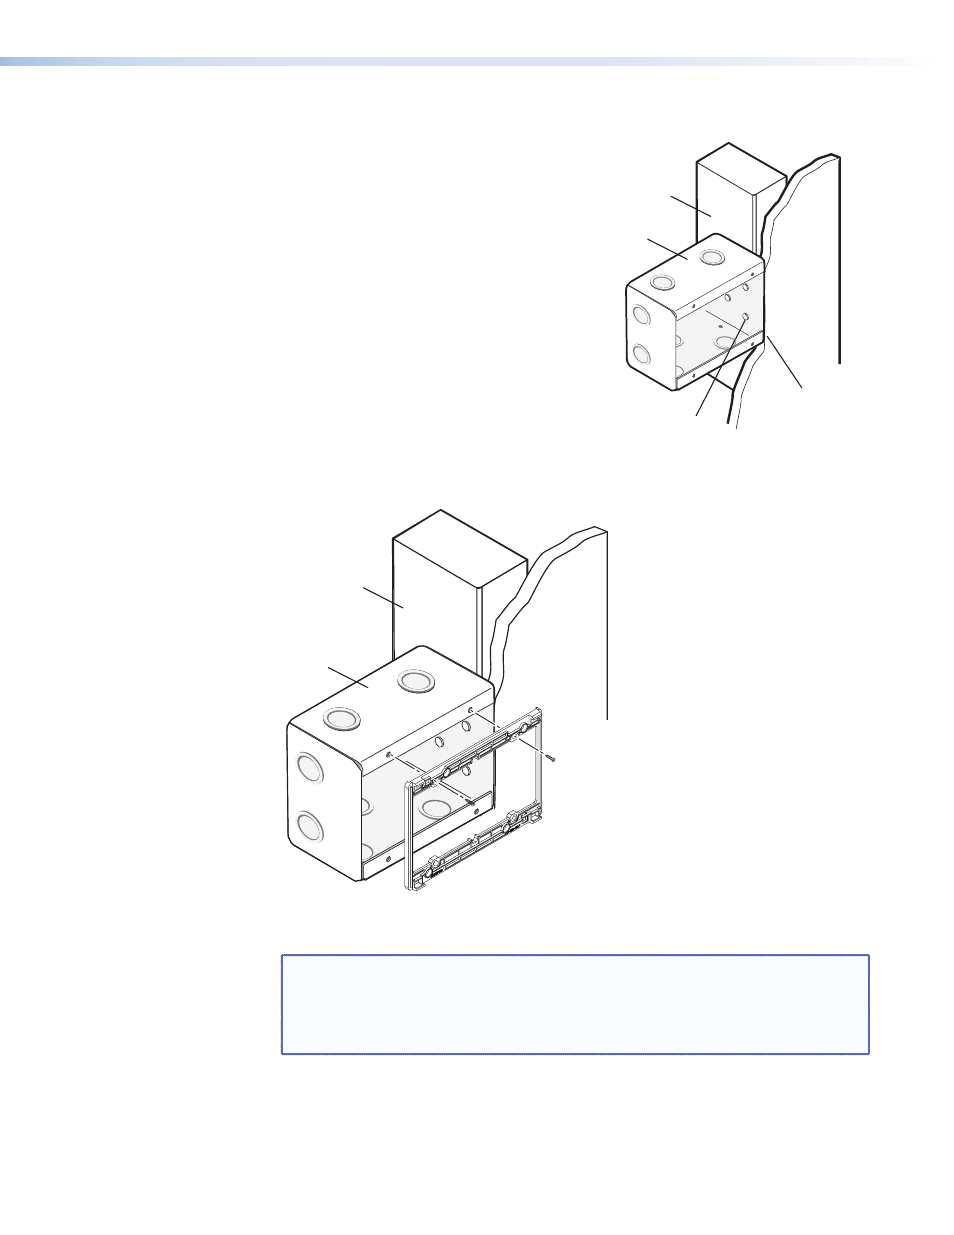
5.
Secure the wall plate adapter (provided) to the junction box, using the four screws
(provided).
Wall Stud
Junction Box
Wall Adapter
Figure 36.
Securing the Wall Plate Adapter
NOTE: If the junction box is installed at a new construction site, it must be secured
to a stud before the drywall is placed. Offset the junction box slightly from
the stud so that the outside face of the junction box is flush with the
outside surface of the drywall. Cut a hole in the drywall and attach the
drywall sheet in position around the junction box.
Flush with
Wall Surface
Screws or Nails
Wall Stud
Wall Box
TLP 350MV • Mounting
33