GE Industrial Solutions EntelliGuard G User Manual
Page 24
EntelliGuard® G Circuit Breaker
DEH-41304C
Section 5 – Locks and Interlocks
13 March 14
24
©2012 General Electric All Rights Reserved
Fig. 5.7. Safety Shutter in Closed Position
Door Interlock Installation
A door interlock mechanism may be installed inside the
cassette on the right for L/H (left-hand) hinged door or left
for R/H (right-hand) hinged door. Specify whether the door
is L/H or R/H hinged when ordering interlock kits (Figs. 5.8
and 5.9). Each kit contains:
One interlock lever
One helical spring
Door Catch Assembly
Washers
Circlips
Figure 5.8. Door Interlock Pack Contents
Figure 5.9. Door Interlock Showing both L/H and R/H Sets
To assemble (Fig. 5.10):
1. Place the spring over the pivot pin protruding from
cassette side plate.
2. Position interlock lever as shown. Ensure one end of
spring is located below the nut and the other rests over
the small boss on the lever.
3. While holding the interlock lever in position: Insert two
Circlip into the groove in the pivot pins and secure.
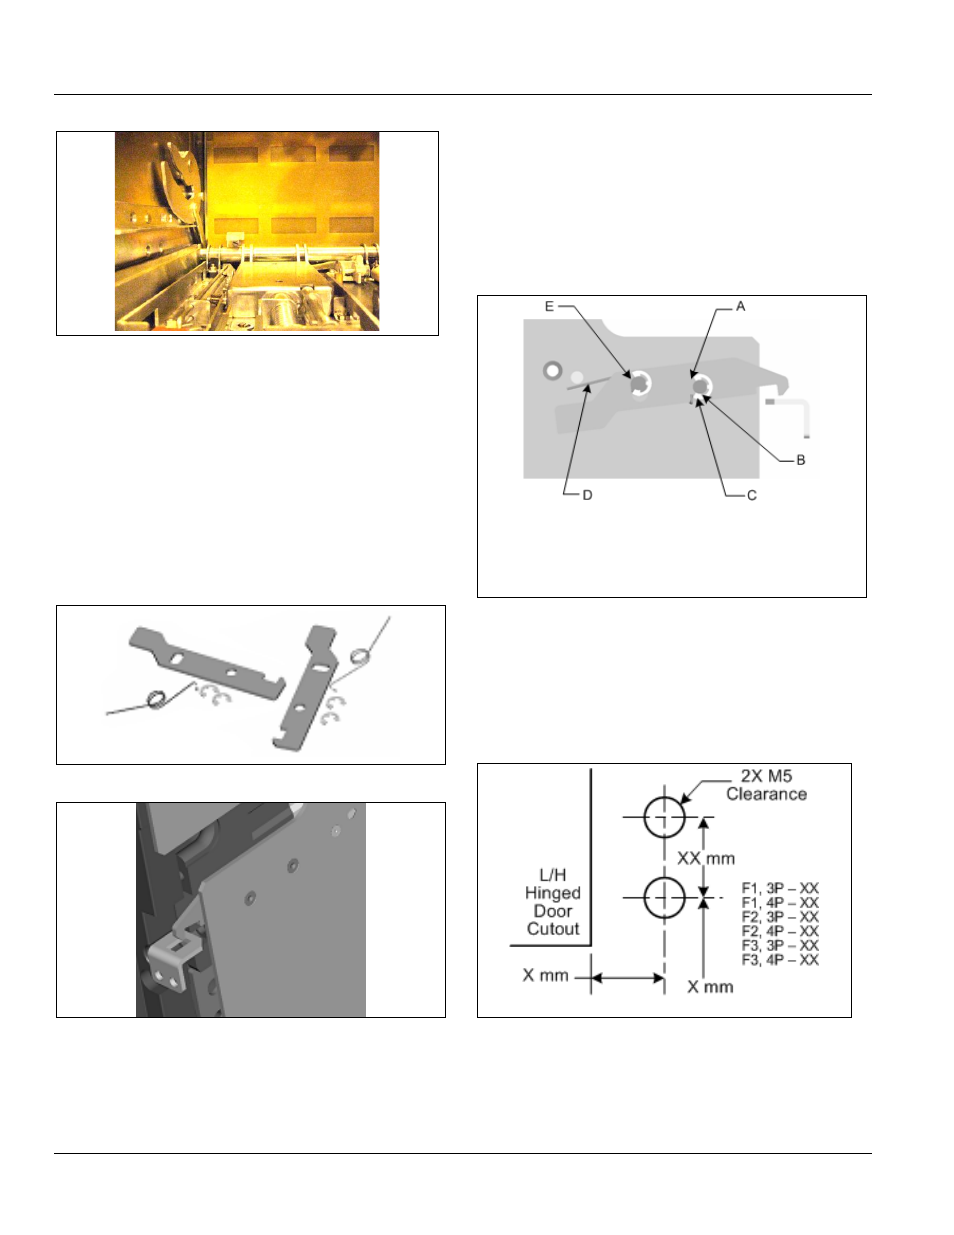
Figure 5.10. Door Interlock Assembly)
A End of spring locates below Circlip
B Spring pin
C Circlip
D End of spring fits below boss in inside of lever
E Fulcrum boss with Circlip
4. Mount the door catch assembly to the panel door using
2 X M5 – 8 long socket head screws, lock washers
through the mounting holes shown in Fig. 5.11 and Fig.
5.12. Tighten the bolts to a torque of 8 N m on the panel
door.
Figure 5.11. Left-Hand Hinged Board Door Bracket
Location Detail