GE Industrial Solutions EntelliGuard G User Manual
Page 23
DEH-41304C
EntelliGuard® G Circuit Breaker
13 March 14
Section 5 – Locks and Interlocks
©2012 General Electric All Rights Reserved
23
Key Lock for Breaker Trip Free Condition
A total of four key locks (Ronis/Profalux/Kirk and one Castel
lock) can be installed.
1. Press the OFF pushbutton until the padlock lever is
pulled out
2. Pull the padlock lever and remove the key from lock by
rotating it in counterclockwise direction (Fig. 5.3).
Figure 5.3. Key Lock for Breaker Trip Free Condition
DRAWOUT CASSETTE FRONT PANEL LOCKING
Security Locking
This function locks the entry of the racking handle in the
crank insertion hole of the cassette front panel when the
padlock is installed when circuit breaker in the
DISCONNECTED/ CONNECTED position. Up to three
padlocks (shaft diameter of 3 mm to 9.5 mm) may be
installed for additional security (Fig. 5.4).
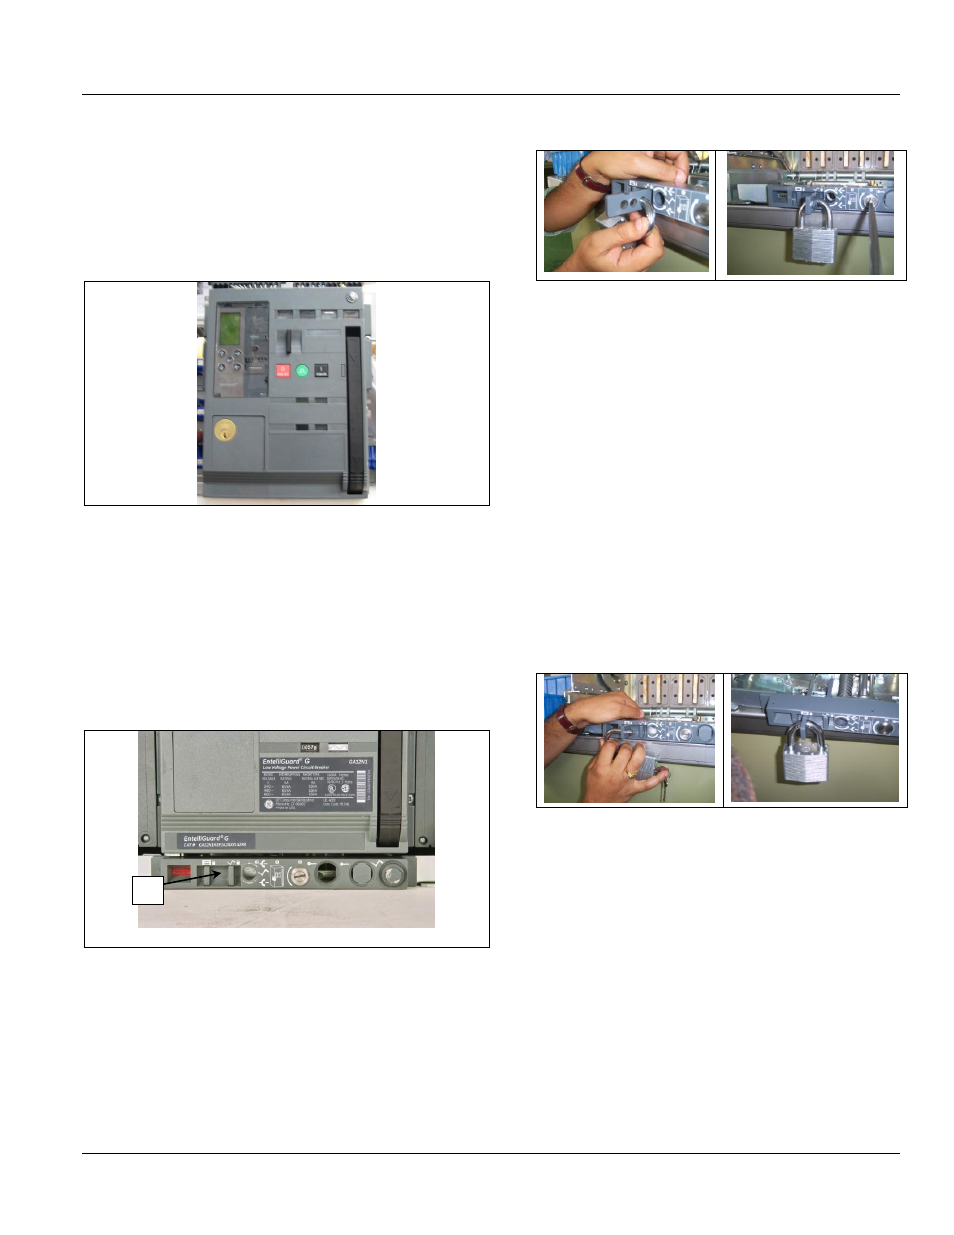
Figure 5.4. Circuit Breaker Security Padlocking Location
A Security Locking Bar
1. Ensure the position indicator shows the
DISCONNECTED/CONNECTED position.
2. Remove the racking handle from the operating
position.
3. Pull the locking bar until the locking eye is exposed
and hold while inserting the padlock shaft (Fig. 5.5).
Figure 5.5. Padlock Insertion and Lock-Out on the
Security Locking Bar
4. Using a screwdriver, turn the racking handle
shutter drive A clockwise.
Isolation Shutters Locking (If Installed)
This function locks the operation of the safety shutters
when the pad lock is installed on the security locking
bar B only when the cassette is in the DISCONNECTED
position. Only one padlock (shaft diameter of 3 mm to
9.5 mm) may be installed.
1. Ensure the position indicator shows the
DISCONNECTED/CONNECTED position.
2. Remove the racking handle from the operating
position.
3. Pull the locking bar until the locking eye is
exposed and hold while inserting the padlock
hasp (Fig. 5.6).
Figure 5.6. Padlock Insertion and Lock-Out on the
Security Locking Bar
1. Using a screwdriver, turn the racking handle
shutter drive clockwise.
2. Check installation by trying to lift the front shutter
plate up and down (for horizontal terminations) or
sliding it left to right (for vertical terminations)
which are installed on the cassette in front of the
terminals (Fig. 5.7).
A