Installation guide – Veris Industries H8822 Install User Manual
Page 6
VERIS INDUSTRIES
™
H8822
INSTALLATION GUIDE
ZL0056-0C
PAGE 6
©2010 Veris Industries USA 800.354.8556 or +1.503.598.4564 / [email protected]
06101
Alta Labs, Enercept, Enspector, Hawkeye, Trustat, Veris, and the Veris ‘V’ logo are trademarks or registered trademarks of Veris Industries, L.L.C. in the USA and/or other countries.
Laptop/Computer Setup
1. You must have a computer to access and configure the AcquiSuite DR. This
computer must have an ethernet connection (on the LAN or by direct connection)
and must have a web browser installed such as Internet Explorer or Netscape.
Note: If your building already has an existing LAN that the AcquiSuite DR
is attached to, you can use an existing computer on that LAN. Check with
your network administrator for details. If this option is available, use a LAN
connected computer and skip to the “AcquiSuite DR administration overview”
section below.
The remainder of this section will assume the installer has brought a laptop to the
site, and will connect the laptop to the building LAN, or directly to the AcquiSuite DR.
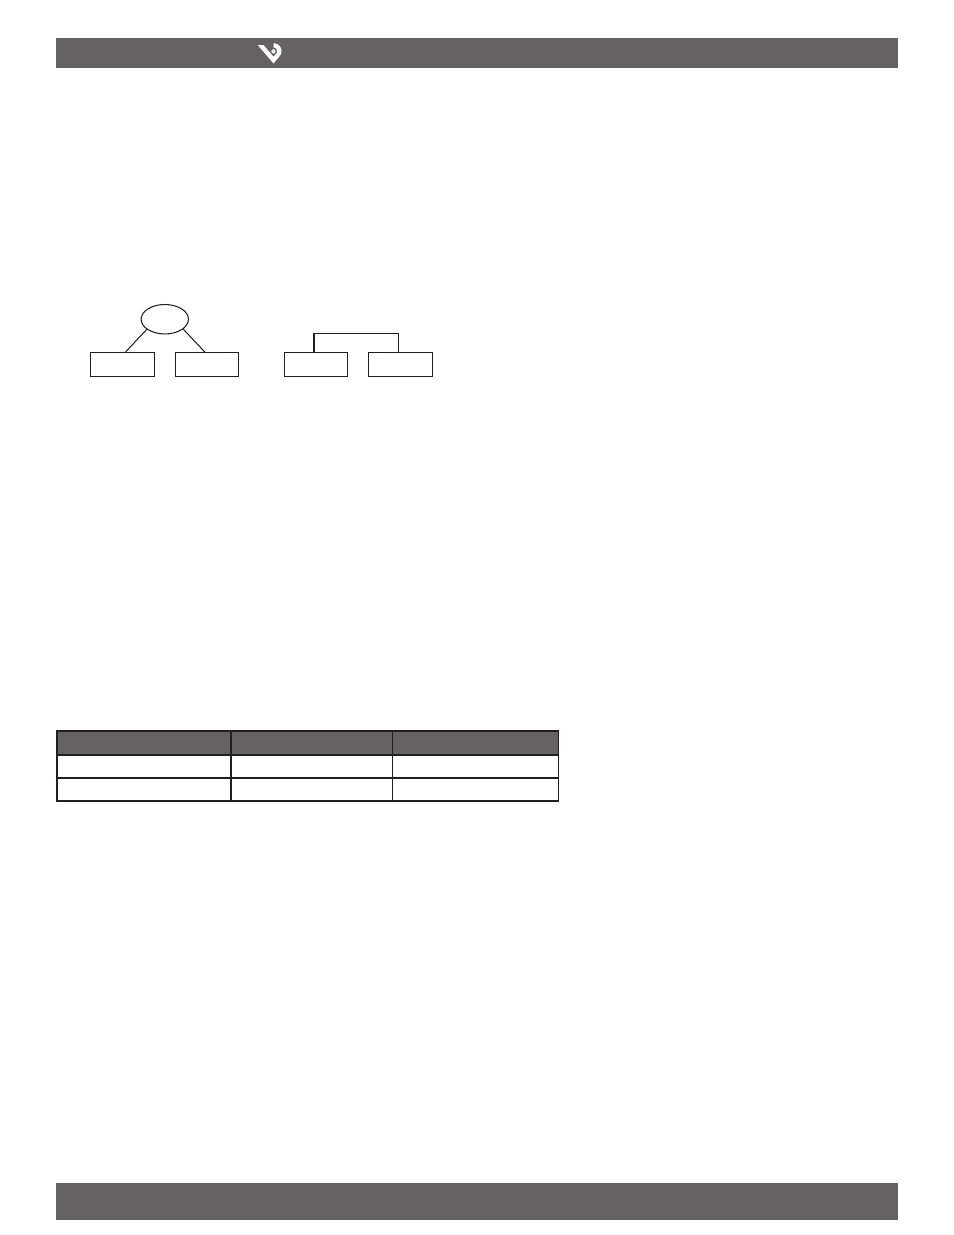
Attach the laptop to the AcquiSuite DR or LAN as shown.
2. Attach the laptop to the AcquiSuite DR or to the LAN. If the laptop is to be
attached to an existing LAN, use a standard (direct) ethernet patch cable. If the
laptop is to be attached directly to the AcquiSuite DR use an ethernet “Crossover”
cable. If the laptop is to be attached to an existing LAN, obtain a static IP address
(or use DHCP addressing) from the network administrator.
3. Configure the laptop IP address using the following steps.
Note: Only MS Windows is detailed below, however you can use any OS/
Browser you wish such as MacOS or Linux. Details on network setup fornon-
windows operating systems is beyond the scope of this document however.
Laptop
AcquiSuite
LAN
LAN connected AcquiSuite
ethernet
ethernet
ethernet crossover cable
Direct connected AcquiSuite
Laptop
AcquiSsuite
Static IP Address
DHCP
Direct Connection to Laptop
IP address: ___.___.___.___
Obtain IP address automatically
IP Address: 192.168.40.1
Netmask: ___.___.___.___
IP address: (dhcp assigned)
Netmask: 255.255.255.0
Laptop Address Worksheet:
A. From the Windows start menu, select the “Settings”, “Control Panel”
option. Double click the network icon in the displayed window.
Note: If you are using Windows 2000 or Windows XP, select the ‘Local Area’
connection icon in the network folder, then click the “Properties” button.
B. In the network setup dialog, there should be a list of items including
adapters, clients and protocols. Locate the protocol labeled “TCP/IP”.
Note: If you have multiple ethernet cards, you may have multiple lines labeled
“TCP/IP --> ethernet card”. Locate the ethernet card that corresponds to the
physical connection to the AcquiSuite DR and then select the TCP/IP option
that is linked with that ethernet card.
C. Double click the TCP/IP option you selected in step B above. An example
screen is shown. Set the IP and Netmask from the laptop Address Worksheet
above. It would be helpful to make note of your previous settings in this
dialog so you may set them back after you are done with the AcquiSuite DR
Configuration.
D. Close the TCP/IP settings dialog, and Network dialog. If you are using
Windows 95, 98, or ME, you will be required to reboot your computer.
E. Close the TCP/IP Settings dialog and Network dialog.