Change and cleaning of the injection nozzle, Removing the bypass t-piece, Figure 15 – M&C TechGroup DIL-1_(H) Operator's manual User Manual
Page 28: Bypass t-piece with injection nozzle and o-ring
28
Gas sampling and gas conditioning technology
2-1.1.7.6-ME
16.3
CHANGE AND CLEANING OF THE INJECTION NOZZLE
N O T E !
For cleaning the injector, it is not necessary to remove the nozzle out of the
crosspiece. The nozzle can be cleaned together with the complete cross-
piece in an ultrasonic bath.
For changing the injector nozzle, see figure 14:
Loosen nut 3 and remove jet pipe;
Push the injection nozzle out of the jet pipe side by using the mounting tools (item 8, figure 14);
Check the o-ring and change it if necessary;
Push the new nozzle with o-ring until blocking.
16.4
REMOVING THE BYPASS T-PIECE
For cleaning or changing the bypass injector, the bypass T-piece can be completely disassembled.
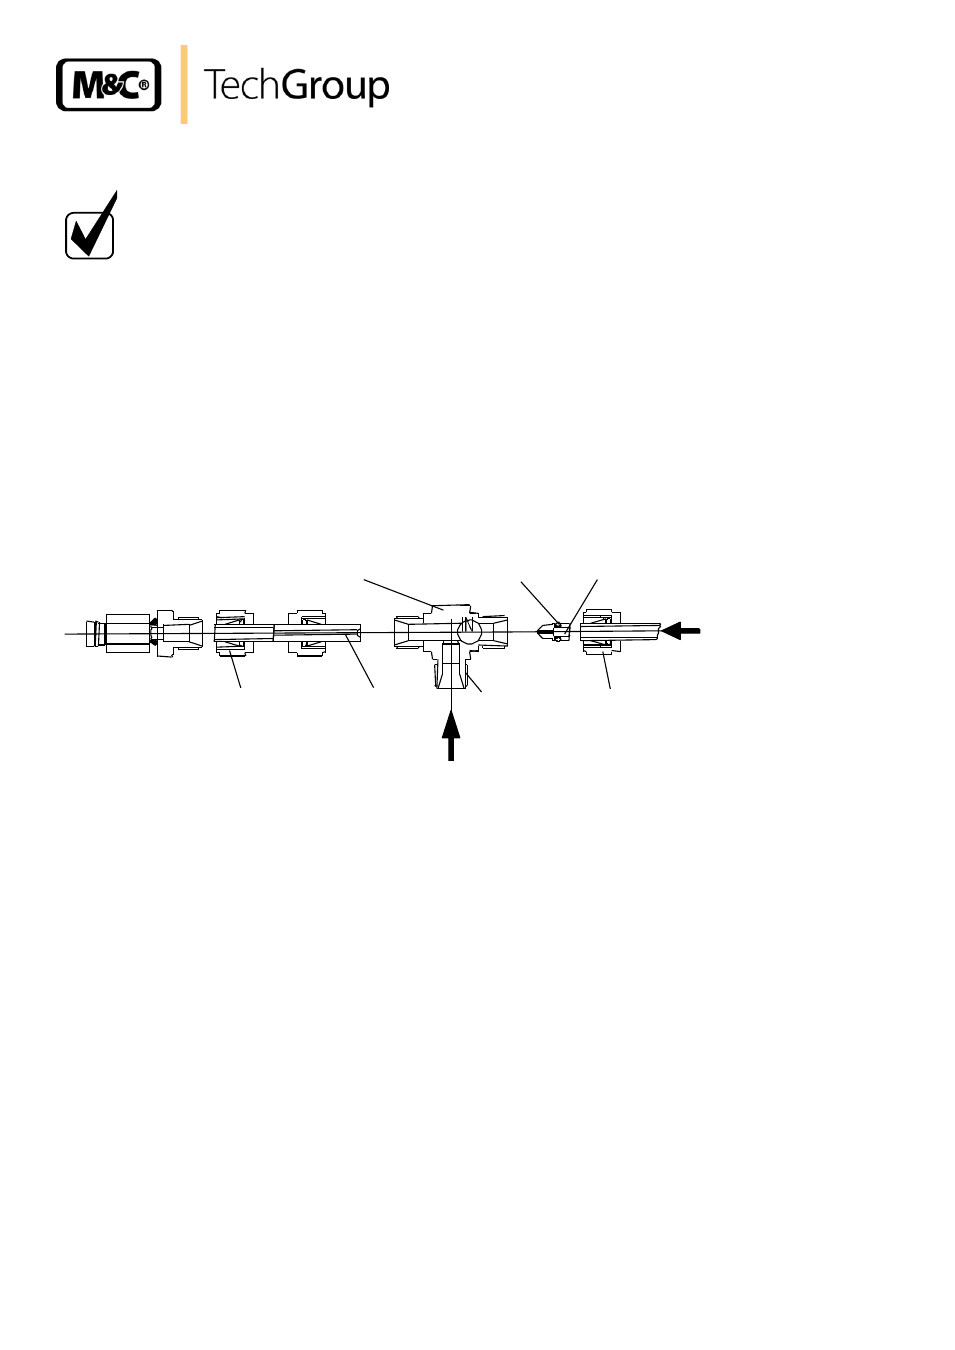
The following figure shows the bypass T-piece.
Injection nozzle
O-ring
Bypass T-piece
Jet pipe
Nut 2
Nut 1
Nut 3
Sample gas
Dilution gas
Figure 15
Bypass T-piece with injection nozzle and o-ring
Dismantle the T-piece as follows:
Romove insulation cover if applicable;
Remove all tube connectors on the bypass-T. These are: (see figure 15):
- Bypass inlet union nut 1
- Union nut 2 (jet pipe side)
- Union nut 3 (sample inlet).
The bypass-T is now ready for further maintenance and repair.
16.5
CHANGE AND CLEANING OF THE BYPASS INJECTION NOZZLE AND CON-
TROL OR CHANGE OF THE O-RING
Push the injection nozzle out of the jet pipe side by using the mounting tools (item 8, figure 14);
Check the o-ring and change if necessary;
Push in the new or cleaned old nozzle with o-ring until blocking.