Overland Storage REO 9000 User Manual
Page 23
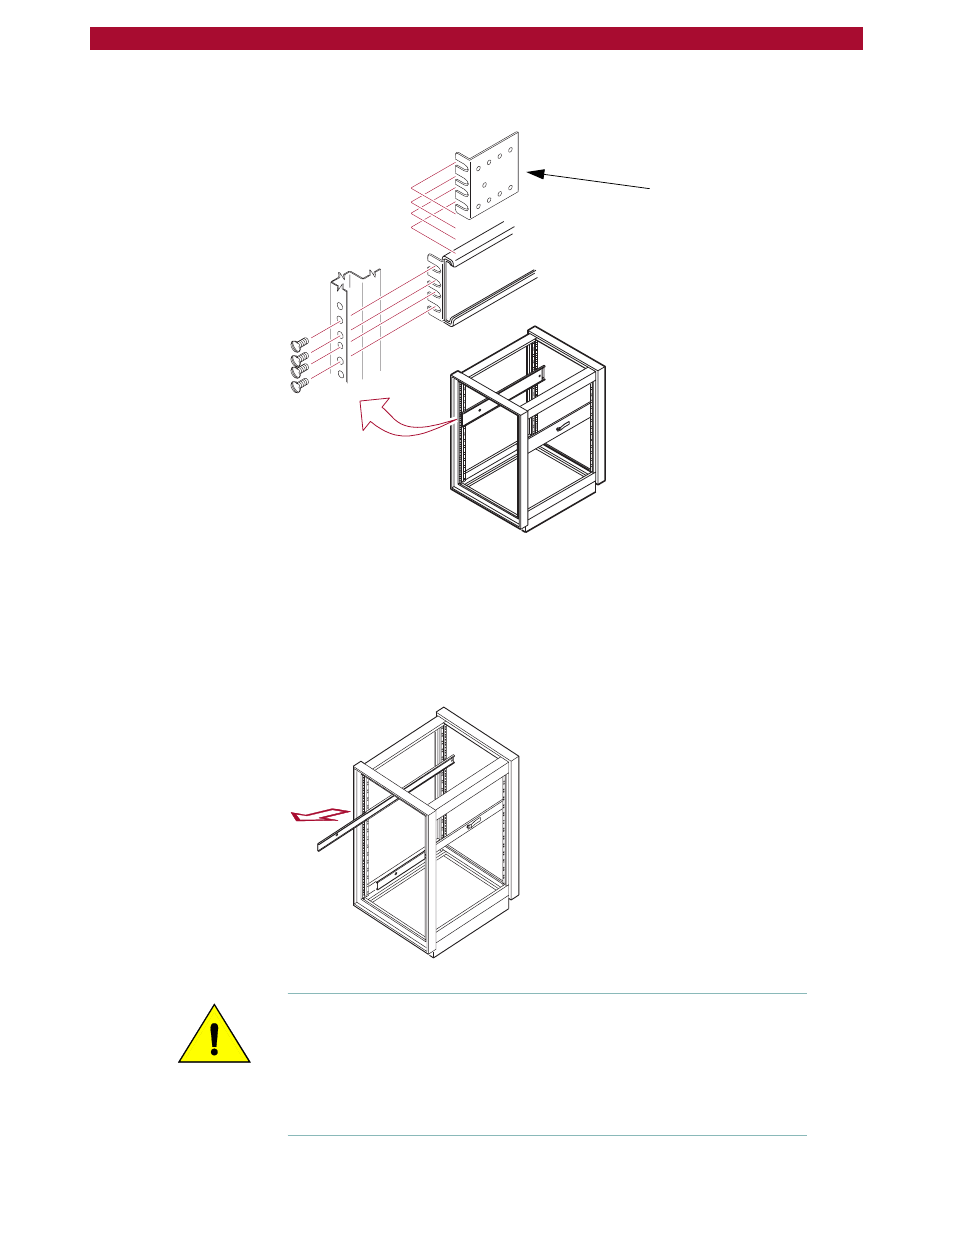
Positioning the REO Appliance in a Rack
W
23
Setup Guide
Select slots in the mounting brackets so that the length of the assembly
equals the distance between the front and rear rails of the rack.
Note:
When fastening the adjustable bracket, allow room for the slide to
pass by the inside of the rack.
4
Tighten all the screws.
5
If they are not already locked in the extended position, pull the
intermediate slides toward the front (out of the rack) so that they lock in
the extended position.
Caution:
The disk drives for the REO Appliance are located in the front
of the unit. The result being the majority of weight is distributed to the
front of the REO Appliance. This next step should be performed by at
least two people, or by using a mechanical lift. Make certain that when
the REO Appliance is fully extended that a force of 20% of the rack’s
weight, but not more than lb. (Kg), applied in any direction other than
upwards, does not cause the rack to overbalance.
REO90063
Nut Plate
REO0065