Getting ready, Placing the atelier on the stand, Placing on the ks-g8 – Roland ATELIER Combo AT-350C User Manual
Page 20: Placing on the ks-12
20
Getting Ready
Placing the ATELIER on the Stand
If you place the ATELIER on a stand, you must use the KS-G8 or the KS-12 (sold separately).
NOTE!
• When placing the ATELIER on the stand, be careful not to pinch your fingers between the instrument and the stand.
• When lifting the ATELIER onto the stand, make sure to enlist the help of at least one other person.
• Using the ATELIER with any other stand may produce an unstable situation, possibly causing the instrument to fall or overturn, and resulting in
injury or damage.
• For details on how to assemble the stand, refer to the owner’s manual that accompanied the stand.
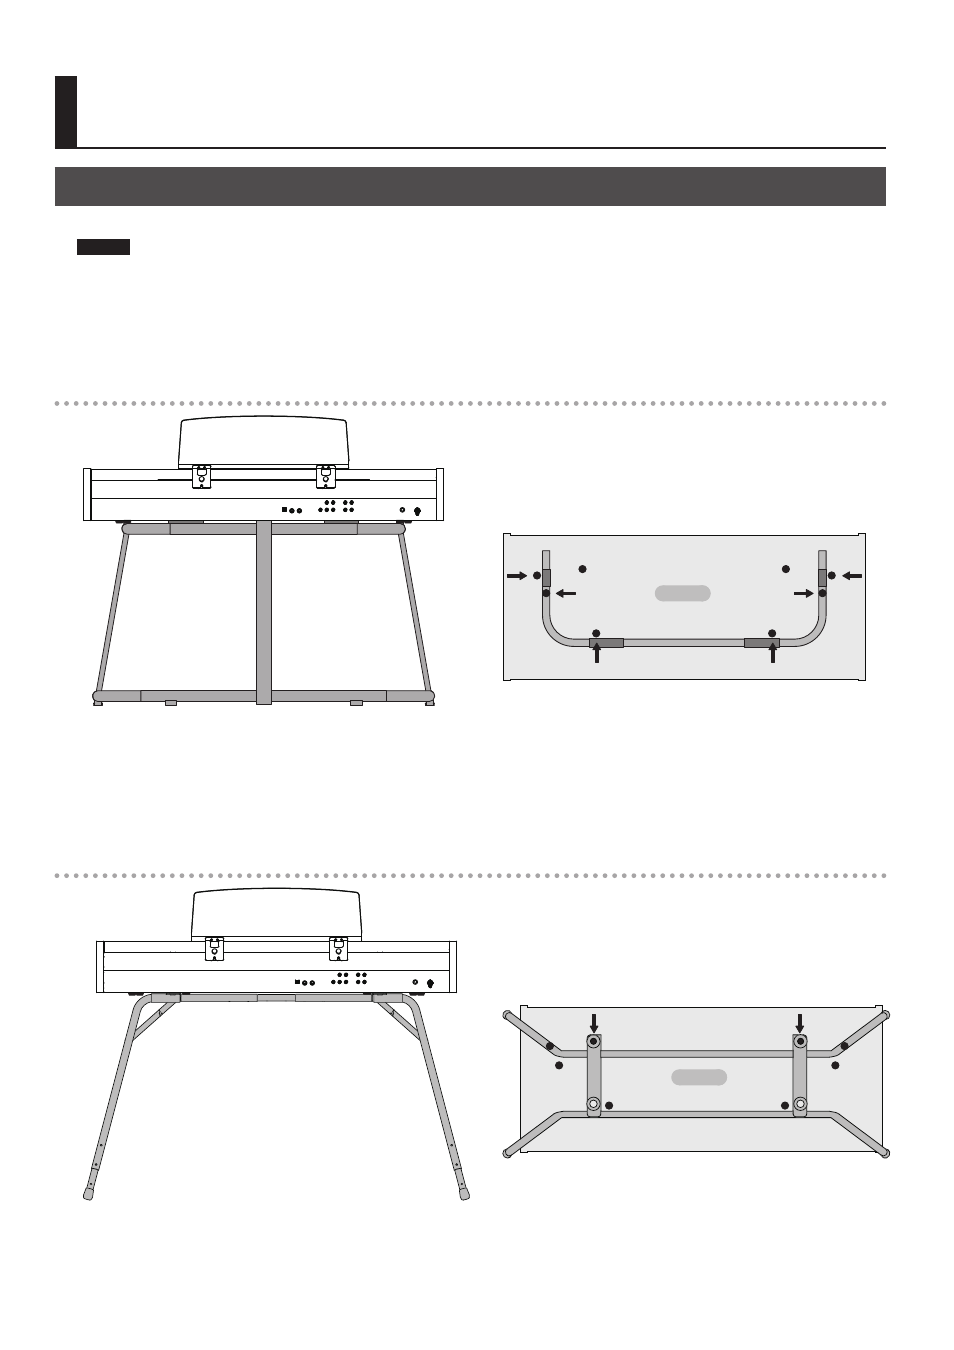
Placing on the KS-G8
A
B
C
Front (keyboard) side
Rear panel side
A
C
B
Top view
D
D
1. Place the ATELIER in the position shown in the illustration.
• Position rubber feet “A” on the outside of the stand’s rubber pads.
• Position rubber feet “B” directly above the stand’s arms.
• Position rubber feet “C” so that they contact the inside of the stand’s rubber pads.
* Make sure that the ATELIER’s eight rubber feet (A–D) are not resting on the stand’s rubber pads.
Placing on the KS-12
D
D
Front (keyboard) side
Rear panel side
Top view
1. Place the ATELIER in the position shown in the illustration.
Position rubber feet “D” so they fit inside the holes on the stand.