Installing a sas controller on the sas riser card, Installing, Controller – Lenovo 3797 User Manual
Page 97: Riser, Card
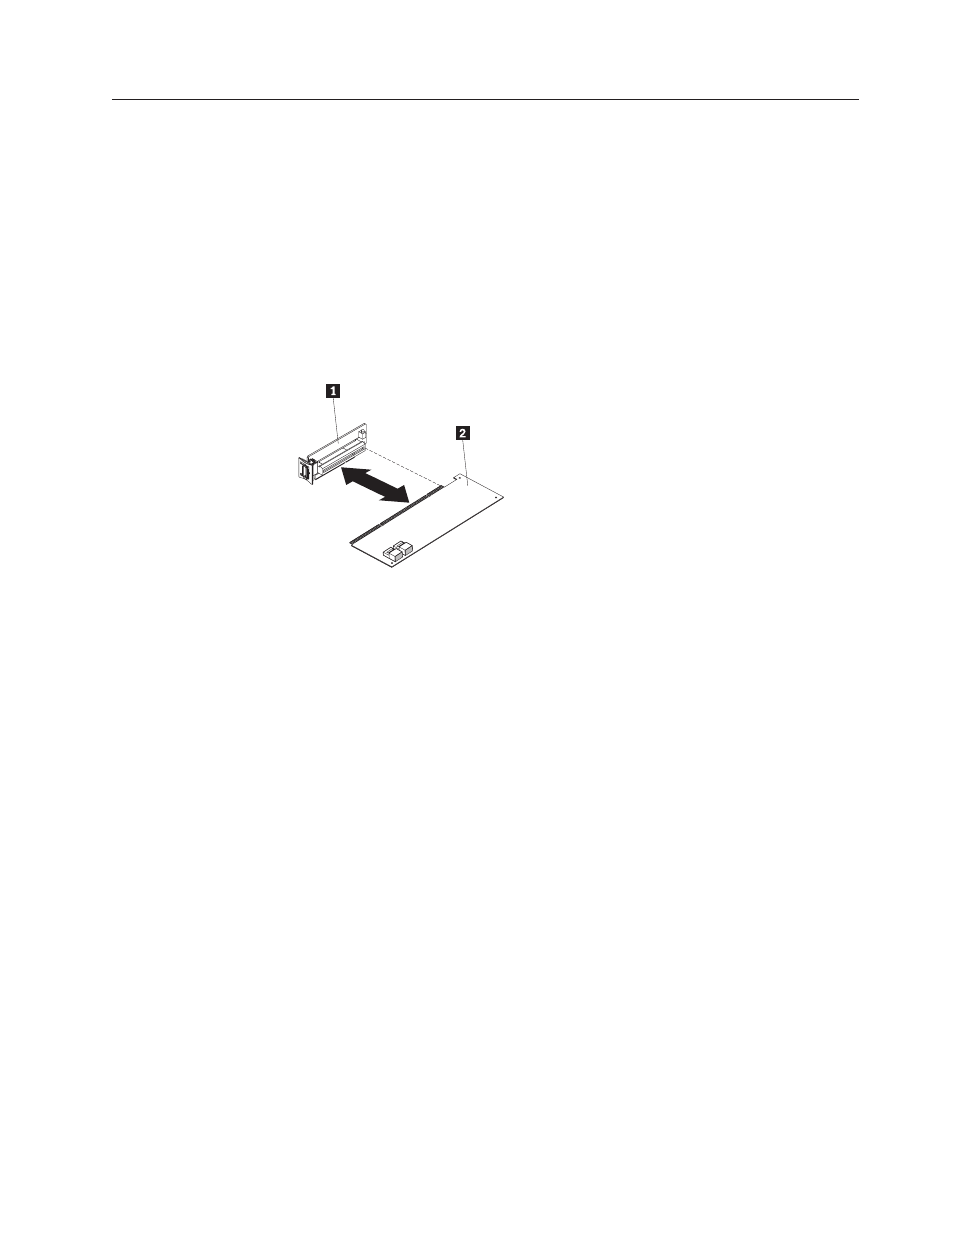
Installing
a
SAS
controller
on
the
SAS
riser
card
Important:
If
you
have
installed
a
4-disk-drive
optional
expansion
device
in
a
12-drive-capable
server,
the
SAS
controller
is
installed
in
a
PCI
riser-card
assembly
and
is
installed
and
removed
the
same
way
as
any
other
PCI
adapter.
Do
not
use
the
instructions
in
this
topic;
use
the
instructions
in
and
To
install
a
SAS
controller
on
the
SAS
riser
card,
complete
the
following
steps:
1.
Make
sure
that
the
server
is
turned
off,
all
external
cables
and
power
cords
are
disconnected,
and
the
cover
has
been
removed.
2.
If
you
are
installing
a
new
or
replacement
SAS
controller,
touch
the
static-protective
package
that
contains
the
new
SAS
controller
to
any
unpainted
metal
surface
on
the
server.
Then,
remove
the
SAS
controller
from
the
package.
1
SAS
riser
card
2
RAID
adapter
3.
If
you
are
installing
a
new
or
replacement
SAS
controller
that
uses
a
battery,
complete
the
following
steps:
a.
Remove
the
battery
from
the
SAS
controller
package
or
the
battery
package.
b.
Install
the
battery
and
connect
the
battery
to
the
SAS
controller
as
instructed
in
the
documentation
that
comes
with
the
SAS
controller
or
the
battery.
4.
If
the
new
SAS
controller
is
a
different
physical
size
than
the
SAS
controller
you
removed,
you
might
have
to
move
the
controller
retention
bracket
(tape-enabled
model
servers
only)
to
the
correct
location
for
the
new
SAS
controller.
See
then,
continue
with
the
next
step
in
this
procedure.
5.
Turn
the
SAS
controller
so
that
the
keys
on
the
bottom
edge
align
correctly
with
the
connector
on
the
SAS
riser
card
in
the
SAS
controller
assembly.
6.
Firmly
press
the
SAS
controller
horizontally
into
the
connector
on
the
SAS
riser
card.
7.
(Tape-enabled
model
server
only)
Gently
press
the
opposite
edge
of
the
SAS
controller
into
the
controller
retention
bracket.
8.
Install
the
SAS
riser
card
and
controller
assembly
(see
If
you
have
other
optional
devices
to
install
or
remove,
do
so
now.
Otherwise,
go
to
Chapter
5.
Installing
optional
devices
and
replacing
customer
replaceable
units
81