Removing a hot-swap hard disk drive, Installing a hot-swap hard disk drive, Removing – Lenovo 3797 User Manual
Page 103: Hot-swap, Hard, Disk, Drive, Installing
1
Posts
2
Battery
retention
clip
3
Battery
4
Battery
tray
5
Post
6
Rings
d.
Press
the
posts
into
the
rings
and
underneath
the
tabs
on
the
remote
battery
tray.
e.
Secure
the
battery
to
the
tray
with
the
battery
retention
clip.
2.
Install
the
cover
Removing
a
hot-swap
hard
disk
drive
Attention:
To
maintain
proper
system
cooling,
do
not
operate
the
server
for
more
than
10
minutes
without
either
a
drive
or
a
filler
panel
installed
in
each
bay.
To
remove
a
hard
disk
drive
from
a
hot-swap
bay,
complete
the
following
steps.
1.
Read
the
safety
information
that
begins
on
page
and
2.
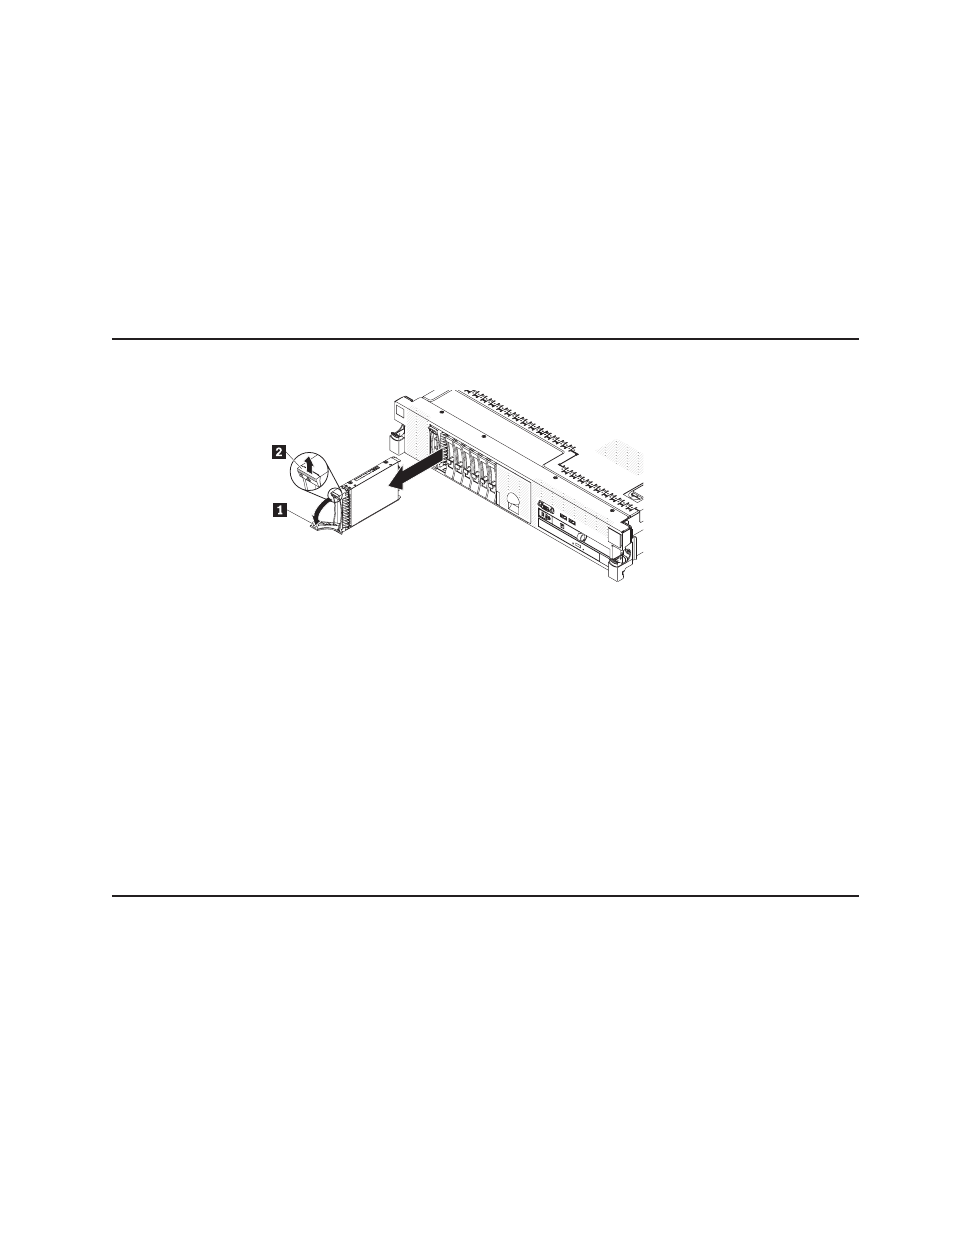
Press
up
on
the
release
latch
2
at
the
top
of
the
drive
front.
3.
Rotate
the
handle
1
on
the
drive
downward
to
the
open
position.
4.
Pull
the
hot-swap
drive
assembly
out
of
the
bay
approximately
25
mm
(1
inch).
Wait
approximately
45
seconds
while
the
drive
spins
down
before
you
remove
the
drive
assembly
completely
from
the
bay.
5.
If
you
are
instructed
to
return
the
hot-swap
drive,
follow
all
packaging
instructions,
and
use
any
packaging
materials
for
shipping
that
are
supplied
to
you.
Installing
a
hot-swap
hard
disk
drive
Locate
the
documentation
that
comes
with
the
hard
disk
drive
and
follow
those
instructions
in
addition
to
the
instructions
in
this
section.
The
following
notes
describe
the
type
of
hard
disk
drive
that
the
server
supports
and
other
information
that
you
must
consider
when
installing
a
hard
disk
drive:
v
The
server
supports
eight
2.5-inch
hot-swap
hard
disk
drives
installed
on
Ultra-Slim
hard
disk
drive
trays
for
2.5-inch
drives.
An
optional
4–drive-bay
kit
is
available
for
12–drive-capable
server
models.
For
a
list
of
supported
2.5-inch
hard
disk
drives,
see
Chapter
5.
Installing
optional
devices
and
replacing
customer
replaceable
units
87