Installing a hot-swap fan, Installing, Hot-swap – Lenovo 3797 User Manual
Page 89
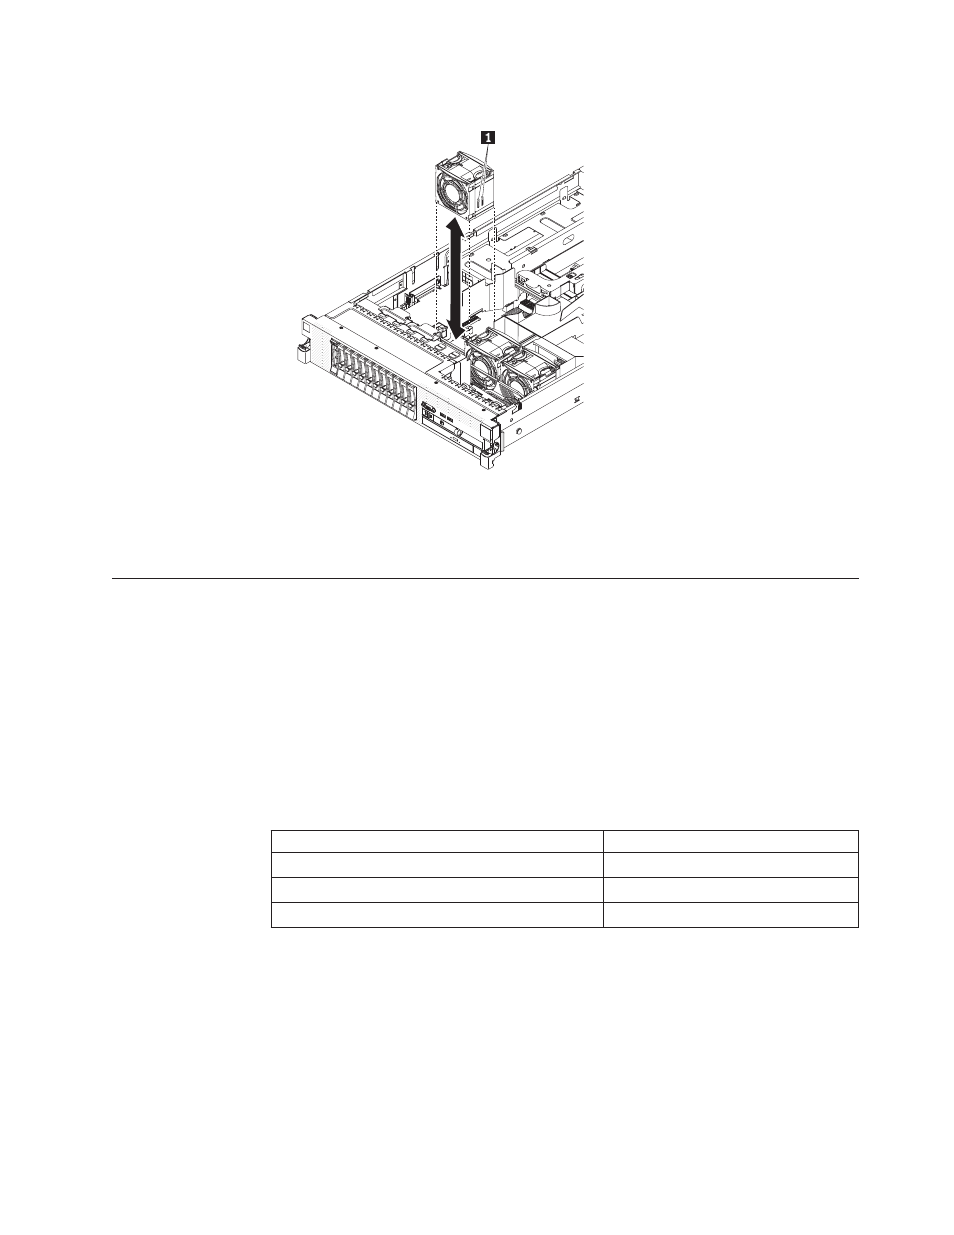
4.
Lift
the
fan
out
of
the
server,
holding
the
vertical
tabs
1 .
5.
Replace
the
fan
within
30
seconds
(see
If
you
have
other
optional
devices
to
install
or
remove,
do
so
now.
Otherwise,
go
to
Installing
a
hot-swap
fan
The
server
comes
with
three
replaceable
double-fans.
For
proper
cooling,
the
server
requires
that
all
three
fans
be
installed
at
all
times.
Attention:
To
ensure
proper
server
operation,
if
a
fan
fails,
replace
it
immediately.
Have
a
replacement
fan
ready
to
install
as
soon
as
you
remove
the
failed
fan.
The
fans
use
system-board
fan
connectors
2,
4,
and
6
only.
lists
the
fan
connector
on
the
system
board
for
each
double-fan.
See
for
the
locations
of
the
fan
connectors.
Table
11.
Fan
connectors
on
the
system
board
Fan
number
System
board
fan
connector
1
2
2
4
3
6
To
install
any
of
the
three
replaceable
fans,
complete
the
following
steps:
1.
Read
the
safety
information
that
begins
on
page
and
2.
If
you
have
not
done
so
already,
slide
the
server
out
of
the
rack
and
remove
the
cover
(see
Attention:
To
ensure
proper
system
cooling,
do
not
remove
the
top
cover
for
more
than
two
minutes
during
this
procedure.
3.
Orient
the
new
fan
over
its
position
in
the
fan
bracket
1
so
that
the
connector
on
the
bottom
aligns
with
the
fan
connector
on
the
system
board.
Chapter
5.
Installing
optional
devices
and
replacing
customer
replaceable
units
73