Installing an ethernet adapter, Storing the full-length-adapter bracket, Installing – Lenovo 3797 User Manual
Page 65: Ethernet, Adapter, Storing, Full-length-adapter, Bracket
7.
Turn
on
the
server
and
reconnect
the
peripheral
devices,
power
cords,
and
external
cables.
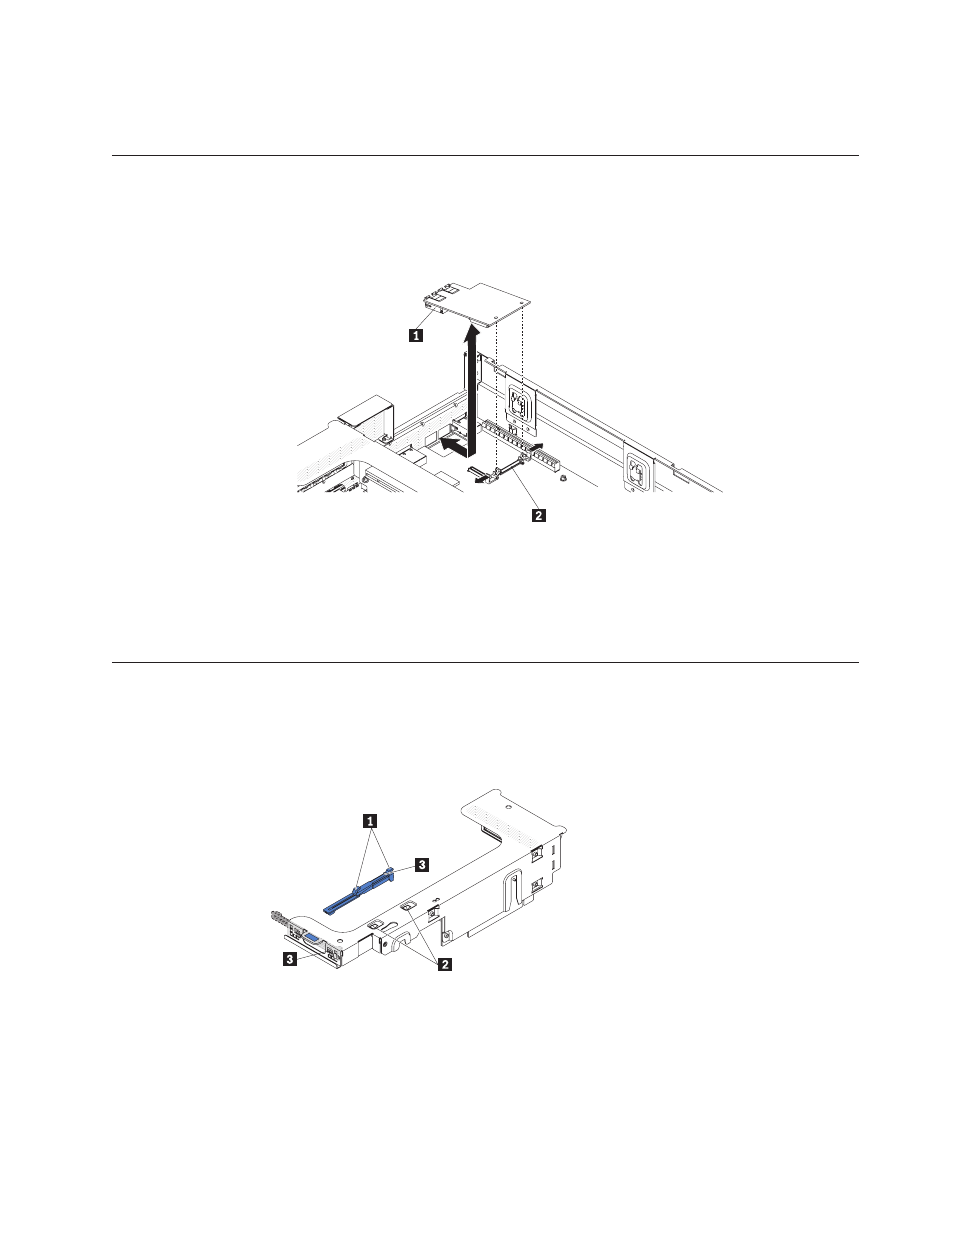
Installing
an
Ethernet
adapter
To
install
an
Ethernet
adapter,
complete
the
following
steps:
1.
Remove
the
adapter
bracket
2
from
the
new
Ethernet
adapter
1 .
2.
Extend
the
Ethernet
ports
through
the
openings
in
the
rear
of
the
chassis.
3.
Press
down
on
the
adapter
above
the
connector
and
adapter
bracket.
4.
Install
PCI
riser
1.
5.
Install
the
cover.
6.
Turn
on
the
server
and
reconnect
the
peripheral
devices,
power
cords,
and
external
cables.
Storing
the
full-length-adapter
bracket
If
you
are
removing
a
full-length
adapter
in
the
upper
riser-card
PCI
slot
and
will
replace
it
with
a
shorter
adapter
or
no
adapter,
you
must
remove
the
full-length-adapter
bracket
from
the
end
of
the
riser-card
assembly
and
return
the
bracket
to
its
storage
location.
To
remove
and
store
the
full-length-adapter
bracket,
complete
the
following
steps:
1.
Press
the
bracket
tab
3
and
slide
the
bracket
to
the
left
until
the
bracket
falls
free
of
the
riser-card
assembly.
2.
Align
the
bracket
with
the
storage
location
on
the
riser-card
assembly
as
shown.
3.
Place
the
two
hooks
1
in
the
two
openings
2
in
the
storage
location
on
the
riser-card
assembly.
Chapter
5.
Installing
optional
devices
and
replacing
customer
replaceable
units
49