Completing the installation, Completing, Installation – Lenovo 3797 User Manual
Page 116
7.
Reconnect
the
external
cables;
then,
reconnect
the
power
cords
and
turn
on
the
peripheral
devices
and
the
server.
Note:
You
must
wait
approximately
20
seconds
after
you
connect
the
power
cord
of
the
server
to
an
electrical
outlet
before
the
power-control
button
becomes
active.
8.
Start
the
Setup
utility
and
reset
the
configuration.
v
Set
the
system
date
and
time.
v
Set
the
power-on
password.
v
Reconfigure
the
server.
See
for
details.
Completing
the
installation
To
complete
the
installation,
complete
the
following
steps:
1.
If
you
removed
the
microprocessor
2
air
baffle,
replace
the
microprocessor
2
air
baffle
(see
).
2.
If
you
removed
the
DIMM
air
baffle,
install
it
now
(see
3.
If
you
removed
either
of
the
PCI
riser-card
assemblies,
replace
the
riser-card
assemblies
now
(see
4.
If
you
removed
the
server
cover,
replace
it:
a.
Make
sure
that
all
internal
cables
are
correctly
routed.
b.
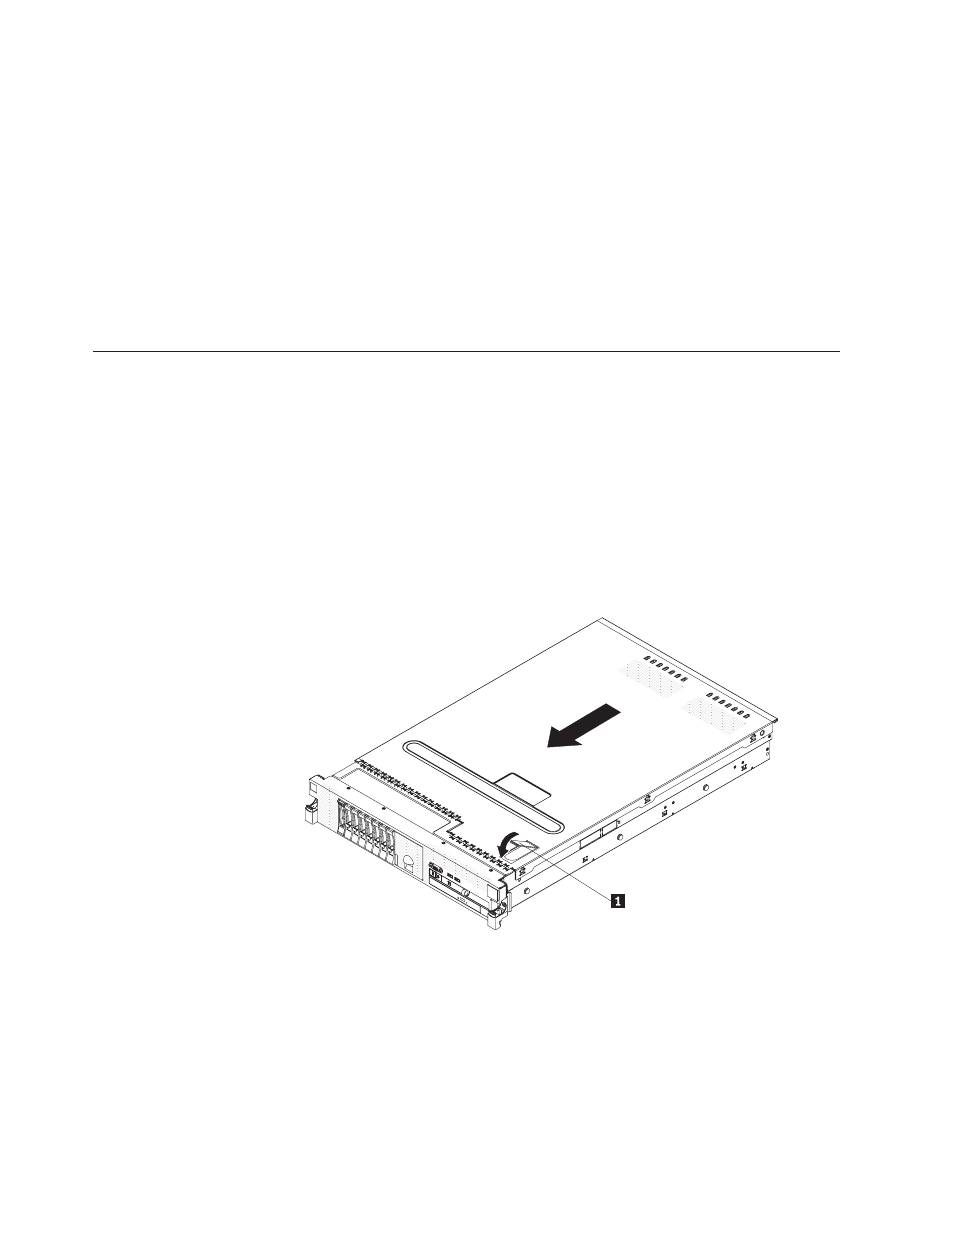
Place
the
cover-release
latch
1
in
the
open
(up)
position.
c.
Insert
the
bottom
tabs
of
the
top
cover
into
the
matching
slots
in
the
server
chassis.
d.
Press
down
on
the
cover-release
latch
to
slide
the
cover
forward
and
lock
the
cover
in
place.
e.
Slide
the
server
into
the
rack.
5.
Install
the
server
in
a
rack.
See
the
Rack
Installation
Instructions
that
come
with
the
server
for
complete
rack
installation
and
removal
instructions.
6.
To
attach
peripheral
devices
and
connect
the
power
cords,
see
100
ThinkServer
RD220
Types
3729,
3779,
3797,
and
3798:
Installation
and
User
Guide